The mechanics of the stitch are simple enough but simplicity does not always equate to easy. I have come to realise that there many factors to laying a perfect foundation and that a good foundation is key to whatever comes next. I have yet to lay a “perfect” foundation.
The weft foundation (W) is made with long stitches, the full width of the motif. The stitches should be evenly spaced, close together with no space between them, and parallel with the weft thread of the fabric.
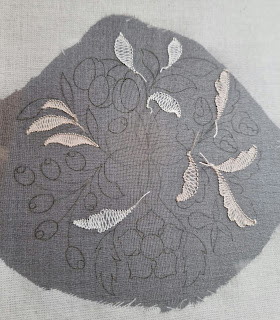
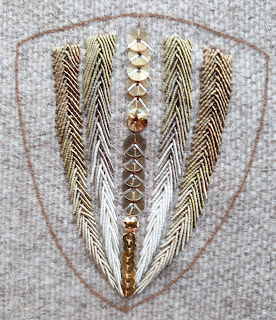
On some fabrics the weft is plainly visible which can be helpful. On other fabrics, such as the fabric Hanayama is stitched on, the weft is not discernable. In this case, I find it helpful to mark parallel lines at regular intervals to assist me. Stitching the pine trees on Hanayama, I could not keep the stitches parallel; they were closer together at one end than the other. I still have a tendency to do this if I do not pay close attention to every stitch. In the following image you can clearly see that the stitches are not parallel. Although this is a horizontal foundation rather than weft, the stitches should still be parallel to each other.
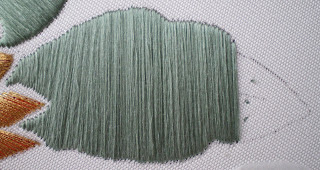
© JEC/Carol-Anne Conway
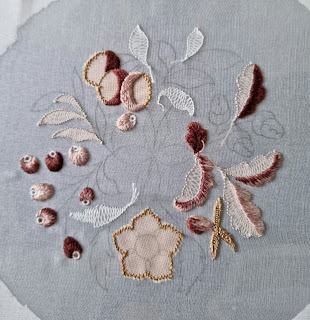
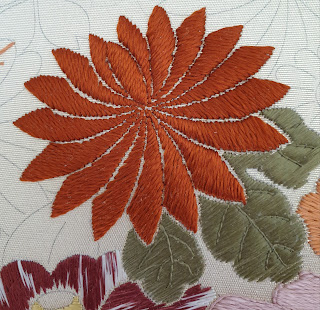
The spacing of the stitches is determined by the width of the thread. While they should be close enough to cover the fabric, if they are too close they become crowded and will not lay evenly. This may be even more evident when other techniques are superimposed over the foundation. In the following two images, the stitches are inconsistently spaced and many are too close together. When the stitch transfer is in place, the foundation does not lay flat and, in places, appears rippled.
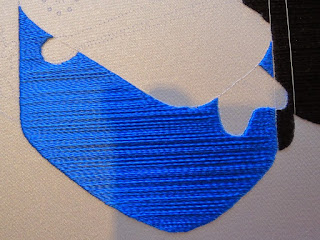
© JEC/Carol-Anne Conway
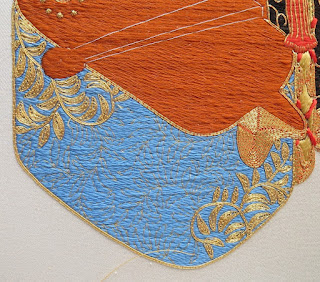
© JEC/Carol-Anne Conway
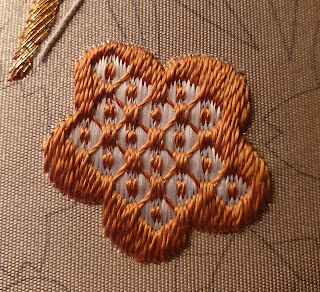
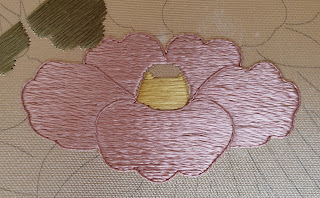
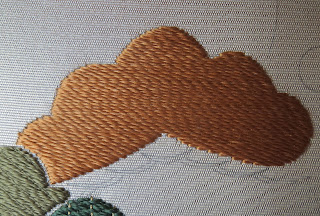
Where I find an obvious weft helps me keep my stitches parallel, I can find it a distraction when it comes to spacing the stitches correctly. I find I allow the fabric to determine the spacing rather than the thread. I have done that here and the stitches are slightly too close together.
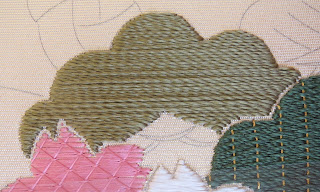
© JEC/Carol-Anne Conway
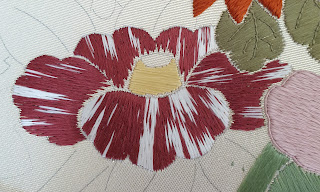
Here I tried hard not to fall into the same trap and the spacing is much more pleasing; the stitches look comfortable.
© JEC/Carol-Anne Conway
There are other factors that contribute to a pleasing foundation but these apply to many, if not all, of the techniques so I will post about these seperately.
Happy Stitching