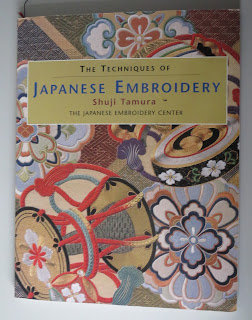
In addition to classes, one of the text books is, I find, essential. Over time, the JEC have published a number of text books. When I began, the recommended text was The Techniques of Japanese Embroidery by Shuji Tamura. While I have other text books, this is still my go to manual when stitching. This book is now out of print but copies of it can usually be found on the internet at reasonable prices.
© Japanese Embroidery Centre
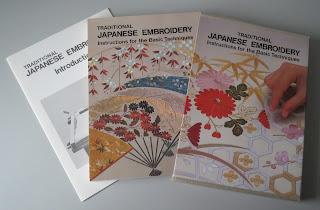
A predecessor to this text is affectionately known as the concertina book. Traditional Japanese Embroidery, Instructions for the Basic Techniques was published by the Kurenai-Kai. This is much harder to find on the internet but copies do occasionally surface. I was lucky enough to obtain a near mint condition copy still in its original cardboard cover together with the Traditional Japanese Embroidery, Introduction booklet that covers the subjects included in Chapter 3 of the JEC book.
© Kurenai-Kai
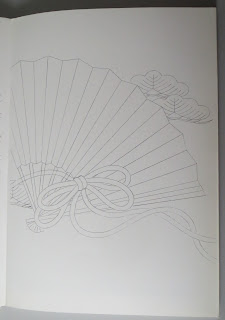
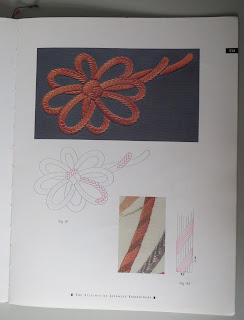
Traditional Japanese Embroidery is an accordion style book. Printed on one side of the pages are designs suitable for the technique that is explained on the reverse. The 46 basic techniques are grouped into 12 sections.
© Kurenai-Kai
© Kurenai-Kai
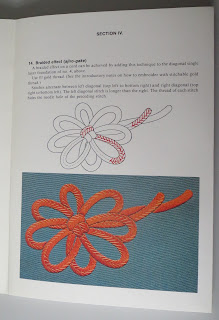
This more-or-less corresponds to Chapter 4 of the JEC book but there are a few differences, for example, technique #14 Braided effect is listed under Linear Effects in the concertina book but called Imitation-wicker braid and listed under Braided Cords in the JEC book. The two publications contain many of the same photographs and diagrams. The concertina book numbers the techniques whereas the JEC have substituted the numbers with a code letter. In theory, I guess these are easier to relate to the technique than a number but I have been very bad at learning either and tend to refer to the techniques by their name.
© Japanese Embroidery Centre
The following list groups the techniques according to the concertina book. Some of the names that we use now and in the JEC book vary from those listed but I think these are, in some cases, more descriptive of the technique. The most obvious difference is that we usually refer to Laying Weft Valley Lines as Fuzzy Effect.
| I | Laying the Foundation (Shitagoshirea-nui) | |
| 1 | W | Weft foundation layer (nuki-jibiki) |
| 2 | H | Horizontal foundation layer (nari-jibiki) |
| 3 | V | Vertical single layer (tate-nuikiri) |
| 4 | D | Diagonal single layer: regular shapes (naname-nuikiri: himo) |
| 5 | D | Diagonal single layer: irregular shapes (naname-nuikiri: kiku) |
| 6 | S | Separated single layer (wari-nui) |
| II | Holding the Foundation (Osea-Nui) | |
| 7 | Hd | Diagonal holding (hippari-osae) |
| 8 | Hl | Lattice holding (goban-osae) |
| 9 | Hs | Short-stitch holding (kiri-osae) |
| III | Sewing Thin Lines (Sen-Nui) | |
| 10 | Lh | Line of held thread (hippari-toji) |
| 11 | Ls | Line of staggered diagonals (matsui-nui) |
| IV | Adding Linear Effects (Uwagake-Nui) | |
| 12 | Stamen effect (shibe-kake) | |
| 13 | Vein effect (yōmyaku-kake) | |
| 14 | Braided effect (ajiro-gake) | |
| 15 | Geometrical effects (waritsuke-nui) | |
| Gt | Tie-dye effect (hitta-gake) | |
| Tie-dye effect: in relief (honbitta-gake) | ||
| Gf | Flax-leaf effect (asanoha-gake) | |
| V | Adding Superimposed Figures (Uwamoyō-Toji) | |
| 16 | St | Superimposed straight lines (uwamoyō-hippari-toji) |
| 17 | Sc | Superimposed weft layer (uwamoyō-nuki-nui) |
| 18 | Ss | Superimposed single layer (uwamoyō-nuikiri) |
| VI | Using Non-stitchable Thread (Komadori-Nui) | |
| 19 | C2 | One pair non-stitchable (komadori ikkai) |
| 20 | C4 | Two pairs non-stitchable (komadori nikai) |
| 21 | C3 | One and a half pairs non-stitchable (komadori ikkai-han) |
| 22 | C1 | Single thread non-stitchable (komadori katakoma) |
| 23 | C2r | One pair round and round (hiraume-hakoume) |
| 24 | C2t | One pair to and fro (hiraume-hikikaeshiume) |
| 25 | C2o | Outward coiling pair (hiraume-tamaume) |
| 26 | C2i | Inward coiling pair (hiraume-waume) |
| 27 | C1t | Single thread to and fro: weft (nuki-orandagaeshiume) |
| 28 | C1tD | Single thread to and fro: diagonal (nuikiri-orandagaeshiume) |
| C1tH | Single thread to and fro: Horizontal | |
| C1tV | Single thread to and fro: Vertical | |
| 29 | C1M | Single thread: maze pattern (charaume) |
| VII | Achieving Novel Effects (Kawari-Nui) | |
| 30 | Nt | Three-dimensional lattice effect (masu-nui) |
| Nw | Woven effect (mushiro-nui) | |
| Nb | Blister effect (hōkamuri-nui) | |
| VIII | Padding the Figure (Nikuire-Nui) | |
| 31 | PsH | Horizontal padding (kira-nikuire) |
| PsV | Vertical padding | |
| 32 | PsD | Diagonal padding (naname-nikuire) |
| 33 | Pc | Non-stitchable padding (koma-nikuire) |
| IX | Laying Weft Valley Lines (Suga-Nui) | |
| 34 | Fw | Weft valley layer (sugabiki) |
| 35 | Fv | Vertically held valley lines (suganui-tojiosae) |
| 36 | Fd | Diagonally held valley lines (suganui-mojiriosae) |
| X | Making Knots (Sagara-Nui) | |
| 37 | Kr | Single round knot (sagara-nui) |
| 38 | Kl | Single tadpole knot (ashinaga-sagara) |
| 39 | Multiple round knots (sagara-zume) | |
| 40 | Kl+Ra | Multiple tadpole knots (sagaara sashinui) |
| XI | Making Braided Cords (Kumihimo-Nui) | |
| 41 | Bw | Wicker braid (ajirokumi-nui) |
| 42 | Bs | Single central braid (nakayuwae-nui) |
| 43 | Bd | Double central braid (yotsugumi-nui) |
| XII | Achieving Realistic Effects (Sashi-Nui) | |
| 44 | Ra | Alternating long and short stitches (nagamijika – sashinui)) |
| 45 | Rr | Random long and short stitches (midare-sashinui) |
| 46 | Rc | Angular curves (kussetsu-sashinui) |
In theory, all 46 techniques are introduced progressively through Phases I-IX. In practice, depending on the designs you choose to stitch, it is possible to reach Phase X without covering them all. Whereas, the first nine phases are carefully designed teaching pieces, Phase X is a graduation piece and rather than learning the emphasis is on revisiting, revising, and refining each of the techniques.
Considering I had been learning JE since 2005, I felt like an absolute beginner at the beginning of the class. I was horrified at how much I had either not taken on board or forgotten and at the bad habits I had developed. But Kazumi-san has been teaching Phase X class for a very long time and she is very good at building your confidence and coaxing buried knowledge from the darkest recesses of your mind. When I asked Kazumi-san if I should take something out and redo it, she replied that they are looking for improvement not perfection. In a recent meeting with Arata-san when someone else asked him the same question, he gave a similar response, saying that he rarely took work out. It is difficult when we want to do our best, to leave your errors in so that we might learn from it.
Over the Christmas break, I finished stitching the samples for a fabulous class I took at the end of 2021, one of a few that I have not yet written about. I was keen to complete the piece before the end of December so that I could (re)start work on my main project for 2022. With several WIPs that I am eager to resume, it was difficult to select which to do first but the voice of reason (my husband) said that I should focus on completing Phase X.
As I work on Kusudama this year, I plan to revisit where I have used the technique previously; revise what I was previously taught by my Sensei and by Kazumi-san, and what is written in the textbooks I have; and I hope to refine my understanding and execution of each of the techniques.
Happy stitching

1 comment:
I can see why you would be tempted to take out anything you didn't feel was quite perfect, because Japanese embroidery has such an air of precision about it; but equally, when you come back to an early piece and realise how long it it since you made that particular error, that must be cheering, no?
Post a Comment