© JEC/Carol-Anne Conway
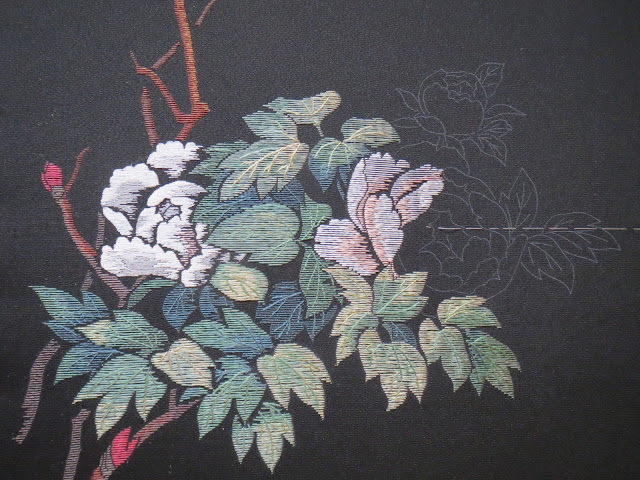
Before stitching the large bloom on the right, I stitched the remaining leaves below it as they are in the foreground. Those are the leave that were the subject of my previous post. While I had a lot of fun stitching these leaves, some of them presented me with a minor problem. They are in what I call “no man’s land”, i.e., the very centre of the fabric; an area that I cannot reach comfortably from either side of the frame.
© JEC/Carol-Anne Conway
I was really looking forward to stitching the large bloom. The flowers and the bud show case this technique, I think. As always, the foreground petals are stitched first. The edges of these petals are shown coming forward and are in the light so they are stitched with the heaviest threads.
© JEC/Carol-Anne Conway
Other areas are stitched with slightly thinner threads to shape and contour the petals.
© JEC/Carol-Anne Conway
A different colour is used for the areas that are in shadow. In the original colour scheme, which is on pink fabric, the shadows are done in pink and fade into the background.
© JEC/Carol-Anne Conway
The pink on the on that black fabric did not look right to me and highlighted a nagging doubt about the flower on the left that I had already stitched. I have since seen another version of this design on black fabric where they have used pink and it works well but I think that they used a less sugary pink than mine.
The main reason that I felt the pink did not work was that it did not melt into the background. I considered using black that definitely would have faded into the background but I thought that the contrast with the white would have been too stark. I elected instead to use a deep blue.
© JEC/Carol-Anne Conway
Happy stitching


