Tuesday 23 December 2008

Some Time Spent with Friends

I spent this morning padding and stitching plum blossom buds.

© JEC/Carol-Anne Conway

I know that it does not look like much for a morning's work, it never does, but something much more than can be seen here was achieved. A few hours patiently working with flat silk has instilled in me a deeeeeeep, deep, sense of peace.

Over the past few weeks, I have managed a few short sessions with Venerable Friends, couching the outlines of the pages. Yesterday, I completed all but the final book and I need to embroider the motif before I can outline this book and complete the last leg of this voyage.

© JEC/Carol-Anne Conway

Normally, I enjoy couching, but I became almost bored with the process of outlining the pages. Maybe that is because I am becoming impatient to finish this Phase that has been on the frame for nearly two years now.

Happy Stitching

Monday 22 December 2008

More Wallpaper

Three more rows of stitches: the first is Vandsyke stitch, a new stitch for me that I found in Mary Thomas's Dictionary of Embroidery Stitches. I purchased this book, second hand, from a book sale at my local branch of the Embroiderer's Guild. Four of the following stitches were taken from this book.


I worked the stitch in the lovely fine wool from Gumnut Yarns (light fawn) that I picked up at Alli Palli. I found the stitch easy enough to work, although it was a little difficult to keep the central chain straight. At one point, I tried to shape the stitch around a circular cut out, that proved more difficult and I am not entirely happy with the result.

To the right of the Vandyke stitch is a row of reverse chain in Rachelette (silver Taupe) from the Caron Collection and the right of that is Basket Stitch worked in DMC cotton. Again the stitch was fairly simple to work.

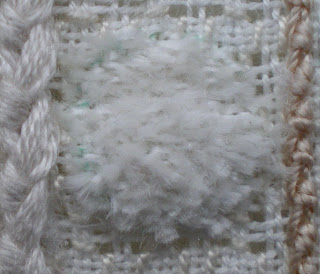
The design has three small circles set into the striped back ground. The first (on the far right) I filled with velvet stitch.


This is an other stitch that I have not tried before. I found the stitch fairly easy to follow but on this scale (28 count linen) extremely fiddly. However, the stitches were tightly packed in and felt secure so that when I trimmed them the result was a nice thick velvety pile.

For the circle on the left I used Turkey Stitch (another new one). On paper, this stitched looked more straight forward than velvet stitch but I found it difficult to translate into practice. I think I got it eventually, but am still not certain that I was working it correctly. It was less fiddly than Velvet Stitch but is less dense and never felt as secure. Although Velvet Stitch was more difficult to work, I think the resulting texture makes it more worthwhile that Turkey Stitch.


The third (central) circle I filled with padded Satin Stitch outlined with stem stitch.


Particularly unimpressive. I could say that the linen frayed and came loose from the calico border, so the linen was not taught in the frame. I could tell you that I worked it late at night and was tired. Poor excusses really, I should be able to work a better satin stitch than this by now.

All three of these circles are worked in Flat silk. Allthough much of the sheen is lost in the Velvet and Turkey stitches, I think that the lushious pile of the Velvet Stitch is largely due to the silk. I will try this stitch again in another thread to compare the results.


Happy Stitching

Wednesday 17 December 2008

Wall Paper

Most evenings I am progressing my stitched samplers for Sumptuous Surfaces. The course has concluded now but I am still working on Lesson 2, such is the content and inspiration of Sharon's course notes.

Over the past week or so I have been working on a stripped design, aiming to fill each vertical stripe with a different texture, some low relief and some more textured. At the moment, I am particularly fascinated by pulled work, so these have featured heavily.


The area on the left is filled with satin stitch worked in a zig-zag pattern over a 2, 3, 4, 5 or 6 threads, #8 cotton perle. Actually, I am a little pleased with this bit. Random usually terrifies me, but for once, I just went with it, rather than trying to work out a random pattern.

To the right is cobbler filling, also worked in #8 cotton perle. Nothing random here, a straight forward pattern.


These two areas are seperated by a row of Portuguese Stem Stitch worked in 12 strands of Soie Cristale. Sharon had commented on an earlier sample of this stitch that it worked well in thicker threads, so I decided to give it a go. I agree, the thicker thread shows the stitch of well.


I enjoyed working the zig-zag satin stitched so decided to try it again, this time in a regular pattern over 6 threads, again in #8 cotton perle. I really like the pattern created in the fabric.


Next, I worked a stripe in four sided stitch. Again, this is a regular pattern and it creates a lovely texture. These 2 stripes are seperated by a line of heavey chain, stitched in Mulberry Silk.

From a question posed in the class forum, and rereading the instructions, I realised that my earlier attempts at Portuguese Stem Stitch were not stitched correctly (although I like them as they are) so I tried again, wrapping the stitch twice as per the instructions, rather than once, as I had done previously.


I worked two rows, one going up and one down, expecting to get a mirrored effect, but I realise now that I should have worked both rows in the same direction, but one left-handed and one right-handed. Between them I worked a row of cable stitch in a twisted rayon.

Happy stitching

Tuesday 9 December 2008

Good Weather Stops Play

This weekend was cold and frosty, but dry and sunny. Unfortunately for Venerable Friends, gardening won the day!

*****

A month ago I got an opportunity to do something that I have wanted to do for a long time, my first Japanese Bead Embroidery class. The Japanese
Embroidery Centre
have offered bead embroidery classes for a few years but until now there was not a qualified tutor in the UK. Through a brief conversation with Mary Alice Sinton on Stitchin Fingers, I learnt that a newly qualified tutor was just about to begin classes here. A few days and a flurry of emails later I was enrolled for my first lesson, together with my good friend Sue.

Apart from Sue, I did not know anyone at this class. I am much less intimidated by that than I would have been a few years ago. I have learnt that stitchers are a fairly friendly bunch, and when you are all learning something for the first time (as we were) any ice soon melts. In fact the rest of the class knew each other very well as they are studying Japanese Embroidery together, but they made Sue and I feel very welcome. Indeed our tutor and our host had framed and prepped for us so that we would not be behind our class mates, who had done that in advance of the lesson.

Marion, our tutor, seemed a little nervous at first (bearing in mine that she only qualified 2 months earlier, who wouldn't be) but she soon relaxed and took us through all we needed to know for Phase I.

I think that everyone enjoyed the class, I know that I did. As usual, I came away with very little completed but with sufficient knowledge to go on and complete the design. I've done two short sessions since and managed to finish the border.

© JEC/Carol-Anne Conway


The design is outlined with a picot stitch. Aren't these beads gorgeous? They are tricut beads and seem to be unavailable in the UK. If anyone knows of a source, I would like to know about it.

© JEC/Carol-Anne Conway

The central design is this flower pattern. The flowers are beaded in one of four colours, arranged in a random manor. I think you know by now that I am more than a little intimidated by random, but I have a cunning plan!

© JEC/Carol-Anne Conway

This is the story so far.

Happy Stitching

Wednesday 3 December 2008

Venerable Friends - Page outlines

I seem to have fingers in lots of pies at the moment, which is not my usual modus operandi. Some of them are making a very strong did for my attention and my Japanese Embroidery is not one of them (gasp). On Venerable Friends I am currently outlining the the pages with couched tight-twist karayori and I have become bored with this process, surprisingly because I really enjoy couching. In truth, I don't think it is the couching that I am bored with but the stop start nature of this part of the design. The pages are stitched in a variety of colours so for each new section, a tight twist karayori and a 1-2 couching threads have to be made and I have found it a little disjointed and tedious.

The box chart declared the colours for the pages to be 'stitcher's choice'. That in itself is cause for mild panic on my behalf as it entails two of the things that I find most daunting; colour choices and randomness. My first thought was to look closely at the colour picture supplied with the design and follow the professional embroiderer's choices, but then I decided to put the copy out of sight and 'have a go'. I decided to limit my palette to colours already used in Venerable Friends - I thought that this would create unity and balance. Secondly, I've tried to apply a colour theory that I had learnt from gardening - reds come forward and blues recede.

© JEC/Carol-Anne Conway

I did not want to restrict myself to using shades of a single colour for each book, so I tried to look for shades of blue, red and yellow within colour groups. For example, I have used both shades on the main book but I used the more yellowy green for one of the pages and used the bluer green for the cover, which is behind the pages. The the book that lies beneath all the others, I will out line in one of the shades of blue.

© JEC/Carol-Anne Conway

I outlined several pages a couple of weekends ago and then did nothing more until this weekend. When I uncovered the work and looked at the whole design (while working, I only uncover the area I am working on), I was struck by how defined it is beginning to look with some of the outlines completed. I've noticed before that the finishing details can bring a design together and make it look sharper. My urge to work on has returned and I feel frustrated that I only get the opportunity to do so at the weekends (gardening permitting!).

Happy Stitching

Sunday 30 November 2008

Christmas Ornament/Card

I don't really like working to a deadline. I do embroidery for pleasure and having to complete something on schedule puts me under pressure. For this reason, and out of fear of disappointing the recipient, I have never taken part in a swap ... until now.

When members of the Embroiderers' Guild forum started planning a Christmas card and ornament swap back in July, I thought that was a time frame that even I could handle. Of course, because I had plenty of time, I didn't get started straight away except to mentally plan what I wanted to do. In fact I only began to stitch in October after I purchases the bright Christmassy red silk that I wanted to use at the Alli Palli Stitching and Knitting Show.

I've been dieing to show and tell this little project but part of the fun of a swap is that the recipient does not get to see the item until they actually receive it.
Well, the swap date has arrived (in Australia, at least) and I know for certain that Elizabeth has received her ornament, I can finally blog it.

The swap called for a Christmas card and an ornament. I cheated, or was creative depending on how you view it, and made a card/ornament.


I wanted the ornament to look like a Christmas bauble. On the top half, I embroidered a design that I had learnt while stitching Suehiro. The design, called Flax leaf, is stitched over a weft foundation. On the bottom half, I attempted a design that I have not stitched before, 3-d effect. The design is stitched in 3 or more shades of the same colour. Around the centre of the bauble, I stitched a gold ribbon.


On the reverse of the bauble, I stitched the date.

When I had finished stitching the design I was feeling pleased that I had finished in good time ... until I remembered that I had to 'finish' the ornament.

I cut four circles of card - two from mount board and two from a cereal box - and two more from wadding. I laced the front and back onto the mount board using the wadding to give some padding. I covered the cereal box circles in plain fabric using PVA to secure the seam allowance to the wrong side. I then joined the front to a plain circle using ladder stitch and repeated the process for the back. This was when I realised that using PVA to secure the fabric was a bad idea. The PVA dries very hard and is extremely difficult to stitch through. I had a very sore finger to prove the point for several days!

I secured each end of a single ribbon between each pair of circles to create a hanger and stitched lengths of the same gold ribbon around the sides of the front and back to hide the join. From the remaining silk, I made a small tassel to hand on the bottom of the ornament.

Finally, I made an insert from silk paper onto which I wrote my greeting to Elizabeth.


Did you notice that when I made up the ornament, I turned the front up-side-down so that the solid red Flax design was on the bottom. When it came to it, the ornament told me that it wanted to hang this way up!

Despite the long time frame, I did not meet the dead line for posting my ornament. Fortunately, the postal service was kind to me and safely delivered it to Australia in only five days instead of the 10-12 I had expected.

I hope Elizabeth likes her ornament. I certainly enjoyed stitching it for her.

Happy Stitching

Wednesday 26 November 2008

Sumptuous Surfaces

For as long as I have know about it, I have wanted to take SharonB's online class, Sumptuous Surfaces. Previously, I have thought that I had too much on to take part. When it was announced that the class would run again this Autumn, I decided that if I didn't just make time for it, I would never get to do it, so I signed on and waited excitedly for the start date.

At the start of the course, I had several other commitments and had to contain my eagerness for a couple more weeks but finally I have some time to dedicate to it.

The course runs over six lessons with the the first three weeks concentrating on monochromatic design and the remaining three weeks focusing on colour. Although the course is now on week five, I am still on week two - I have waited too long for this course to rush through it simply to 'keep up' and I am very pleased that Sharon fully embraces this philosophy and encourages her students to work at their own pace.


These are the threads I have selected for the monochromatic design. Some I already had, others I sourced at the Stitching and Knitting Show at Alli Palli and the remainder I picked up at one of the few embroidery suppliers in my area. I've included a selection of co-ordinated beads and sequins.

Rather than concentrate on a single design for this stage, I have chosen to do a series of small samplers 4 X 2.5 inches. I chose the simplest shape I could imagine as the basis for my designs - a circle.


First we are encouraged to outline the main features of our design, in this case those are the circle, which I have outlined in threaded back stitch using a soft wool purchased at Alli Palli and the wavy lines for which I used Portuguese stem stick. I have never used this stitch before but very quickly settled into it and found that I liked it.


The next step is to work on areas of low relief. In this design there are two areas of relief that hopefully have a very different feel to them. The first is essentially linear but I've tried to make give it a random feel by varying the width and spacing of the lines of satin stitch. These are all stitch in Mulberry silks in a variety of thicknesses and colours.


In the second area I wanted to try out pulled thread work. The stitch I have used is honeycomb stitch. It gives a lovely regular texture but it taxed my brain more that a little.

I like the contrast between these two areas. The third area will be more textured and offer greater contrast but I will not stitch that until I have explored low relief a little more.

Happy Stitching

Friday 21 November 2008

What Knot?

Knots have long been my nemisis. From the first time I encountered a French knot, I have gotten into a tangle with them and bullions simply get me in a twist.

During TAST I attempted to get to grips with both the French knot and bullion knots. In the process, I became more comfortable with both but never felt that I mastered either.

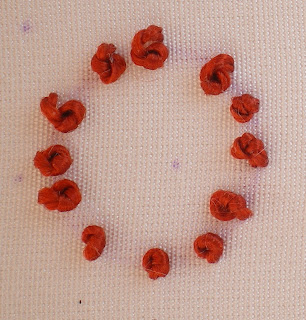
Having made some twisted threads, I decided to play a little with round knots, starting with my old adversary, French knots. French knots are formed by wrapping the thread around the needle before reinserting the needle into the fabric close to where the thread emerges. The thread is usually wrapped twice around the needle but it can be wrapped once or more than twice to alter the size of the knot.


Although I no longer get into a tangle over French knots, I still find it difficult to make them consistent.

Colonial knots are formed by wrapping the thread around the needle in a figure of eight - hence there other name, the figure of eight knot! Again the needle is reinserted a short distance from where the thread emerges from the fabric.


I usually get more consistent results with colonial knots but still do not feel that I am the boss of them.

Japanese round knots are more like colonial knots than French knots.
While forming the knot, the loop is held open with your fingers. It took me a long time to grasp this technique but once I did, I found that I could form much more consistent knots.


These knots are slightly smaller than colonial knots and, as their name suggests have a rounded shape.

A variation of Japanese round knots is the long-legged knot. These are formed in the same way as round knots, except that the needle is reinserted further away from where it emerges from the fabric and the knot is manipulated to sit at one end of the stitch.


These are slightly more difficult to control than round knots but once I understood how to hold and adjust the loop with my fingers, even long-legged knots became a little easier for me.

Happy Stitching

Thursday 20 November 2008

Let's Blog Again

Despite J’s best efforts, my computer was beyond saving; apparently the problem was the motherboard. Fortunately the hard drive was not corrupt and my photographs have been copied onto CD’s but sadly an old but very nice and familiar laptop is no more. I currently have the use of a newer and faster second-hand laptop. We are not working in complete harmony yet, the size and layout of the keyboard is different so I hit the wrong note - frequently, but we will get used to one another in time.

Following my post 'One Thread Fits All', I had a very interesting email conversation with Michael who left the following comment
I've got a question. I don't have much experience with Japanese flat silk. I have handled a piece of JEC Flat Silk that Mary Corbet sent me, but that's it.

It appears that the sugas are very slightly twisted. I haven't actually sat down with a pin and a piece of tape and figured out how many twists per foot, but it looks like they've got just enough twist that it's easy to separate the sugas (i.e., you can pick half a thread, or a third of a thread, and it hangs together well.) Is this typical of the flat silks you're using? I can't really tell from looking at the photos; even with the macro, I can't tell if the sugas are distinct, or if I'm just imagining it.

I'm thinking that this would be part of their strategy for managing the silk "flat" - otherwise, it's a hairy beast to get it into and out of the dye kettle without massive tangles.

Well I haven’t actually sat down with a pin either, but I very carefully unreeled a fresh length of silk and took a good look at it. Firstly, I have always understood that the silk we use is totally flat (that is to say that the sugas are not twisted together at all) and having examined it, I think that is the case. The problem is, it is very easy to introduce twist, and indeed the method by which we secure the tread to the awl introduces 2 or 3 twists to begin with! I then went about separating the thread into single sugas (there are 12 sugars to each thread). I purposely selected a thread that separated easily, in my experience pale thread are more obliging than darker ones.


As you can see, each sugar is very fine. The thread on the far left is DMC cotton (as it comes with 6 strands loosely twisted together), beside that is a strand of silk as it comes from the reel, then the 12 individual sugars and, on the far right, a single strand of DMC cotton. If you click on the picture for an enlargement you can clearly see that the DMC is a two-ply thread with a fairly tight twist. Each sugar is made up of many silk strands, which (I think) are lightly twisted together. I have heard that in China they use a single suga for silk painting. Now that must take some patience!

Before I go, I need to pass on some news. Most of you will already know but incase you have missed it, SharonB has moved her blog to a new blog 'Pin Tangle'. Wether you are a regular or occasional visitor to Sharon'sw blog, you will want to make a note of her new site.

Happy Stitching

Monday 10 November 2008

My Poorly Computer

My computer is very poorly; the hard disc has died. My partner obtained a new disc and installed it but it now seems that one may be defective. We are waiting for a replacement. In the meantime I have limited accesses to the web. More concerning is the potential loss of many of my photographs and various files that I have downloaded and saved. Some of my pictures are copied onto CD but not the more recent ones. J says that it may be possible to retrieve them but by no means certain. All of my fingers and toes are crossed that they can be recovered.

On the stitching front I am making slow but steady progress with a couple of projects. Work on Venerable Friends continues. Currently I am outlining the pages of the central book. For each outline, I first make the couching threads and then a 4->1 tight twist of sufficient length for the outline I am stitching. To make the threads and outline a page takes me a little more than one hour and must be done in one sitting as the tight twist begins to relax if it is not couched in place quickly. I can only manage an hour-long session a couple of times a week so progress is slow. Only a couple of main pages remain; once they are outlined, things should go a little quicker because the remaining outlines are shorter.

Between times, I am stitching a Christmas ornament for a swap. This is the first swap I have ever signed up for and I am slightly anxious about it. I have probably decided on a design that is too time consuming for the time available, but I am determined that I will not be late sending it. I am also concerned that the recipient will not like it, but I guess I can only do my best at stitching it and hope that she will.

When I first heard about SharonB’s Sumptuous Surfaces on-line course, I very much wanted to take part but at the time was over whelmed with other projects. That has been the case each time the course has rerun, until this year. As soon as I heard that it would rerun this November, I determined to do it and signed up. With the Christmas ornament still to do, my time is a little stretched but I have made time to read the excellent class materials and work some of the exercises. I am desperate to start stitching but will resist all temptation until the ornament is dispatched (well, I'll try).

So even if the computer were fully operational, I would have very little stitching to show even though I am doing quite a lot. The only new pictures I have, are some scans of my design exercises for Sumptuous Surfaces in my Flickr account.

Happy Stitching
Saturday 1 November 2008

Let's Twist Again

In addition to the basic twists discussed in 'One Thread Fits All' there are a number of twist variations. Only one of these is a stitchable thread - boroyori. This is a 4->i twist but instead of the even 2+2 threads I reviewed before this is a 3.5 + 0.5 twist that results in a bumpy, irregular thread.


It is a challenging thread to stitch with. You needle a large-eyed needle to recreate a sufficiently large hole in the fabric for the thread to pass through. Also the thread needs to be re-twisted during stitching to maintain the twist and bumps. The stitch I have used here is staggered diagonal so the thread appears twice a thick as it really is. I have not used this thread on any of the designs I have been taught so far so do not know which stitches best suit it, I thick the double threads somewhat detracts from the look of the thread.

The following stitches are all none stitchable threads that are couched in place. The first three are katayori and variations there of. These twist variations can be of any thickness but I have used 6 strands of flat silk as the basis for each one so that they can be compared like for like.


The basic katayori is all silk, 5.5 + 0.5. The bulk of the treads are given an tight undertwist and then over twisted with the half strand. The resulting thread is wonderfully bumpy and textured.


In the first variation, kinkarami no katayori, one of the 5.5 strands of silk is replaced by a strand of #1 gold. The resulting thread is still bumpy but has the added appeal of irregular flecks of gold running through it.


Shinkin no katayori also incoporates #1 gold but in this instance it replaces the 0.5 strand of silk that is added in at the overtwist stage. This thread has a gold core. I was not sure how I should couch this thread. Normally I couch between the bumps using a 1->2 twist in the same colour silk as the katayori but this would cover the gold thread. Instead I couched on the bumps but the fine twisted thread shows against the much loser twist of the katayori.

The other basic twist variation is karayori.


For Karayori, the two strands have an equal quantity of thread, in this case 3 strands of silk each. Each strand is tightly undertwisted before they are overtwisted together resulting in an even bobble like a string of pearls. My 'pearls' have relaxed too much here and it looks more like rope.


This is a smooth version of karayori. The tread is only lightly undertwisted but tightly overtwisted. The resulting thread has a smooth almost glassy texture.


Here are all the couched threads together for comparison.


Here I have left a tail of thread uncouched to show it in its original state, although the twists have relaxed slightly.

You can click on all of the pictures to see an enlargement that show warts and all!

Happy Stitching

Saturday 25 October 2008

Gold Ribbon

For nearly two years I was in something of a stitching frenzy. Nearly every spare moment found me with a needle in my hand. On September 3rd all of that came to a crashing halt. I don’t know if it was inevitable burn out or whether it is a direct result of my accident. Following my enforced break I am finding it difficult to get back into stitching. Most evenings I think “I’ll do some work on that latter” but I don’t get to later.

The one project I do make time for two or three times a week is Venerable Friends, my Phase III Japanese Embroidery but surprisingly, despite my eagerness to return to silk embroidery, I have been doing any and every scrap of gold work there is on this design.

First the Higaki design on the brown foundation and later it’s outline, then the maze effect on the end of the scroll and the fuzzy effect gold. My last few sessions have been spent couching pairs of #4 gold to form a gold ribbon.

© JEC/Carol-Anne Conway

I find this type of stitching extraordinarily peaceful; I lose myself in it completely.

© JEC/Carol-Anne Conway

The gold work is finished; only silk embroidery remains. Have I saved the best for last, or have I backed myself into a corner?

Friday 17 October 2008

One Thread Fits All

I’m often asked what threads we use for Japanese Embroidery. The short answer is (excluding the metallic threads) we only use one thread – Japanese Flat Silk.

The real answer is a bit more complicated. The silk comes on 60 meters tubes of flat silk. One strand of silk is made up of 12 suga (filaments). For optimum shine the silk is used flat, strands can be split for finer threads or combined if a thicker thread is required. The thread can also be twisted.


The above photo shows a tube of flat silk, a variety of threads, twisted and flat and (laying across the silk) a strand of DMC floss.


The first three threads from the left are all flat silk – half a strand, 1 strand and 2 strands. The next five threads are a regular twist – 1->2, 1->1, 2->1, 3->1 and 4->1 (the first number is the number of strands used to make a single twisted thread, e.g 4->1 is four strands twisted together to make one twisted thread). The final two threads are a 3->1 soft twist and (on the far right) a 1->1 S-twist.


The stitched samples above show the relative thickness of a different number of strands of flat silk and the coverage when used to stitch a foundation.

From left to right: 0.5 strands, 1 strand, 1.5 strands, 2 strands and 2.5 strands.


This sample shows the relative thickness of the twisted threads and the coverage when used to stitch a foundation.

From left to right: 1->1 twist, 2->1 twist, 3->1 twist, 4->1 twist and 3->1 soft twist.

Note that the 3->1 soft twist looks as full as the 4->1 regular twist and gives fuller coverage even though it uses fewer strands of silk. The tighter the twist the finer the finished thread.

I have not used the 1->2 twist in these samples. This very fine thread is usually used to couch other threads or for diagonal holding stitch. Nor have I used the thread on the far right, 1->1 S-twist, this thread is used for Japanese round knots or long-legged knots.

Happy Stitching

Tuesday 14 October 2008

Knitting and Stitching Show

On Sunday, I went to my first Stitching and Knitting Show at Ally Pally and had a wonderful time. I don’t know why I’ve never been before, they always seem to fall when I have lots of other things going on, but this year, I pencilled the show into my diary and made everything else fit around it. I car shared with 3 other Guild members whose company I enjoyed both there and back (long journey back with several delays but that gave us more time to talk about the exhibits we had seen and the goodies we had purchased).

At the show we went our separate ways as we each had our own agenda. In the morning I spent a couple of hours looking around the exhibits before meeting up with a Japanese Embroidery friend. There was not an exhibit that I did not enjoy but for me some of the highlights were:

Jan Beaney and Jean Littlejohn, particularly seeing Jan’s work in person, there is so much detail and texture that is not evident in the photographs I have seen.

The Royal School of Needlework – no revelations here just superb workmanship of traditional embroidery techniques.

Ruth Issett who understands colour in a way I can only dream off.

Barbara and Roy Hirst – incredible raised work embroidery, the exhibit included some of Barbara’s step-by-step teaching examples. From the work I say, Barbara was an exceptional needlewoman and my feeling is that she was probably an exceptional teacher.

Takako Sako, Japanese bead weaving. Wow, wow, wow, I thought this was fabulous. I loved the whole exhibit but the kimono was incredible. A life size kimonmo made entirely of beads, it took 4 women 2 years working full time to create.

I took a shopping list with me and mostly stuck to it although I didn’t find everything on my list.

From my list I bought a reel of bright red flat silk (for a Christmas ornament swap); silk wadding (for mounting my Japanese embroidery); white/neutral threads in a variety of weights and textures and white/neutral bead mix (for the online class Sumptuous Surfaces – I don’t have the supply list yet so I took a stab in the half light).

Off list I bought 3mm sequins in pale gold and perlesent white; tiny mother of pearl buttons; two fat quarters of silk tussah; a white sewline fabric pencil.

At the end of the day my feet were killing me, but if we had more time there was still so much more to see (and buy!).

Tuesday 7 October 2008

Riding Without Stabilisers

A friend asked me what was wrong with the gold work that I did and removed on Sunday. I found myself struggling to answer. Sometimes these things are more intuitive than actual.

Students of Japanese Embroidery are encouraged to stitch with their hearts. This is easier said than done. When you are first learning you have to concentrate so hard on simply forming the stitch that the head is fully engaged but gradually, with practice, the hand learns how to do the stitch without conscientious thought.

I remember my first 'real' bike when I was a girl. What I remember most about it was the day that the stabilisers came off and I learnt to ride without them. A kindly neighbour, Fred, patiently followed me up and down the street, supporting the bike and offering words of encouragement. Eventually, I heard his voice still encouraging me but from a distance. I never new the moment that Fred released the saddle and let me ride solo; I never new the moment that my head stopped directing my hand and my heart began to stitch.

© JEC/Carol-Anne Conway

Today was the day that I realised I have started to stitch with my heart and I have begun to feel my mistakes before I see them.

Happy Stitching

Sunday 5 October 2008

Needlepoint Group Project 3

Area F: Bargello pattern. This is simple to stitch but I enjoy this kind of stitching, rhythmical and methodical. I also like how this area looks.


Area G: Byzantine Stitch. Like Bargello this is simple to stitch. I forms a strong diagonal pattern. The remaining squares are stitched in eyelet stitch. Another one that I enjoyed stitching and the look of.


Area H: Another Bargello Pattern. Bargello or Florentine stitch is a stepped stitch which can be worked in either a regular or irregular fashion. This is another regular pattern.


Area I: Woven Stitch. This was a fairly intricate and complicated stitch that requires counting and stitching in a specific order - right up my street. The spaces between the woven stitch are filled with a double straight stitch tied with a cross stitch. Good fun to stitch and very pretty but this area does not seem balanced with the other areas in this round.


Area J: Rice Stitch. The four outside panels are all stitched in the same way, a boarder of tied down rice stitch.

So here is the (nearly) finished panel. It has been this way for over a month. Partly because of my limited stitching in recent weeks but in reality more because I can't decide on how to finish Areas B and D. In the instructions both have straight stitches worked in a single strand of the palest shade of colour A. I worked this in Area A but found it to be too pale and insignificant. I then worked the stitches as instructed but using #1 Japanese gold thread. I still think this is too insignificant. The stitches here should not distract from the patterns in these areas but need sufficient weight to be visible.


Happy Stitching

And there it was gone ...

It is somewhat disheartening to spend the last 5 minutes of an hours stitching taking out the previous 55 minutes work, but I find myself more inclined to listen to the nagging voice that tells me that something is not right. Nine times out of ten I find it to be right so I may as well give in sooner rather than later.

© JEC/Carol-Anne Conway

© JEC/Carol-Anne Conway

Given that I have spent the last six months practising gold work I thought I was getting the hang of it but today I felt like a complete beginner again. Granted I was working with imitation gold and compared to real gold it feels very unyielding. I am very tempted to do the remaining gold work with real gold but the look is too different to contemplate that option. The other thing that I noticed is that the koma I have the #4 imitation gold on are much lighter weight than the koma I have my real gold on. They are not substantial enough to hold the metallic threads taught.

But only a bad work man blames their tools. Next time I will do better!

Happy Stitching