Once I had finished making all of the tail feathers, I wanted to see how they would look assembled but, in order to do that, I had to make another piece of needle lace for his back. This was a much simpler task than the feathers, not least because it was made on a piece of fabric with a cordonet outline. The detached buttonhole is worked over the same silver passing thread as the body and feathers. I wish that I had taken time to create a template and pad for the feathers, it would have made life much easier!
© The Essemplaire/Carol-Anne Conway
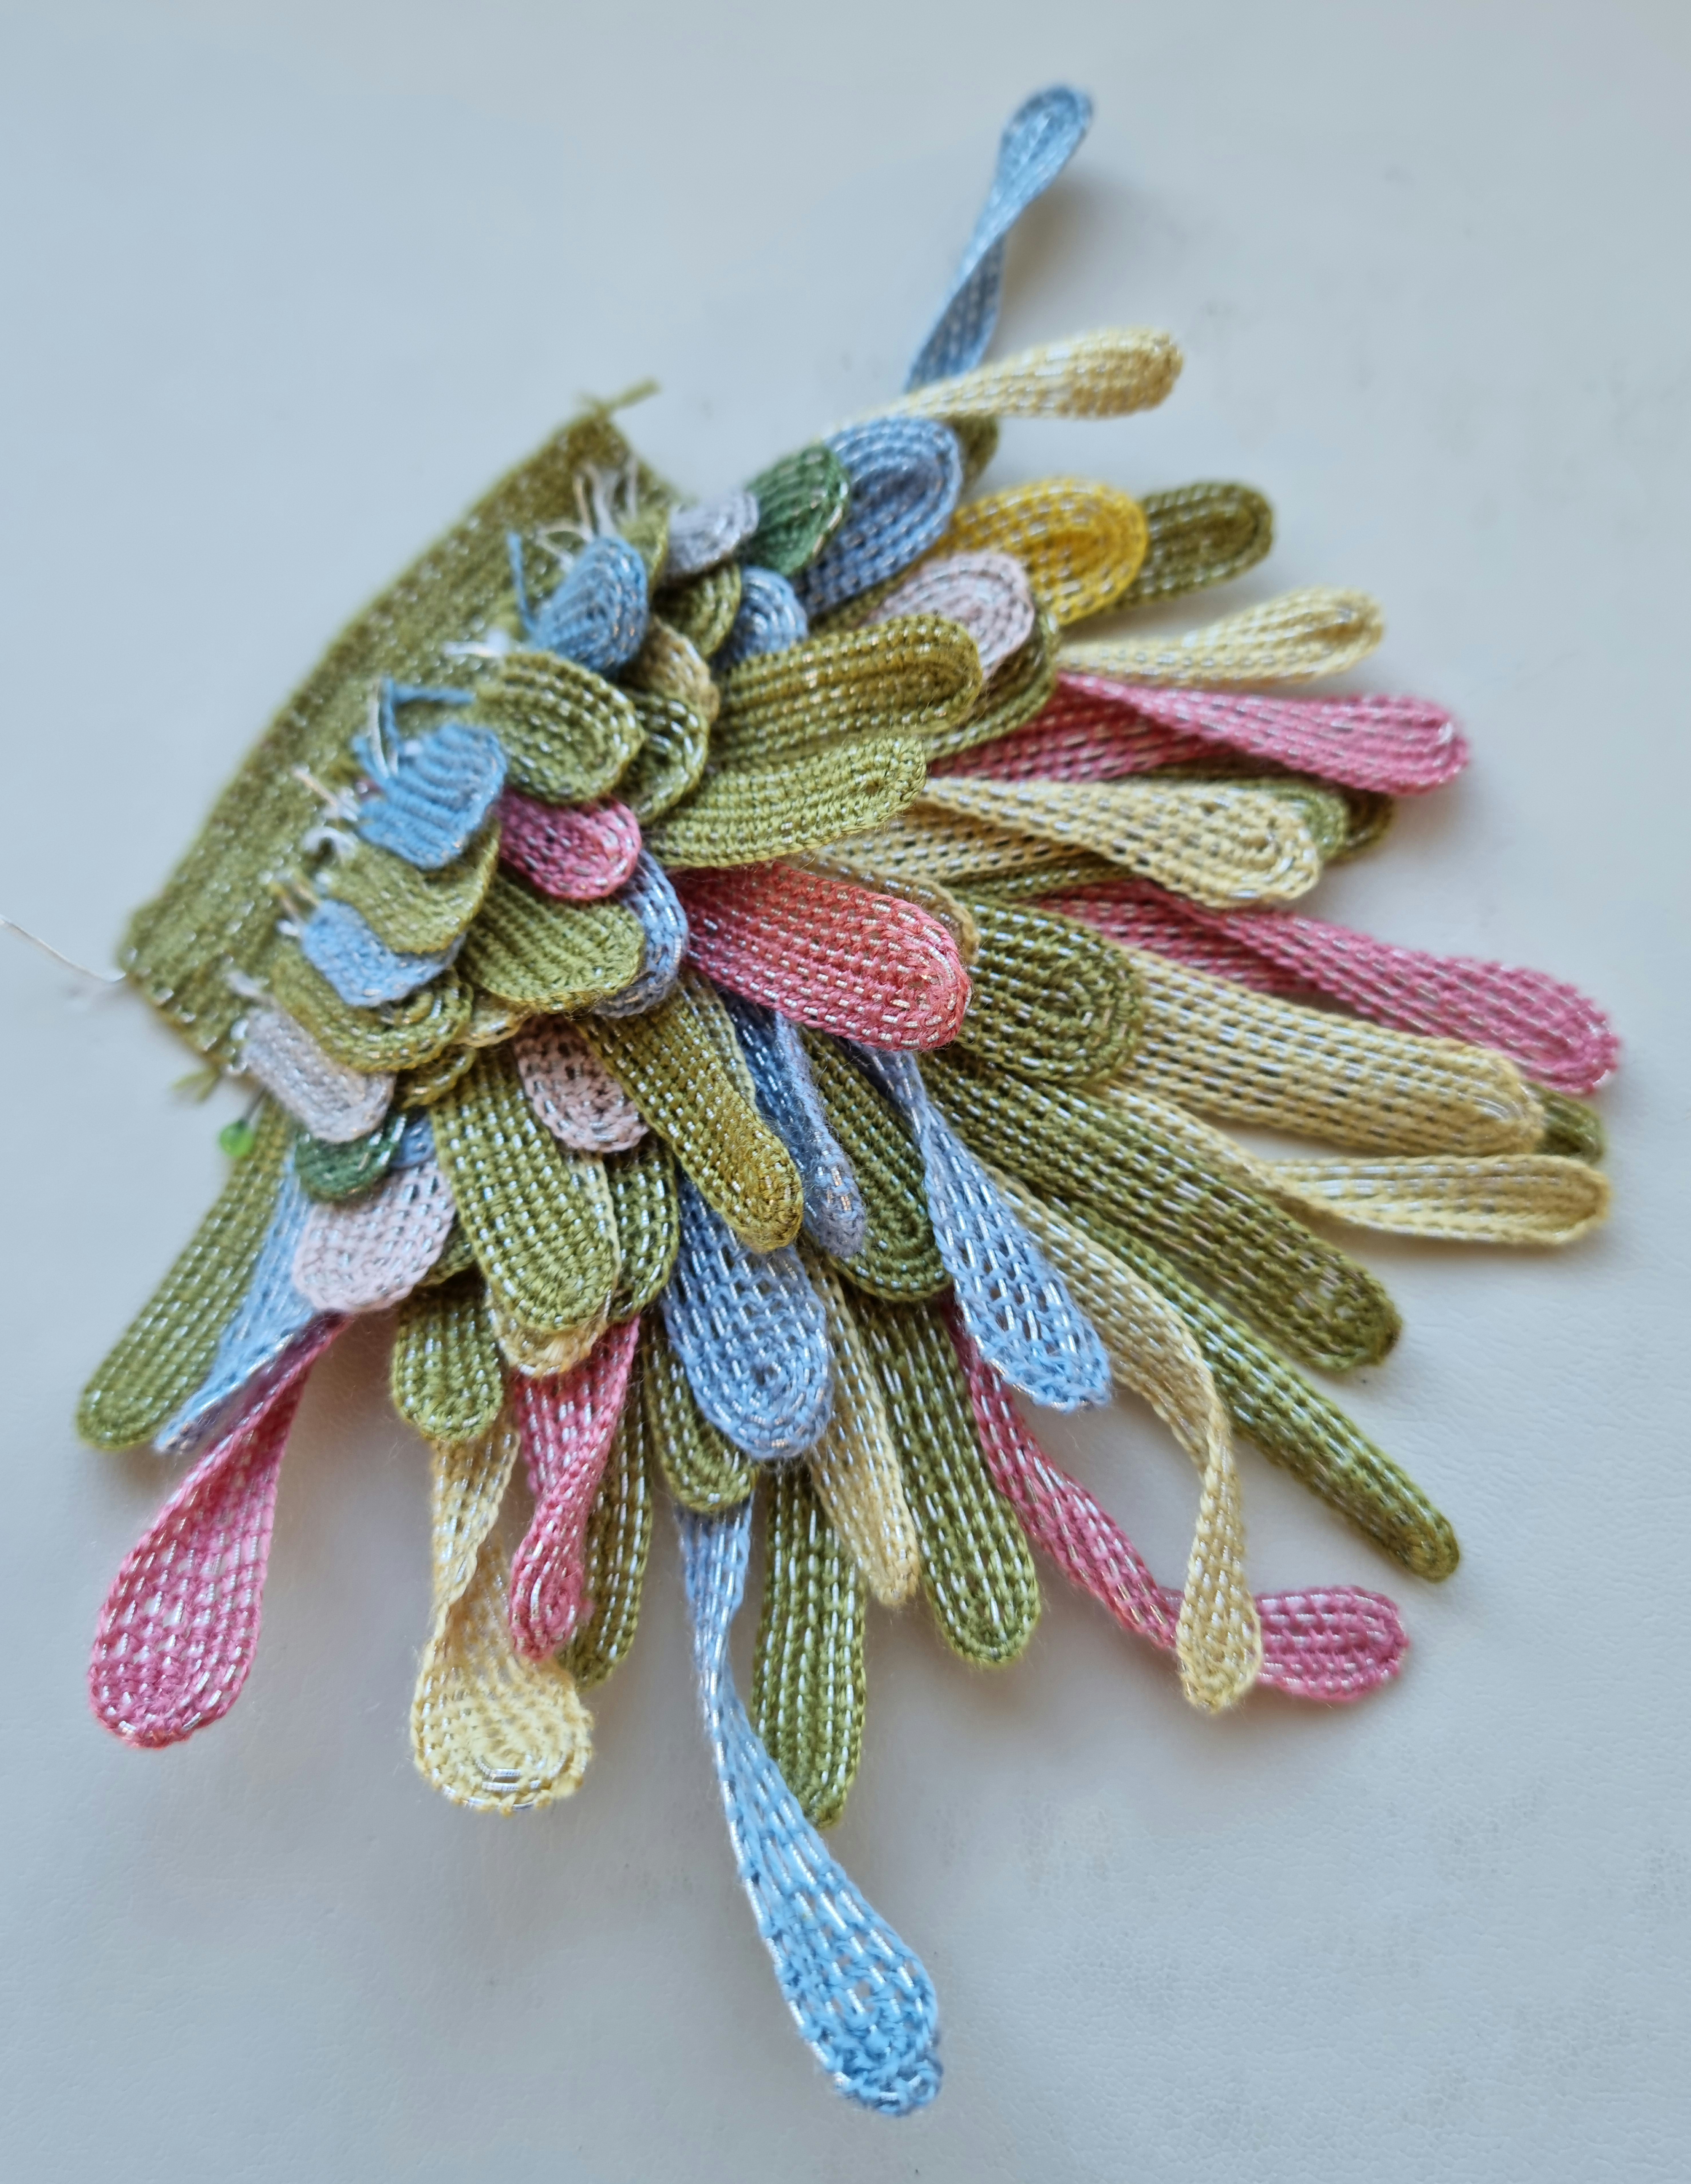
I sometimes struggle to follow written instructions and that the case with the placement of the feathers on the back. In the end, I gave up on the instructions and arranged them in a way that I found pleasing.
© The Essemplaire/Carol-Anne Conway
Now that I had completed most of the components, and I still had not made the finger loop braids for the
Casket Keepsakes, I thought I would continue with the
Bird Thimble Holder. The next step was to make the pouch that sits under his tail feathers. Here I made a couple of changes to the instructions. The first was to the braids that close the pouch. The directions said to make two plaited cords but I thought that finger loop braids might be nicer. Yes, I know that the
Casket Keepsakes are on hold because I didn’t have time to make the finger loop braids but the ones I wanted to make for the pouch are a little simpler, so I thought they would be quicker … and they were … except before I could make them I needed to find a video to remind myself how to do the braid I had in mind and when I found a video I fell into a finger loop braid rabbit hole! Anyway, many hours of watching videos later, I was ready to make my basic braid, which I now know is called a 5 loop square braid. The braid is made in a similar way to a plait but instead of passing the outer loop over other loops, it passes through the other loops. Starting with two loops of one colour on the one hand and three loops of another colour on the other hand, you get a chevron effect that looks very much like a plaited cord.
In one of the videos, the cord maker suggested that you can make your cord anywhere provided you have a suitable anchor for one end of the cord, even in bed using your foot as the anchor. This liberated me from having to make my cord in the office where I have a wooden clamp attached to the desk for this purpose. Instead, I could make the cord in the living room and as I was making a "simple" cord, I could do it while watching TV!
© The Essemplaire/Carol-Anne Conway
The first one went well except I had to hold my leg in the air and it soon got tired. DH placed a small stool and a couple of cushions under my heel so that I could rest it for the rest of the operation. For the second cord, I put both legs up on the sofa and found it even more comfortable to work this way.
The second change I made was a minor detail on the pouch. The instructions suggested threading the cords into a large chenille needle and taking several long running stitches around the opening. I decided to make eight eyelets around the opening and threaded the cords through these.
© The Essemplaire/Carol-Anne Conway
I had a few more pieces of needle lace to make; six pieces to make the decorative tabs on the ends of the cord and two pieces for his beak. I also needed to make two legs then it was a relatively simple process to assemble all of the pieces to finally finish my showy peacock.
© The Essemplaire/Carol-Anne Conway
After his long incubation period, I am very happy to have completed this project and add him to my Cabinet of Curiosities.
© The Essemplaire/Carol-Anne Conway
Happy Stitching