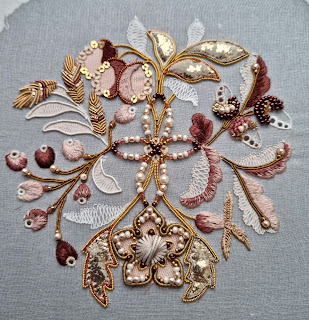
During the covid19 lockdown, the
Oxford branch of the Embroiderer’s Guild is running a virtual exhibition called “
Before, During, After”. This project was my before, during, and after project over a much more personal and poignant period of my life.
Before
It is my usual habit to have two embroidery projects in progress, even when I don’t have much time or enthusiasm for stitching. One is a ‘major’ project, usually Japanese embroidery or beading, that I work on during the daytime. The second is usually a smaller project and something that I can work on during the evenings while watching TV.
Last October, I was looking for something fun and creative but not overly taxing to do in the evenings. I had one or two kits in my stash that might fit the bill so I asked in an online community of embroidery friends for their thoughts. Based on their recommendation, I opted for a
Jenny Adin-Christie kit called
The Gawthorpe Needlecase.
Jenny’s kits are beautifully presented. They come in a sturdy box with a good quality image of the finished item on the lid. I found the box lid made a useful tray for my tools and the treads or materials that I was using for each stage. The kit contents (everything you need with the exception of needlework tools) are separated into smaller packages that are labeled and correspond with the instructions. When I first opened the box and saw the display of threads, fabrics, and other items, I could not wait to get started. One reason that I selected this kit over some of the other wonders available to me is that there is no preparation work required, my head was not up to that at the time, just frame up and start stitching.
The aforementioned instructions are excellent. The whole project is broken down into smaller, manageable sections labeled, in this case, A-K. Each section begins with a short description and is then broken down again into smaller steps. These steps begin with a list of requirements that details what you will need: which needles (all supplied) and which threads or other materials (usually packaged together and clearly labeled but occasionally taken from another pack, in which case the instructions tell you where they can be found). It then tells you very concisely, step by step, what to do. Every step is illustrated with photographs and/or diagrams. Throughout the instructions there are tips and tricks that, even for techniques I was already familiar with, I found useful.
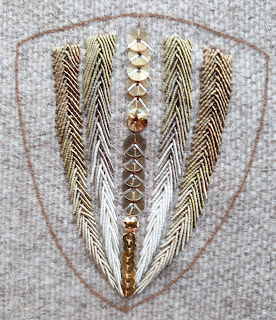
I made a good start and really enjoyed stitching the background areas. I learnt a stitch that I had never encountered before and combined stitches I knew in a way that I had seen used but had not done myself. Although this kit was fulfilling my brief, I found that I did not have as much time for stitching as I had hoped and did not progress very far with it at first.
Although this is ‘Before’ it was also an ‘After’. My dad had recently died. It was sudden and unexpected. The only saving grace was that both he and mum were in a care home at the time; she was spared the horror of being the one who found him in the morning. None the less, it was a terrible shock to us all. Mum and dad were in respite care for the sake of mum’s health and, although dad had had a heart condition for more than 30 years, he was not thought to be in any immediate danger. While mum and dad had been determined to return home as soon as mum was well enough, mum had no desire to do so without dad by her side; she opted to remain in the care home. My mum, my brothers, and I were trying to adjust to a new rhythm of life … and to the fact that my mum was terminally ill.
Mum, we thought, had always been the healthy one. I knew that she had had rheumatic fever when she was a young woman. It was rarely spoken of. She’d had it; she was seriously ill with it; she’d survived it. I was vaguely aware that mum had a heart murmur. It was really spoken of; it didn’t affect her in any way. I did not know that the two were related and that it would, eventually affect her, very seriously. In about 50% of cases, rheumatic fever can cause damage to the heart valves. This usually occurs only after multiple attacks but may occasionally occur after a single attack. Mum was one of those rare cases. To begin with, the damage was minimal and undetected. Very, very gradually the damage became more severe and only manifested as a problem later in life. And because mum ignored what was happening to her believing she had a chest infection from which she would recover it remained undetected until the risks of any intervention outweighed any possible benefit.
During
Mum took dad’s death very badly, as you might expect. At first, I did not think she would survive the shock but after a few weeks, she seemed to rally. She made an effort to join in some of the pre-Christmas activities at the home, we took her to visit her brother and sisters, and she spent some time at my brother’s on Christmas day. She made a great effort, I think for our sake but, honestly, I’d don’t think she had the heart to go on without my dad!
By the end of January, I knew that she had very little time left. I spent as much time with her as possible. She slept much of the time but I tried to be there whenever she awoke. By night, I slept in a reclining chair by her bedside. By day, I left her only while the carers tended to her needs or when other family members were with her. As the care home is in the village where I live, I was able to nip home to shower and change during those times. When she was awake I held her hand and spoke to her, she did not say much in return but I could see that she was listening to everything I said. While she slept, I worked on The Gawthorpe Needlecase. Embroidery has always soothed my soul.
On the final day, I was quietly stitching when I became aware that something was different, the slightest change in the breathing pattern I had become so accustomed to. The doctor, whom the care home must had summoned, confirmed what I already suspected. I put aside my stitching and held her hand until my brothers arrived and together we stayed with her until she quietly slipped away.
After
Grief is an unpredictable thing. When my father died, I was devastated! I had not expected that. Our relationship had not always been easy; at times I had disliked him intensely. I don’t think that dad ever felt the same animosity towards me that I sometimes did for him. I think he always loved me, all of his children, but had great difficulty expressing it. And I think there were other factors that made him, at times, difficult to live with. He mellowed, I matured, I made a conscious effort to put my negative feelings aside. In later years, we had a close and loving relationship. I expected that when he died (there had been several times previously when we thought that he might) I would be extremely sad but I never imagined I would be so distraught.
In contrast, I had always been extremely close to mum. We were great friends and shared in so much together. I had always expected to be totally devastated when she died. I was, of course, profoundly sad and there were tears when we realised that she had gone. And there have been many more moments of sadness and tears but not the overwhelming grief that I expected. I think that maybe because watching my mum grieve for my dad and, I think, the person she once was, was far worse than letting her go. I truly believe that she is with dad, and Cecil and Gladys, her beloved parents, and is fit and healthy again, once more enjoying long walks with Mini, Sally, and Lady, our boxer dogs.
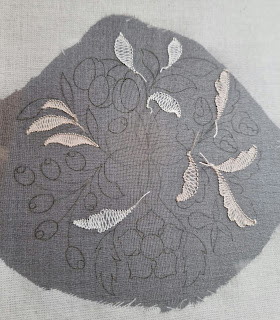
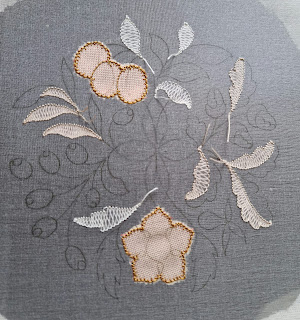
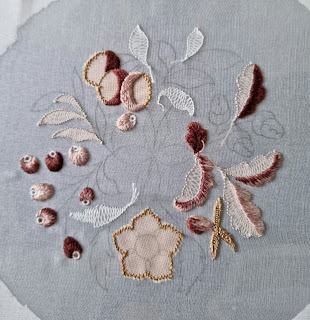
In the days that followed, there was so much to do that I neither had the time nor the energy for stitching. I had a Japanese embroidery class booked for the beginning of March (booked a year earlier). I thought that I might not go. In the end, I decided that a break and a change of pace might do me some good and it did. In fact, it did more than that, it rekindled my mojo and I have been stitching regularly ever since. I returned to, and finished, a piece of Japanese embroidery that had been on my frame for way too long and, in the evening, I have been working on The Gawthorpe Needlecase.
© Jenny Adin-Christie/Carol-Anne Conway
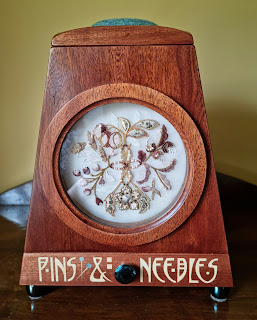
This has been a most enjoyable project! There are so many different aspects to it. Most things, I had some previous experience of but a few were new to me. As mentioned above, the whole project is broken down into small steps and many can be completed in one or two evenings. There were a few materials and techniques that were new to me. Jenny’s instructions are so good that I had no difficulty learning how to work them. I usually enjoy the embroidery far more than the finishing, sometimes I do not even bother with the finishing, but this project absolutely begs to be finished. Transforming the embroidery into the actual needlecase was every bit as enjoyable as the stitching and the finished article is gorgeous!
© Jenny Adin-Christie/Carol-Anne Conway
I am thrilled with my needlecase but it will always have a special place in my heart for being that Before, During, After project. Mum always wanted to know what I was working on and I always to them to show her when it was finished. I wish I could show her this one, too.
Happy Stitching