Showing posts with label Flutterbies. Show all posts

Tuesday, 29 January 2008

The Golden Couple

Sequana: In my eagerness to wrap the picture, I forgot to take a photo first. Nor did I take one of my parents with the picture, but just for you, here is a picture of them at their Golden Wedding Anniversary party. We didn’t have many sunny days in the UK last summer, but the day of their party was a perfect English summer’s day.


Paula: When I showed my sampler to Dad he said, "This doesn’t looked cobbled together to me!" He has told me many times that he had to darn his own socks, I guess his mother was not as keen with a needle as my maternal Grandmother.

I am eagerly anticipating the February challenge details for Take it Further. I really enjoyed the January challenge, not only doing my own sampler, but also watching every one else developing their ideas and translating them into a finished design. I have been really impressed with every ones work and their willingness to share even when they were not entirely happy with their own progress. Last time I looked 149 members had posted 365 pictures to the Flickr album and their are already dozens of finished January Challenge Pieces in the Take it Further blog and many more links to be found on Sharon’s blog in this post here.


Included in the kit from the Plimoth Plantation were materials and instructions for a scissor keeper. This was a 'quick' project to fill the gap while I think about which project to start next.

The butterfly is stitched in some of the stitches used on the sampler. The pink wings are stitched in detached buttonhole needle lace so that they are proud of the background embroidery. I added a narrow wire to the edge to help keep their shape.

The cord is hand made from DMC floss. I used a whole skein to make a 3 ply twist. I made the tassel from a second skein of the same floss. I like big tassels but I think this one may be a bit too big for this little medallion. I will leave it for now; I can always shorten it later if I decide it is too long.

I am eagerly watching The Embroiderer’s Story blog for news of when the new Gilt Sylk Twist goes on sale. I want some! I think they are delaying its release just to tease us!

If you can get to Manchester this weekend why not go the Stitch & Creative Crafts Show at Manchester Central (GMEX). While you are there, visit the Japanese Embroidery Stand and say hello to Jane, Sue and Dennis for me.

Happy Stitching

Friday, 4 January 2008

Flutterbies - The Final Stitches

It is usual to sink the ends of the couched threads after all the other stitching is completed but I had already sunk the ends whenever I thought that they would not interfere with any remaining stitching. The exception was the antennae on the Blue Eyed Boy. For some reason I had decided that I would leave them until the very end - it seemed fitting to finish were it all began back in June. I don’t know why, but I sometimes make these subconscious choices and they become strangely important.

© Jennifer Ashley Taylor/Carol-Anne Conway

Actually sinking the threads is a simple task but it felt as if I were performing a ceremony or ritual - I took my time and savoured the final moments.

© Jennifer Ashley Taylor/Carol-Anne Conway

After working on this for six months and having invested so much thought and emotion in it, I had mixed feelings about finally completing the stitching. Like coming to the end of a good book, I was eager to finish it yet, at the same time, I felt a degree of sadness that it would soon be over. Quite apart for the pleasure that I have had designing and stitching each butterfly, I have become emotionally attached to this particular project.

And here they are ... (by the way, if you didn't already know, when you click on any of the pictures, you will get an enlarged pic)

© Jennifer Ashley Taylor/Carol-Anne Conway

Even though the stitching is complete the piece has to be ‘finished’ before it is removed from the frame. Finishing is the only part of Japanese embroidery I do not enjoy. It’s not that I don’t like any of the steps per se; it’s just that I am terrified that something will go wrong and my months of work will be ruined in an instance!

While working on my Japanese embroidery, I treat it with great reverence. I apply liberal amounts of hand cream to keep my hands as soft and smooth as possible. Before starting work, I wash my hands thoroughly and wash them again whenever they feel hot and sticky. I go through a little ritual of laying out my tools and materials, and usually I mediate for a few moments to rid myself of any tension before I commence stitching. When I am not working on it, the embroidery is covered to protect it from dust and even while I am working on it I only uncover the area that I am working on. Food and drink are not allowed anywhere near it. I regularly check the tension of the silk in the frame and tighten it if necessary and I checked it again before starting the finishing process. All of my tools and materials are carefully put away and the protective cover removed. Let the finishing commence.

First I take a velvet pad and firmly beat the embroidery to remove and dust or particles. Then, on the reverse of the embroidery, I apply glue made from wheat paste to all the stitched areas, taking care not to get any on the silk fabric. Traditionally most of the embroidery was done on kimono, obi or fukusa (a gift covering), which are all items that are worn or handled, gluing the stitching fixes it. I have wondered if it is necessary to glue embroidery that is to be framed, but until I know for certain that it is not, I will continue to glue mine. Then you take a damp towel and wipe first the glued parts to even out the glue and then, with a clean part of the towel wipe the underside of the unstitched areas to dampen the fabric. Now, with the work right side up, you steam the entire piece from the underside. The steam brightens the silk and really makes it shine but having kept anything remotely wet well away from the embroidery until now, this feels totally alien. Finally, you begin drying the embroidery by moving a very cool iron across the surface, which is covered by a piece of finishing paper. This is done on each side. The embroidery is then set aside to dry thoroughly.

This is a brief account of the process to illustrate the rough handling the embroidery receives after months of mollycoddling. This is in no way a tutorial and I seriously recommend you don’t attempt this based on this description alone.

Happy Stitching

Thursday, 3 January 2008

Flutterbies - The End is Nigh

Over New Year, we went to stay with J’s sister in Amsterdam. We've had a lovely time but I have not been able to blog and there is something I’ve been itching to say. I have finished the stitching on Flutterbies!

After my Good Stitching Day, I only had a few details to complete and over the Christmas period, I managed to find an hour here and there to gradually do them.

First I completed the final Flutterby. As I don’t feel I know my youngest brother very well, I decided to keep this butterfly simple and not add any fussy details. Like my brother, I think he has turned out jolly fine.

© Jennifer Ashley Taylor/Carol-Anne Conway

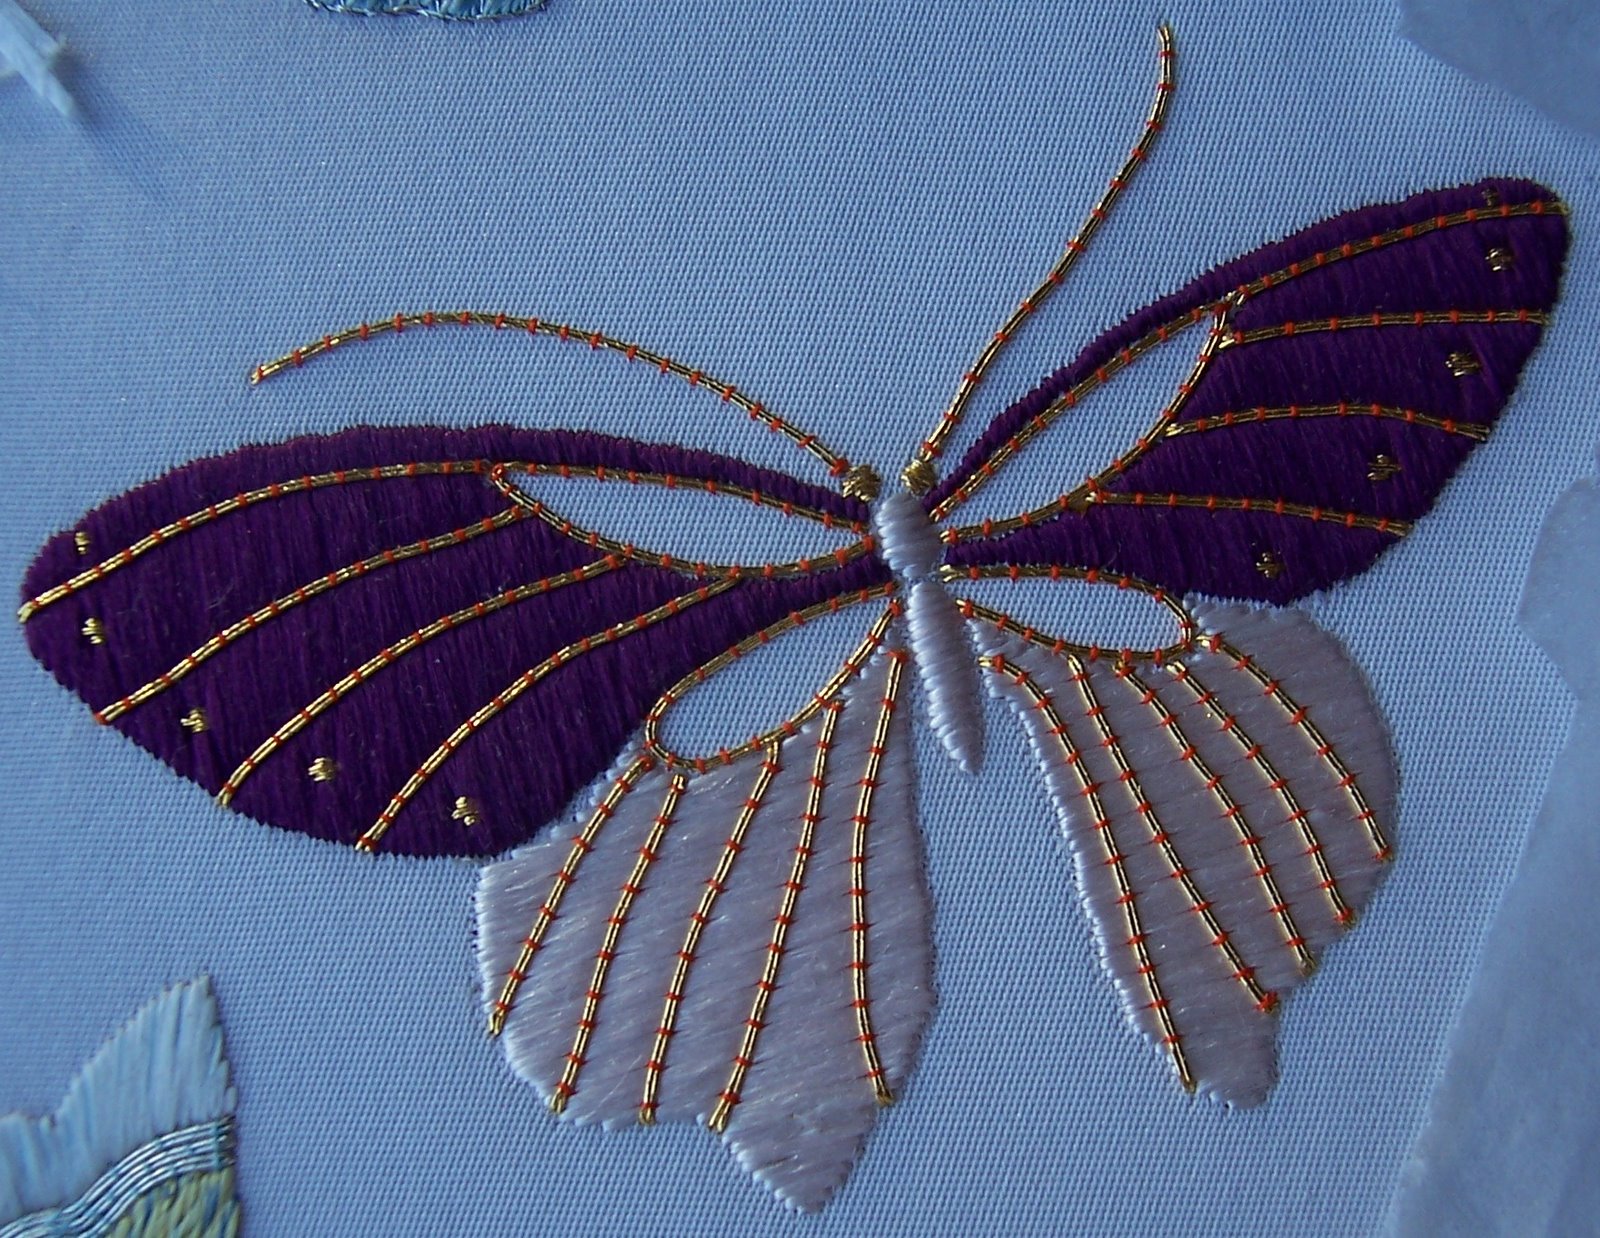
I did however want to add some detail to the hind wings of the purple butterfly. Earlier I had stitched a spot in #1 metallic gold but was not pleased with it. I found it rather difficult to remove the metallic thread stitching without damaging the silk foundation. I thought for a long time about how else I could add a gold spot to each wing. Then, while tidying away some things before Christmas, I came across the materials for The Plimoth Jacket sampler. The kit included some gold spangles for stitching onto a scissor fob I have yet to make. On their blog, The Embroiderer’s Story, there is a fascinating account of the research and investigation into reproducing spangles for the Jacket (and currently, the tale of the Gilt Sylke Twist is being gradually revealed). The spangles in the kit turned out to be just the right size and it was a simple job to stitch them in place with a 1-2 twist of pink silk.

© Jennifer Ashley Taylor/Carol-Anne Conway

The Shibori Samurai has waited patiently to receive his antennae. I knew what I wanted to do, but was not sure if I would succeed in creating the look I wanted. I had put this task off until there were no more excuses for not doing it. I stitched the left antenna first and it came out exactly as I intended.

© Jennifer Ashley Taylor/Carol-Anne Conway

When it came to the second antenna, the bulbous end came out a strange shape. The second time I stitched it, it came out exactly the same again and although the third time it was slightly less bent, it was more or less the same shape. There comes a point where you think, this thing ‘wants’ to be this shape and you have to go with it. Curiously, it reminds me of my Dad’s eyebrow, so it’s staying.

© Jennifer Ashley Taylor/Carol-Anne Conway

I wanted the antennae to be strong and proud, like my Dad, and for them to bring a little more emphasis to this butterfly, which was in danger of being overshadowed by those around it.

© Jennifer Ashley Taylor/Carol-Anne Conway

To be continued ...

Sunday, 23 December 2007

A Good Stitching Day

Having spent Friday doing necessary but boring jobs, yesterday I managed several hours of, guilt free stitching. First, I finished couching imitation silver #4 round and round with 1-2 twisted silk. Silver is traditionally couched with white as it is thought to enhance the appearance of the silver. Here I have I have also used black silk along the line of the veins. I have not decided yet whether or not I like how it turned out.

I then added the green 2-1 twisted green silk to the wing tip. This is not the green that I originally chose. Jennifer Ashley Taylor who supplied the silk thought that the green I had selected was too yellow with my other colour choices and suggested this green in stead. Jennifer had given me a list of DMC colours that most closely matched her silks but the matches are not exact so, as I had not seen the actual silks, I was happy to accept her advice. I love green but this is not a shade that I would have been drawn to but I am so pleased that Jennifer suggested it, I think it is beautiful colour.

© Jennifer Ashley Taylor/Carol-Anne Conway

The second wing is behind the first and I have tried to emphasis this by stitching it in flat silk. Also I wanted to mimic the different textures of the front and back of a butterfly’s wing.

© Jennifer Ashley Taylor/Carol-Anne Conway

© Jennifer Ashley Taylor/Carol-Anne Conway

I had virtually no interruptions all day, the light was good, I was totally in the zone and the stitching just flowed. Usually, I will take out most of what I stitch at least once and do it again, but I barely took out a stitch. If only it could always be like that.

Happy Stitching.

PS. I am typing this in the kitchen, but I keep stopping to look out of the window. I have several bird feeders in the garden and they are teeming with birds. This morning I have seen the usual gang of great tits, blue tits, coal tits, green finches, chaffinches, siskins and sparrows; a pair of gold finches, a pair of doves, a robin, black birds, starlings, pigeons and a woodpecker who all are frequent visitors. Recently a fieldfare and a magpie have started dropping in and just now, my favourites, a gang of long-tail tits who only visit us now and then are vying for a place on the nuts. We also have a pair of squirrels who come regularly. I love watching them but they have a nasty habit of destroying the feeders, I scatter nuts on the ground to encourage them away from the feeders but they are greedy and want it all. I want to go and stitch but I can’t tear myself away from the birds!

Monday, 17 December 2007

Why don't I feel the need for speed?

There has been a lot of discussion about slow clothes recently. Much of the conversation has taken place on SharonB’s Blog, In a Minute ago and Sharon has provided links to several posts on other blogs. From all that I have read, I think that Nuido - The way of Embroidery fits very neatly with the concept of Slow Cloth. I briefly mentioned Nuido in a post two weeks ago, and although it is a concept developed by the JEC for teaching Japanese Embroidery, I think that the philosophy applies equally well to any embroidery and indeed to any craft.

The word Nuido is made up of two parts; Nui, or embroidery (also shishu), and Do (the way). The way of Nui refers to the acquisition of technical skills and knowledge. Do refers to the development, and constant discovery, of the spiritual components of the art of Nuido. Nuido has three aspects: the acquisition of technical skills and knowledge (rationality), the development of artistic sensitivity and awareness (sensitivity), and understanding the spiritual aspects of shishu (Spirituality).


I am a slow worker (not only in embroidery) and although I do not think that being slow necessarily qualifies one as being a slow practitioner, I think in my case the two are intrinsically linked. Part of the reason I stitch slowly, cook slowly, read slowly, write slowly is that I am nearly always lost in thought about whatever I am stitching, cooking, reading or writing. I know that it is a source of frustration to some people around me that I cannot pick up a task and simply do it.

I take an eternity to read a book because I keep going back to reread something I have not fully understood, or to check details that I have forgotten. Preparing meals I like to make whatever I can from basic ingredients. Watching me make sauce for a prawn cocktail, my partner will ask "wouldn’t it be easier to buy it ready made." Of course it would, but where is the satisfaction in that. If I bake a cake (which I don’t do often, because my baking leaves a lot to be desired) I like to mix it by hand. I don’t think this is a ‘better’ way than using a food processor, I simply enjoy creaming the butter and sugar far more than getting the machine out of the cupboard and listening to the awful noise it makes. Why make a rubbish cake, if you don't enjoy the process of making it?

I can take months to stitch a design. Before I start stitching, I spend hours admiring the threads and fabric, contemplating the design. When it comes to actually stitching the piece I work in a slow, almost meditative fashion. If it is something I want to stitch I care little about how long it takes to work and rework the motifs. If it is something that I have no interest in stitching, I would struggle to dedicate 5 minutes to it.

I like ‘quick’ projects (something that takes me less me than a month to complete) and may have several on the go along side my ‘serious’ embroidery. I also like workshops that allow me to ‘dabble’ in something completely new to me but now that I have come to terms with being ‘slow’ I find it deeply satisfying to spend several hours couching only a few rounds of imitation silver to a butterfly wing!

© Jennifer Ashley Taylor/Carol-Anne Conway

Happy Stitching

PS. I took me more than two hours to write this and as I type I am still contemplating the title. Now I am going to cook stir-fry prawns (a quick meal but one I will prepare from scratch) while I think of a title that I like, even if it is not very inspired!

PPS. This title came to me while waiting for the water to boil to cook the noodles in. If I'd used 'Straight to Wok' dinner would be ready but I might not have a title yet!

Tuesday, 4 December 2007

Oh No! Not Another Brother

I have a few details to still to stitch, but effectively only one butterfly remains - my youngest brother. Of all the butterflies, this was the most difficult for me to design and I have had no flash of inspiration like I did with The Optimist’s Suit. I have to admit that I do not know this brother terribly well.

I was six when youngest was born. I understood that Mummy had a baby in her tummy - a new brother or sister. I already had two brothers - an older one and a younger one - I didn’t need any more brothers. I wanted a baby sister and I was very disappointed when I got a third brother. Throughout my childhood, I don’t think I ever quite forgave him for being a boy. My big brother was so cool and clever. My middle brother was great, we played together all the time - we were the gang of two but my youngest brother was just annoying. It’s not surprising I don’t know much about him, when we were children I tried to avoid him as much as possible, as a young woman I was too busy with my own life and see what was happening in his. Of course I know about things he has done and things that have happened to him but I realise that I have never really got to know him and that is a great shame because somewhere along the line the most stupid and annoying little brother in the world grew up to be a thoughtful, caring and intelligent man.

I haven’t committed any designs to paper; I have an idea in my head and I am just going let it evolve. During the lectures Tamura-san reminded use of the three pillars of Nuido: rationality, sensitivity and spirituality. Working on Flutterbys, I have come to understand these three pillars like never before. I have given much thought to the design (sensitivity) and concentrated on doing the best stitching I can (rationality). In a comment on The Butterfly with No Name, Jane mentioned Master Saito's saying "the hands are the exit of the spirit" this is the spirituality of Nuido. Working on each of the butterflies I have thought deeply about the person represented and the love I feel for them is woven into every stitch.

© Jennifer Ashley Taylor/Carol-Anne Conway

© Jennifer Ashley Taylor/Carol-Anne Conway

There is a more detailed explanation of Nuido on the JEC website, here.

Happy Stitching

Monday, 3 December 2007

The Butterfly with No Name

The first four butterflies spoke to me while I was planning them and all the time I was stitching them. They told me their name, how they wanted to be stitched and all the time they kept calling to me to work on them. They could not wait to emerge. This butterfly, the one that represents me, has been a completely different experience. She is purple because that is my favourite colour, with pink from the Mother butterfly and gold from the Father but she gave me no hints about how she would like to appear and I still don't know her name. Until she decides to identify herself to me (if she ever does), I have nick-named her Purple Missus, after a blog of that name.

© Jennifer Ashley Taylor/Carol-Anne Conway

I wouldn't say that stitching her has been a chore, I always enjoy time spent stitching, but I have not had the same buzz that I had watching the others emerge. Nor am I as satisfied with the stitching, I feel I could have done better. She is not quite finished, something more is needed on the hind wings but I am going to leave that for now and move on to the last butterfly, my youngest brother.

© Jennifer Ashley Taylor/Carol-Anne Conway

Happy Stitching

Monday, 15 October 2007

Flutterbys - Long Time, No See

I took a days holiday today because I had an important appointment. Important to me, but obviously not to the other party as they cancelled this morning. I am irritated to waste my last days holiday for nothing, but looking on the bright side, I got a day of stitching.

It has been two weeks since I last put a stitch in my Flutterbys and I have missed them. I din't dare stitch on them when I was feeling so low and the last two weekends have been really busy, no stitching, but as soon as I knew I had a free day, I knew how I would be spending it.

All of my doubts have melted away (boy, am I glad that I didn't rip out all that stitching 10 days ago!) I am back in love with the purple, the colour that is, the thread is a different matter. Although all the colours are the same weight silk, from the same supplier, it is amazing the difference in handling. The palest pink silk is a dream, it almost lays itself. The purple is the complete opposite, it seems to fight me all the way (do you think it is trying to tell me something?) It won't lay nicely and snags as soon as you look at it. I have made a lot of mistakes and taken out almost as much as I have put in. It is still not perfect, but I decided to leave a mistake or two to remind me that I am not perfect - that is not an easy thing for a Virgo to admit.

Anyway, after several hours lost in horizontal and vertical foundations, she looks like this.

© Jennifer Ashley Taylor/Carol-Anne Conway

Happy Stitching

Saturday, 29 September 2007

A Crisis of Confidence

The Shibori Samurai went so well I was riding of the crest of the wave. Now the wave has gone and left me high and dry. I really thought I knew where I was going with my purple butterfly but suddenly I am having such a crisis of confidence that I have not been able to stitch on Flutterbys for two days.

© Jennifer Ashley Taylor/Carol-Anne Conway

I am worried that the purple is too dominant. I intended to stitch the veins in gold which I think will serve to break up and lighten the expanse of purple, but I am just not sure. Is this just a self-image thing, concern that I am making myself too important or am I looking at it objectively and seeing a genuine imbalance? Do I press on and see how it works out, or do I remove the stitching now and rethink the design of this butterfly? I can’t make up my mind and I don’t have time to prevaricate.

© Jennifer Ashley Taylor/Carol-Anne Conway

Thursday, 27 September 2007

Designing Me

In some respects it easy to design something that represents yourself. I know my favourite colours, designs and stitches. It would be tempting to simply include my all my favourite things, but it is important that this butterfly balances with the others.

In other respects it is hard to design something that represents yourself. While designing the other butterflies, I have thought deeply about the family member they represent; their character, characteristics they share with other members of the family, and my relationship with them. I thought just as deeply about myself while designing my butterfly, and in many ways it is harder to be honest about yourself, and more painful. It is no revelation to me that I am a lot like my Dad, I’ve known that for a long time. For a very long time, I rejected the idea, who wants to be like someone they don’t always like. Eventually, I accepted that is the way it is and there is nothing I can do to change that, other than learn to moderate the characteristics I don’t like. I also realise that some of my best characteristics are also inherited from Dad.

Physically, I resemble my Mum, people always remark on it. I’m not sure what personality I inherit from her. We have the best relationship, I don’t analyse it, I’m simply very happy that she is my Mum and my mate.

So, I have to have purple because it is my favourite colour. Actually, I love all colours and my favourite can change according to mood, but purple is my favourite favourite. Because I look so much like my Mum, I will include a lot of pink and because I am finally proud to say that I am like my Dad, I will include gold to represent the best of him.

Wednesday, 26 September 2007

Shibori Samurai

I would like to include a picture of the Kimono that inspired the design of this butterfly but I think that would contravene copyright rules. The kimono is called Hana utsuroi (Transient Flowers) and Shizuka Kusano describes her embroidery as follows
Butterflies have been added using shibori appliqués to make them stand out and appear to float over a plain where wisteria and wild pinks bloom in profusion. The butterflies with floral patterns on their wings gradually merge with the flowers, becoming one with them as they move towards death.
As described, the whole of the background is covered in a profusion of flowers. The butterflies to the right have both wings appliquéd with shibori fabric and are outlined in gold metallic thread. In the center, only one wing of each butterfly is appliqué, the other is embroidered with flowers similar to the background. Both wings of the butterflies on the left are embroidered with flowers and although the wings are outlined with gold metallic, the butterflies gradually merge with the background.

This was a bold design choice for me, but I am really pleased with how it has worked out. On one side the black and white Hitta-gake reflects my Father's rigid views and though parenting style; the other represents his love of not only flowers, but the world around him, that he passed down to all four of his children. More than that, it represents the passion, loyalty and strong sense of family that we also inherit from him.

© Jennifer Ashley Taylor/Carol-Anne Conway

I still have the antennae to embroidery but I want to complete at least the next butterfly so that I can decide how heavy or light they need to be, so for now, this is finished.

Happy Stitching

Tuesday, 25 September 2007

Sakura

Cherry blossom (sakura), which falls at the height of its beauty without withering, is one of the symbols of the samurai warrior, who had to be ready to give his life instantly. I do believe my Dad would have given his life for ours if he could, so he is my Samurai.

Also, Dad is passionate about all things horticultural, and has always filled the house and garden with flowering plants. It must be from him that I get my love of gardening and flowers. Sakura is a very appropriate emblem for my Dad.

© Jennifer Ashley Taylor/Carol-Anne Conway

Cherry blossoms are so delicate, I wanted to keep these light and delicate, so used a single strand of flat silk. I have used some white silk that I had left over from Suehiro, it is finer than the white that I ordered for this project and is not as bright. The middle blossom is not white but very pale pink, there is barely any difference between this pink and the white but I like that they are subtly different, as are real flowers.

Behind the three small flowers I have outlined one larger blossom by couching a single strand of twisted real gold #1. Gold is often couched with a red thread, it is thought to enhance the gold. Here I have used a gold couching thread because I wanted the couching stitches to be insignificant.

© Jennifer Ashley Taylor/Carol-Anne Conway

Happy Stitching

Sunday, 23 September 2007

Hitta-gake

I first did hitta-gake (tie-dye effect) on Suehiro and really liked it, although I thought my first attempt was heavy handed. A tutor advised me that I should use a more tightly twisted thread. I would say that Shizuka Kusano also has a fondness for this novel effect as it is a recurring theme in her book "The Fine Art of Kimono Embroidery".

At first, I did not fully appreciate why this design is called tie-dye effect but recently I have become interested in shibori and now I can see what this novel effect represents. This article by John Marshall explains how kanokoshibori is made and the meaning of its name.

Like all the novel effects that I have worked so far, hitta-gake starts with a foundation, this one is a weft foundation worked in flat silk (white). A grid of threads is then laid diagonally over the foundation. The threads are space 5mm apart and this time I remembered the advise I was given and twisted the thread tightly.

© Jennifer Ashley Taylor/Carol-Anne Conway

© Jennifer Ashley Taylor/Carol-Anne Conway

Where the laid threads intersect, they are tied down with three short stitches in the same twisted thread.

© Jennifer Ashley Taylor/Carol-Anne Conway

Finally, in the center of each square, two short stitches are worked over a sleeper stitch, still using the same twisted thread.

© Jennifer Ashley Taylor/Carol-Anne Conway

This time, I think I have achieved the lighter touch that I was aiming for, but I do not think that the foundation is as good as on Suehiro, that may be because I worked this foundation in a single strand of flat silk, but on Suehiro I used 1.5 or 2 strands. The threads that I am using for Flutterbys is naturally thicker than those I used for Suehiro so I thought that 1 strand would be sufficient. Even so, I am satisfied with this hitta-gake.

Happy Stitching

Thursday, 13 September 2007

A Well-rounded Head

I have been getting up an hour earlier than usual so that I can do a little stitching before I leave for work but somehow that never translates into an hour of stitching and a little stitching is all that I have done!

Fleegle drew my attention to the shape of the head, and quite rightly pointed out that it was not well rounded. I removed the stitching and had another go. The metallic that I am using has a narrow strip of real gold wrapped around a silk core. In removing the stitching the gold striped from the core and was unusable. The real gold is much nicer to stitch with than the imitation gold, but I am finding it more delicate. I have striped two strands so far and only managed to successfully stitch with one! I have stitched and reverse stitched so many times that I am no further forward than I was 3 days ago, except that I now have a well-rounded head (well not me, but the butterfly). I am having problems making the body part well rounded. One stitch forward, two stitches back.

© Jennifer Ashley Taylor/Carol-Anne Conway

Happy Stitching

Monday, 10 September 2007

Real Gold

This next butterfly represents my Dad. I am really excited about this butterfly; I think that I have made a bold design choice and that is unusual for me.

The starting point for the whole colour scheme was this embroidery, Happy Family and especially the 'Father'. The Father is embroidered entirely in black and white silk and gold metallic. The Mother is worked in pink and white silk with silver metallic. My idea is to embroider my Mother and Father butterflies in these colours and that each of the butterflies representing my brothers and myself will include something in a colour from each of the parent butterflies. I have had more ideas for the design of the Father than any other butterfly, but what I now intend to embroider is unlike any of my original concepts. The inspiration for what I have planned comes from a book called The Fine Art of Kimono Embroidery. The author, Shizuka Kusano, is an incredibly talented artist, her medium is embroidery and her canvases are (mostly) kimonos. A google search revealed lots of links to reviews of the book but I could only find two sites with examples of her work, here and here (you need to scroll down in both cases). I don’t have a sketch of my design, but I have a clear picture in my head - I hope that it works out the way I see it.

Although the colour scheme came from 'Happy Family', black and white is so appropriate for my Dad; he has very strong views on things. There are no shades of grey where Dad is concerned; a thing is one way or another, right or wrong, good or bad. Gold is also appropriate because he has a heart of gold (he just tries to keep it hidden). Growing up with my Dad was difficult and he and I often fell out, especially during my teens/twenties when I formed some strong opinions of my own. Even when relations between us were strained, I still knew that he was my champion in life - he is fiercely loyal. Once I made a rather silly mistake and got myself in a fix. I was really scared to tell him about my predicament; I thought that he would be extremely angry and disappointed in me. In fact I should have know that he would react exactly the way he did. He told me that although my situation was bad, it was not the end of the world and that we would be able to sort it out. He stood by me and supported me through the difficult months that followed, and eventually he told me to stop being angry and disappointed in myself and to put the past behind me. More than anyone, my Dad has made me the person I am today.

Over twenty years ago, Dad was suddenly taken ill and within days had a triple heart by-pass. At that time, his surgeon said that might live another 5-10 years. Since then, there have been times when we didn’t think he would make the next Wedding Anniversary let alone his Golden Wedding Anniversary. I am really grateful for the extra years we have had, it has given me an opportunity to get to know him and for us to develop a friendship and a more loving bond that I could have imagined possible. I still have hang ups about some aspects of my childhood and we still strongly debate some issues. I’m not sure if it is because he has mellowed or if it is because I have matured, or perhaps it is because we have each realised that other loves us, but we no longer fall out whenever we disagree.

© Jennifer Ashley Taylor/Carol-Anne Conway

All the gold on this design will be stitched in real gold; after all it is a Golden Wedding Anniversary gift. I have been told that real gold is much nice to stitch with than imitation metallic threads. I have padded the head with two layers of flat silk before stitching a final layer in #1 real gold.

Happy Stitching

Saturday, 8 September 2007

The Pink Lady is Done

© Jennifer Ashley Taylor/Carol-Anne Conway

I think you can just about see, in this photograph, the difference that the pearlescent thread makes to the flat silk; it just adds a subtle hint of shimmering mother-of-pearl.

I am feeling more confident about the second wing now that I have completed the left-hand hind wing. The two wings appear more balanced than before. I still think the stitching on the right is better than on the left but I do not think that I will be removing it.

© Jennifer Ashley Taylor/Carol-Anne Conway

This butterfly really does look the way I imagined it when I was transferring the design. I love the way the two forewings sweep upwards and I have couched two pairs of #4 silver in the space between the segments of the wings to reinforce that effect. While the overall look of this butterfly is dainty and feminine, I think these two lines convey a sense of strength and stability. These are characteristics that I associate with my Mum and she has been a rock for me throughout my life.

© Jennifer Ashley Taylor/Carol-Anne Conway

So, I am half way there and this is how the three completed butterflies look together.

© Jennifer Ashley Taylor/Carol-Anne Conway

During the stitching, I was a little concerned that The Pink Lady is going to be too bright and dominate the entire picture. Seeing the three together, I am less concerned and keeping in mind what I have planned for the remaining butterflies, I think that the whole design will be balanced when done. It is common practice to stitch tissue paper over completed elements to protect them while stitching the remaining elements. Because I want to keep an eye on how the separate butterflies interact with each other and affect the overall dynamic of the design I have not done that. Instead I cover the completed stitching with a sheet of tissue paper and take a lot of care.

Happy Stitching

Monday, 3 September 2007

A Difficult Wing

The second wing has been giving me a few problems and I am not sure why. I am really pleased with the stitching on the first wing, but the second one does not look as good, despite unpicking and re-stitching several times.

I think the problem may be that I am stitching the 'wrong' way. On the first wing, I stitched from top/left to bottom/right so that I am stitching towards myself. A tool called a Tekobari is used to stroke the thread to help to make is smooth and shiny. On the second wing I stitched from bottom/left to top/right because I wanted the stitches to mirror those on the first wing. In this case I was stitching away from myself; this is the 'wrong' way. I could have stitched top/right to bottom/left, but with the angle of the stitches this felt cack-handed.

© Jennifer Ashley Taylor/Carol-Anne Conway

Now I have a dilemma. I want to remove the stitches and try again, but I am beginning to feel the pressure of time. It has taken me three months to get to this stage and my deadline is just two months away with three butterflies remaining. I think I will leave this for now and review it when I have stitched the remaining butterflies.

Happy Stitching

Saturday, 1 September 2007

Pearlescent Pink

I bought this beautiful pearlescent pink thread while Flutterbys was still in the early planning stage. I thought that it would be perfect for imitating the shimmering, colour shifting qualities of a butterfly's wings.


Here I have combined it with pale pink flat silk to stitch diagonal foundation on the Pink Ladies fore wing.

© Jennifer Ashley Taylor/Carol-Anne Conway

You probably already know this but if you click on any of the pictures, you get an enlarged view which not only shows the details more clearly, but all of the mistakes as well.

Happy Stitching

Monday, 27 August 2007

Lattice Holding Stitch, step by step

A while ago, I was asked how to do the lattice holding stitch. This stitch was taught to me on a Japanese embroidery course held by Japanese Embroidery UK and is fully detailed in The Techniques of Japanese Embroidery available from the Japanese Embroidery Centre.

I used this stitch on the Blue Eyed Boy and am using it again on the Pink Lady. First I covered the whole area in Vertical Foundation Stitch. I used a double strand of pale pink silk.

© Jennifer Ashley Taylor/Carol-Anne Conway

Next, I laid stitches across the whole area at a 45 degree angle to the foundation, taking care to space the stitches evenly and keep them parallel to one another. The area of the hind wing is rather small so I have spaced the stitches at 3mm in this case. I could have used a twisted silk of the same colour as the foundation or in a colour to either compliment or contrast the foundation. Here I have used twisted imitation silver.

© Jennifer Ashley Taylor/Carol-Anne Conway

I used the same thread to lay more stitches, this time at 90 degrees to the first laid stitches. to create a grid of small squares.

© Jennifer Ashley Taylor/Carol-Anne Conway

Finally, wherever the laid stitches intersect, I have tied them down with little couching stitches. I have used the same twisted silver thread for this but twisted pale pink could also have been used.

© Jennifer Ashley Taylor/Carol-Anne Conway

I think the finished effect is quite lovely.

© Jennifer Ashley Taylor/Carol-Anne Conway

Happy Stitching

Pink Lady, continued

So far this is looking exactly as I hoped it would. This shows why I love silk embroidery so much. This stitch, diagonal foundation, is simple to execute yet it looks simply stunning, I think.

© Jennifer Ashley Taylor/Carol-Anne Conway

Happy Stitching