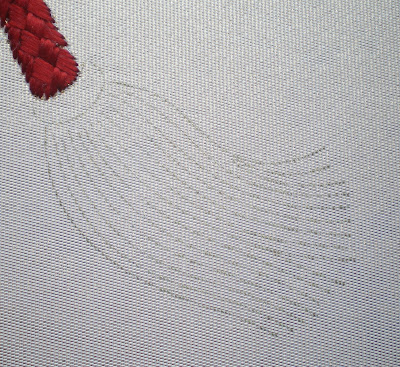
In Japanese Embroidery, things are generally stitched in a certain order. Foreground objects are stitched before those behind them. As far as possible, begin with the elements furthest away and work forwards, similarly start with the elements on the left-hand side and work towards the right. This prevents the right hand (which is always on top of the fabric) from resting on parts of the design already stitched. As the 'best bits' are generally in the foreground it is not always possible to save them for last but on Himotaba there is a tassel on the right-hand side (the design is mounted on the frame sideways on) with nothing behind it. For me this, was the obvious 'special something' to save for last.

© JEC/Carol-Anne Conway
There are two versions of Himotaba. On the original version, cord #1 ends in a small tassel. On the extended version that I am stitching, as well as longer cords, there is a longer, more elegant tassel.
The head of the tassel is padded with two layers of padding cotton before stitching with 2 strands of flat silk in the diagonal direction.

© JEC/Carol-Anne Conway
The box chart gives the two options for stitching the tassel, the first is to stitch the tassel strands with a line of staggered diagonals using .75 strand of flat silk the alternative is to cover the entire tassel in diagonal layer using 1.5 strands of flat silk to give a solid shape. I have seen 2 or 3 versions of Himotaba that combine a flat silk foundation with stitched strands, and one that has round knots at the end of the tassel to give a 'frilly' effect. For some time, I was tempted to use one of these variations. After much thought, I felt that the tassel is already a prominent feature of the design; the eye is automatically drawn to it, I felt that a more flamboyant tassels would detract from the cords and so decided to go with the simplest treatment.

© JEC/Carol-Anne Conway
I am still in two minds about it. I do like a bit of bling and feel that the tassel is crying out to be the star of the show but on the other hand, I don't want it to hog the limelight.
Happy Stitching.

6 comments:
Well, it must have been so much fun to stitch that tassel in such a pretty shade of red. I had to go back and look at what I did way back when. I did the same as you...staggered diagonals..but I added a little bit of gold to the end of the tassel...you could always do that...rather than rip out, you have so much space in between your tassel "threads" that you could almost add another row in between and add the gold on the end. Even if you do nothing, it's absolutely beautifully stitched. And congratulations are in order!
OH, I love your tassel. The red is SO lush and I love the airy nature. I love SE's idea of adding a little bit of flare with gold to give it a little more elegance.
It's giving me inspiration on what to do the end of the cord under the branch on Uguisu R Ume....
You have such beautiful stitching!! it is always a pleasure to look at, your tassel is fantastic. I love the red you used!
Ann Flowers
flowerscrazyq@gmail.com
Hi there, loving the red tassel, but I think you are right it needs something else. It looks to me like the tassel is a bit 'mean' to end what is quite a thick cord. I've looked back at my green tassel and the lines on mine are thicker, I am pretty sure I did mine in 1F. I think Susans suggestion of adding in another line is a good one. It would give it more body. Whatever you do have fun - and then celebrate with a real cake with a cherry on the top!
Love the red tassle adding the gold would make it yummy, a really great cherry, looking forward to seeing it for real. Love Sue X
I think you will find if you leave the panel to sit for a few days before declaring it Finished (such a clang of doom about it..) you will see what - if anything - you need to do to the tassel.
I did wonder if it needed a few more layers of stitching, but you will be the best judge of that.
Post a Comment