Tuesday, 4 January 2022

On the Tenth Day of Christmas, Embroidery Gave to me ...

Kusudama

Japanese Embroidery is taught in Ten Phases. Phases I-III teach the basics and fundamental techniques. Phases IV-VIII focus on the special techniques. Phase IX teaches perseverance (that is not the official line, just what I learnt most from Sake Boxes). Only when these nine phases are complete can you apply to take Phase X which is always taught by the Japanese Embroidery Centre. These classes take place annually at the JEC and, periodically, in Australia, Europe, or Japan. When I began Japanese embroidery, I was not thinking in terms of Phases and graduation, I’m not entirely sure that I knew this was an option. I only knew that I wanted to learn how this exquisite embroidery is done. At some point, I must have decided that I did, in fact, want to complete the whole curriculum. Initially, I was completing one phase per year and was on course to take Phase X in 2015. My dear friend Sue and I planned to return to Atlanta to take the course at the Centre. Sadly, Sue fell ill and passed away and we never made it back to Atlanta. For a long time after we lost Sue, I found it too painful to sit at my frame. Following that, well let’s just say life happened and I seemed to have little time or energy for Japanese Embroidery.
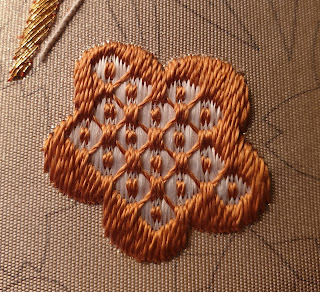
© JEC/Carol-Anne Conway

Although there was still a lot going on in my life, in 2018 I felt a strong urge to bring stitching back into my life and resolved to do 15 minutes a day. 15 minutes does not seem much but this was enough to give me a stitching fix and, on days when things got a little crazy, this was my 15 minutes of calm. This approach also helped me overcome the obstacle of the wisteria vine on Sake Boxes. While my aim was to do 15 minutes, I found that I often did more and slowly but surely I completed the last of my nine phase pieces. Finally, I was able to apply to do Phase X but, by then, the pandemic had struck; there was no possibility of my travelling to Atlanta and no possibility of a class happening outside of Atlanta! However, the JEC decided to teach the class online, something they had never attempted before.
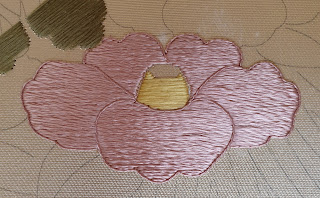
© JEC/Carol-Anne Conway

The class was amazing! I think we all wondered how effective it could be and were sad not to be together for this class (especially those who had expected to be taking it in Japan) but we all agreed that there were some advantages to learning this way. The tutoring was superb and, as with the classes with Arata-san, I was able to focus on some of my weaker techniques.
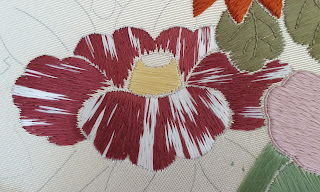
© JEC/Carol-Anne Conway

There is a choice of two designs for Phase X; I chose Kusudama – the flower ball. This design includes all of the techniques taught in the previous nine Phases. While the alternative design is beautiful and very challenging, I have always viewed Kusudama as a rite of passage.
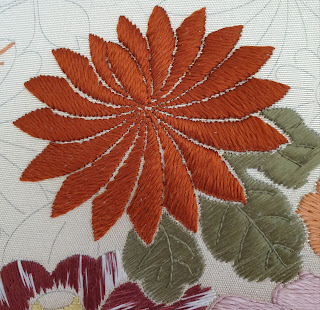
© JEC/Carol-Anne Conway

I have done some stitching on Kusudama since the class but she is currently in hibernation. I am considering which piece to bring out of hibernation in the New Year and Kusudama is high on the list.
© JEC/Carol-Anne Conway

Happy Stitching

Monday, 3 January 2022

On the Nineth Day of Christmas, Embroidery Gave to me ...

A Proud Peacock

Another designer from whom I have collected a number of kits that I am very much enjoying is Jenny Adin-Christie. Jenny was also brought to my attention by friends on the Cabinet of Curiosities Course. I think the first design of hers that I saw was The Brown Wren Etui and I don’t think I have ever seen anything quite like it before. Like Amy, some of Jenny’s kits are reminiscent of Casket toys but hers have a totally unique, contemporary take. Although I have the Wren kit in my stash, it was different bird that I decided to stitch first. The Peacock Etui joined Jenny’s flock a little later and the kit joined my stash as soon as it was released. I could not wait to get started with this gorgeous embroidery extravaganza!
© Jenny Adin-Christie/Carol-Anne Conway

I described how beautifully presented Jenny’s kits are when I wrote about the Gawthorpe Needlecase and the quality of the supplies and instructions. Every kit I have is of the same standard. One aspect of Jenny’s kits that I appreciate above all others is the amazing array of threads that are used. As gorgeous as they are, there was one substitution I wanted to make for the Peacock Etui.

The first area stitched are the feathers at the base of his tail. To me, they were crying out to be stitched in flat silk so I went through my silks to find those that most closely matched those provided. I almost regretted my decision to change the thread as stitching through three layers of wool and felt does not do flat silk any favours. But I am nothing if not stubborn so I persisted and was pleased that I had. I think my peacock can be proud of his plumage especially once the plate and sequins were added. The area around these feathers is satin stitched in chenille and wool and felt is even less gentle on silk chenille. This was another job for my size 12 Japanese needle and even with that weapon the chenille shredded terribly.
© Jenny Adin-Christie/Carol-Anne Conway

The real show stoppers on his tail are the “eyes”, as they should be. Each eye is first padded with a layer of felt but then they are stitched and embellished in a different ways with a variety of threads. Along the edge of the tail is zigzag of fettuccini ribbon. I have only used this thread in Jenny’s kits and I really like working with it.
© Jenny Adin-Christie/Carol-Anne Conway

Another thread that Jenny frequently uses in her designs that I really like working with is silk gimp. Here it is used to stitch the feathers on the Peacock's back.
© Jenny Adin-Christie/Carol-Anne Conway

All of that practice stitching detached buttonhole on the Spring Casket Keepsakes came in handy when it came to covering the body form; his head and long neck are covered in detached buttonhole spiralling around and around.
© Jenny Adin-Christie/Carol-Anne Conway

Happy Stitching

Sunday, 2 January 2022

On the Eighth Day of Christmas, Embroidery Gave to me ...

A Host of Butterflies

In September 2019, Arata-san returned to High Leigh to teach another advanced class. The main design offered on this occasion was Bevy of Beauties. The original is a double width piece designed by Arata-san’s Grandfather, Iwao Saito, founder of the Kurenai Kai embroidery centre. For this class, we were offered the design on a specially died Monmuji fabric. In addition to the embroidery class, we were offered an optional one-day class in Kinsai – gold leaf-application.
© JEC/Carol-Anne Conway

The class, of course, was excellent but my recollection of it is a little hazy. Mum’s health was deteriorating at that time and I was extremely concerned for her and dad’s welfare. They had temporarily (we thought) moved into a residential home with nursing facilities. I know that they were well cared for while I was away but I could not stop thinking about them.
© JEC/Carol-Anne Conway

As with all of these classes, I managed very little stitching but I did take notes during the lectures and class so I hope, when I come to work on Bevy of Beauties, they will remind me of what I need to know.

Happy Stitching.

Saturday, 1 January 2022

On the Seventh Day of Christmas, Embroidery Gave to me ...

Butterfly Wings and Beetle Juice

The third in the series of Casket Keepsakes, both in order of release and the order in which I stitched them, is Summer. This kit contained two more needlework accessories – a beetle thimble holder and a butterfly needle case.

The design for the butterfly wings is preprinted onto the silk ground fabric which is prepared in the same manner as the silk for the Winter Keepsakes. There are four wings with embroidery on either side, so eight wing sections in total. The foundation stitching is satin stitch in Amy’s hand dyed silk. The front of the wings are then embellished with metallic threads, sequins, beads, and discs of shell that attached using Shisha Stitch. Only the outer edge of the wing backs are embroidered, a piece of felt in which to store needles, is appliqued to the centre of each wing. The front and back of each wing are joined with lacing stitches that are covered with couched pearl purl.

The abdomen is made from fabric covered straws. Long parallel stitches are made along each segment of the abdomen. These stitches form a warp thread through which rounds of thread are woven to cover the abdomen. One half is woven with heavy twisted silk; the other with chenille. The chenille is extremely delicate and shredded easily. The straw abdomen serves as a vile for needles and is closed with a wooden spindle.

The head is made from a large wooden bead prewrapped in metallic thread, with two tiny bronze beads for the eyes.

A paper template is supplied for making the legs using covered wire that is bent to match the template and then covered in Hedebo stitches. This was a new stitch for me and it took me two or three attempts to get the hang of it. There are three pairs of legs for the butterfly.

The wings are joined to form a needle book and then assembled with the legs and body into a butterfly.
© Amy Mitten/Carol-Anne Conway

The beetle wings are embroidered onto a piece of green linen. A “thread” is constructed by wrapping a heavy twisted thread around a wavey metallic. This is then couched, in slightly spaced rows, across the wing. Although a little fiddly, this is quite simple to do but the effect is quite stunning, and very difficult to adequately capture in a photograph. The outline of each wing is then worked in backstitches over the wrapped metal trim. The pieces are cut out and assembled into two separate wings.

The thorax is worked over a paper template covered in sticky back plastic that is formed into a cone. A silicon ring is first couched to the cone. Buttonhole stitches are worked over the ring. The remaining threaded used to work the buttonhole stitches is then used for the horizontal bar. Rounds of detached buttonhole stitches are worked through the stitches on the previous row and under the horizontal bar, increasing as necessary, to cover the cone.

The head is fashioned from bronze kid leather with two gem stones beads for the eyes. I think the head is quite ingenious; I could not see how it could work until I attached it to the thorax and it morphed itself into a beetle’s head.

The beetles legs are made using the same techniques as used for the butterfly legs except that the six legs are made as a single piece together with the body. The wings are attached to the body which is then molded around the thorax head structure before the thorax is joined to the wings/body. The thimble is stored in the thorax which is closed with a pair of finger looped braids.
© Amy Mitten/Carol-Anne Conway

Of all the pieces in this series, it was the one that least caught my attention. It is such an ingenious casket toy and so pretty in real life that it is, thus far, my favourite Casket Keepsake.

Happy stitching

Friday, 31 December 2021

On the Sixth Day of Christmas, Embroidery Gave to me ...

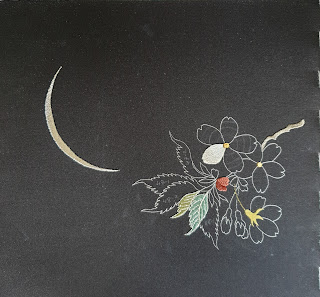
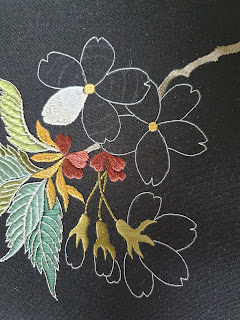
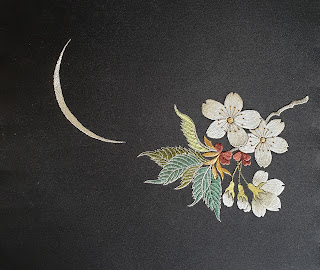
Some Cherry Blossom and the Moon

Cherries and the Moon was the first piece I worked on after completing Queen of Flowers. It had not been on the frame quiet as long as Bridge BEW but I required a frame for another project and thought this piece would be the quickest to complete.

During the class with Kusano-senei, in June 2013, I had stitched a sample of each of the elements. Since then I had only stitched on Cherries and the Moon once more, when I completed the stitching on the moon.
© Shizuka Kusano/Carol-Anne Conway

In Japanese embroidery, we start with the elements furthest way from us, working from left to right, so the first area I worked on was the leaves (the frame is positioned length wise). These are relatively simple with a horizontal foundation and twisted silver outline and veins. I recalled that Kusano-sensei had encouraged me to exaggerate the tips of the serrations so that they would be obviously pointed.
© Shizuka Kusano/Carol-Anne Conway

Since 2013 I have become much more confident with long and short stitch and now, I can honestly say that I enjoy it. All of the cherry blossoms are stitched in long and short stitch. Sticking to the working order, I stitched the buds first.

Of the open blooms, only a single petal was stitched. When I looked at it, I thought that after so much time, I would not be able to match the stitching on that petal. I thought that it would be better to remove it and start again. Too late, I remembered that this was A Very Special Petal but what is done cannot be undone, or in this case, what is undone cannot be redone. Now it was up to me to restitch this petal beautifully in honour of what Kusano-sensei, Ishii-san, and Watakabe-san had taught me. I really enjoyed stitching these flowers. Kusano-sensei often uses shades of grey for white flowers; I think it gives them a certain grace and elegance.
© Shizuka Kusano/Carol-Anne Conway

Happy Stitching

Thursday, 30 December 2021

On the Fifth Day of Christmas, Embroidery Gave to me ...

A Golden Compass

Yet another designer I became aware of through the Cabinet of Curiosities ladies, Cynthia Jackson. Cynthia researches and reconstructs original embroidered artifacts, particularly those from Medieval and Tudor times. Amongst other things, Cynthia has designed a series of embroideries inspired by a fragment of embroidery traditionally believed to have graced the bed that Anne Boleyn was born in. This year I took part in an amazing online class on Medieval embroidery delivered by Cynthia. But before I knew about Cynthia’s research and Medieval inspired embroideries, I came across her Mariner’s Compass. Enough of us we keen to stitch our own that Cynthia was persuaded to offer it as a class. One of the most interesting aspects of this course (at the time) was that it was conducted entirely online. Cynthia is based in Canada and, in normal circumstances, this class would not have been accessible for many of the participants. It was a added bonus to “meet” several people I had got to know through the Cabinet of Curiosities forum.
© Cynthia Jackson/Carol-Anne Conway

Many of the materials and techniques were familiar to me, although, I think this is the first time I have worked with plate and is the first time I have done S’ing. I found it very challenging and was not entirely satisfied with my attempt. Everything else was within my comfort zone but I think the various materials and techniques come together to form a very pleasing design that I thoroughly enjoyed stitching.

Happy Stitching

Wednesday, 29 December 2021

On the Fourth Day of Christmas, Embroidery Gave to me ...

Two Spring Blossoms

Spring is the second in the series of Amy Mitten’s Casket Keepsakes but the first that I stitched. Like Winter, this kit consists of two casket toys, each a needle work accessory cunningly disguised as a flower. A carnation and a cornflower.

Each flower has a Calyx, a front and back to each, which is worked in tent stitch on Laurel green linen. Details and an outline are worked in backstitch; the outline will be used when assembling the pieces later. One of the flowers holds a tape measure wound around a spindle. The spindle emerges from the front of the calyx through an eyelet outlined in buttonhole stitch.

The next step is to make the petals, lots of petals, which are needlelace, lots and lots, of needlelace. The needlelace is worked on paper templates. There are lots of them, one for each petal. There are dots on the templates, lots and lots of dots, that indicate where to place couching stitches. It is best to pierce holes at this point prior to stitching. I fashioned myself a tool to do this step by pushing the eye end of a needle into a champagne cork.
© Amy Mitten/Carol-Anne Conway

The carnation has four large petals. The needlelace is worked over rows of vintage metal thread that is first couched into place with a contrasting thread. The thread is couching in one continuous length worked up and down along the length of the petal. The working thread is then couched along the outline of the petal, over the previously couched down lines of vintage metal thread. Then, with the same thread, you begin the first row of detached buttonhole stitches working over both the outline and the first row of vintage metal thread. Subsequent rows of button hole stitch are worked through the loop of the buttonhole stitch in the previous row and under the next row of vintage metal thread. And you keep working back and forth along the rows making detached button hole stitches until you have complete the entire petal - on all four petals.
© Amy Mitten/Carol-Anne Conway

The cornflower petals are worked in a similar manner but the metallic thread is first laid in a zigzag pattern across the petals and the detached buttonhole is worked back and forth across the petals rather than up and down. The cornflower petals are smaller than those of the carnation but there are more of them, twenty in total.
© Amy Mitten/Carol-Anne Conway

I will admit it, the detached buttonhole stitching was a bit monotonous but after a while I got into a rhythm and my tension and consistency improved greatly by the time I had finished all of the petals.

As with the Winter Keepsakes, the assembly is as much fun as the embroidery. The carnation is a thread winder keeper with a silk pouch contained within the gathered petals. The cornflower is a small tape measure with the end of the tape forming the stem.

Happy stitching