Saturday, 10 October 2020

Queen of Flowers - Finished

From the first time I saw an example of Fuzzy Effect it intrigued me and I was eager to stitch this phase. The technique did not intimidate me in the way some others have but I think it is deceptively difficult. The skill is not so much in executing the stitch as in selecting and blending the threads to give a harmonious effect.

On some of the leaves, I thought I might have been too subtle in my choices.
© JEC/Carol-Anne Conway

While on others, I wondered if the colour changes were too sudden and whether I could have blended the colours more.
© JEC/Carol-Anne Conway

I enjoyed experimenting with different aspects of this technique on the flowers. Working the bud in a single colour and using only the thickness of the thread to suggest the shape.
© JEC/Carol-Anne Conway

The smaller bloom on the left is stitched in every valley whereas the rest of the design is stitched in every other valley.
© JEC/Carol-Anne Conway

The larger bloom relies more on colour than thread thickness to create the shadows.
© JEC/Carol-Anne Conway

It is always important to step away from your work and view it at a ‘normal’ distance. With this piece it was vital. Those leaves, that I had thought might be too contrasty look completely different when viewing the whole picture.

I took especial care to ensure that I was working in the same valley as I moved from one element to the next. This may not be evident at a distance but it pleases me to know that I have that continuity throughout.
© JEC/Carol-Anne Conway

I really enjoyed working on this piece and I am pleased with the finished piece. I am even more pleased that I have now completed all nine phase pieces and can progress to my graduation phase.

Happy stitching

Friday, 25 September 2020

Queen of Flowers - Pollen

With the bud and last remaining leaves stitched, I had just a few finishing details to stitch.

© JEC/Carol-Anne Conway

The anther or pollen on the open flowers are worked in Japanese knots, I like to leave these to last so that my working thread does not catch on them as I stitch. First, I stitched a yellow weft foundation in the centre of the flower. Randomly spaced knots where worked on top.

© JEC/Carol-Anne Conway

On the smaller bloom on the right, I had originally worked the shadow area in pink and the centre of the flower in white. I decided to rework these areas based on what I had done on the full bloom and bud. The pink area was removed and redone in a thinner white thread. The white centre was removed and redone in yellow with a few yellow knots on top.

© JEC/Carol-Anne Conway

Happy Stitching

Thursday, 24 September 2020

Queen of Flowers - bud

Where colour had played a large part in the other elements of this design, I wanted to form the bud solely using different thickness of thread and couching methods. The bud on the original background fabric is a deep pink but, having already moved away from the pinks, I chose to do a pure white bud. I put in the foundation threads for the entire bud leaving one point open space between the petals.

© JEC/Carol-Anne Conway

My intention was to make the bud appear round by using thicker threads and diagonal couching on the fullest parts.

© JEC/Carol-Anne Conway

Again, I used colour and various thicknesses of thread on the surrounding leaves to give an increased depth of field to the bud.

© JEC/Carol-Anne Conway

Happy stitching

Friday, 28 August 2020

Queen of Flowers - large bloom

I don’t appear to have taken any photographs while stitching the branches or buds. I think that is indicative of how much I was enjoying the stitching.

© JEC/Carol-Anne Conway

Before stitching the large bloom on the right, I stitched the remaining leaves below it as they are in the foreground. Those are the leave that were the subject of my previous post. While I had a lot of fun stitching these leaves, some of them presented me with a minor problem. They are in what I call “no man’s land”, i.e., the very centre of the fabric; an area that I cannot reach comfortably from either side of the frame.

© JEC/Carol-Anne Conway

I was really looking forward to stitching the large bloom. The flowers and the bud show case this technique, I think. As always, the foreground petals are stitched first. The edges of these petals are shown coming forward and are in the light so they are stitched with the heaviest threads.

© JEC/Carol-Anne Conway

Other areas are stitched with slightly thinner threads to shape and contour the petals.

© JEC/Carol-Anne Conway

A different colour is used for the areas that are in shadow. In the original colour scheme, which is on pink fabric, the shadows are done in pink and fade into the background.

© JEC/Carol-Anne Conway

The pink on the on that black fabric did not look right to me and highlighted a nagging doubt about the flower on the left that I had already stitched. I have since seen another version of this design on black fabric where they have used pink and it works well but I think that they used a less sugary pink than mine.

The main reason that I felt the pink did not work was that it did not melt into the background. I considered using black that definitely would have faded into the background but I thought that the contrast with the white would have been too stark. I elected instead to use a deep blue.

© JEC/Carol-Anne Conway

Happy stitching

Friday, 7 August 2020

Queen of Flowers - leaves

I elected to do the flowers in white so all of the colour in this piece comes from the foliage and stems. While I am not very confident with colour, I had a very clear vision of what I hoped to achieve with the foliage. For this to work, I needed to visualize the light source, where the sun would fall on the leaves and where would be in shadow. For those parts that were clearly in shadow, I used the deepest bluey green for the foundation. Where I imagined the sun would fall on the leaf, I used the lightest yellowy green. And in between, I used a mid-green.

© JEC/Carol-Anne Conway

The fall of sunlight is further enhanced by a technique called 'striking effect' whereby a gold thread is placed above the silk foundation before the couching threads are applied.

© JEC/Carol-Anne Conway

The couching stitches can be the same colour as the foundation to enrich the colour or they can be in a different hue to start blending the foundation stitches.

© JEC/Carol-Anne Conway

Sometimes I used the highlight and lowlight colours to blend into the mid-tones to strengthen the shadows and highlights. Sometimes I used a mid-tone to tone down the shadows and highlights. This blending is most effective when using diagonal couching.

© JEC/Carol-Anne Conway

While the shading is the fun part, the leaves really come to life when the veins are added.

© JEC/Carol-Anne Conway

With this area completed, I was ready to move onto the part that excited me the most – the main flower.

Happy Stitching

Thursday, 14 May 2020

Queen of Flowers - back to it

I really like this piece and the technique and cannot wait to get back to it but it is going to have to wait while I concentrate on something I am finding much more challenging.

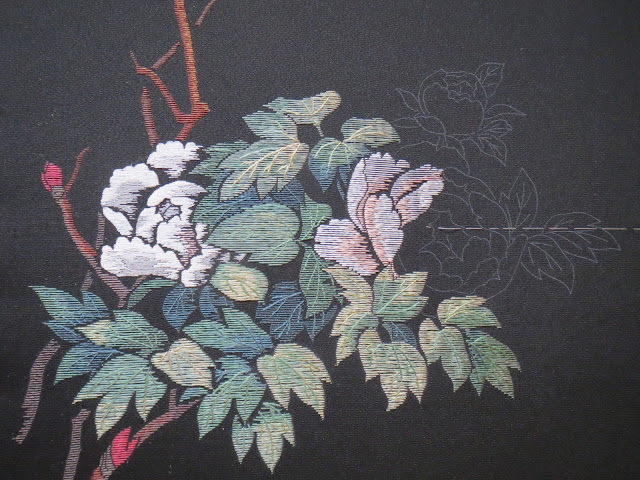
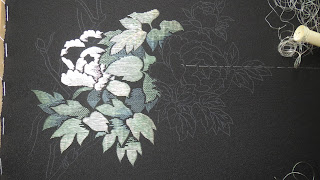
I wrote those words in November 2014. And this is how Queen of Flowers looked at the time.

© JEC/Carol-Anne Conway

I did not imagine that it would take me four and a half years to get back to it! But when I did, I was obviously enjoying myself because this is the next photograph I took!

© JEC/Carol-Anne Conway

Each Phase is designed to teach a specific technique but many of the phase pieces also include other techniques or there are many aspects to it as with goldwork, for example. The designs at Phase VIII are worked entirely in Fuzzy Effect (except for a few details) and there are just two aspects; vertically held valley lines and diagonally held valley lines. The technique relies on different thicknesses of thread and colour blending to build the picture.

Nuido, the Way of Embroidery, as taught by the Japanese Embroidery Center has three aspects: the acquisition of technical skills and knowledge (rationality), the development of artistic sensitivity and awareness (sensitivity), and understanding the spiritual aspects of shishu (spirituality), resulting in a state of peace, calm, and harmony. For me, the technical aspect of Fuzzy Effect was one of the easiest to learn; the sensitivity aspect was one of the most difficult.

The design comes with a suggested colour pallet but that is based on the dusky pink fabric used in the original. Having changed the background fabric, my colour pallet needed adjusting. I’m not very confident with colour selection and am happy to take guidance from my tutor. With my rudimentary understanding of colour theory, I know that bluey greens recede into the background and brighter, yellowy greens come forward. I combined this notion with the basic principle of the technique to use thinner threads, vertically held, in the background and thicker threads, diagonally held, in the foreground to create depth of field.

© JEC/Carol-Anne Conway

Happy Stitching

Sunday, 26 April 2020

The Gawthorpe Needlecase - Before, During, After

During the covid19 lockdown, the Oxford branch of the Embroiderer’s Guild is running a virtual exhibition called “Before, During, After”. This project was my before, during, and after project over a much more personal and poignant period of my life.

Before
It is my usual habit to have two embroidery projects in progress, even when I don’t have much time or enthusiasm for stitching. One is a ‘major’ project, usually Japanese embroidery or beading, that I work on during the daytime. The second is usually a smaller project and something that I can work on during the evenings while watching TV.

Last October, I was looking for something fun and creative but not overly taxing to do in the evenings. I had one or two kits in my stash that might fit the bill so I asked in an online community of embroidery friends for their thoughts. Based on their recommendation, I opted for a Jenny Adin-Christie kit called The Gawthorpe Needlecase.

Jenny’s kits are beautifully presented. They come in a sturdy box with a good quality image of the finished item on the lid. I found the box lid made a useful tray for my tools and the treads or materials that I was using for each stage. The kit contents (everything you need with the exception of needlework tools) are separated into smaller packages that are labeled and correspond with the instructions. When I first opened the box and saw the display of threads, fabrics, and other items, I could not wait to get started. One reason that I selected this kit over some of the other wonders available to me is that there is no preparation work required, my head was not up to that at the time, just frame up and start stitching.

The aforementioned instructions are excellent. The whole project is broken down into smaller, manageable sections labeled, in this case, A-K. Each section begins with a short description and is then broken down again into smaller steps. These steps begin with a list of requirements that details what you will need: which needles (all supplied) and which threads or other materials (usually packaged together and clearly labeled but occasionally taken from another pack, in which case the instructions tell you where they can be found). It then tells you very concisely, step by step, what to do. Every step is illustrated with photographs and/or diagrams. Throughout the instructions there are tips and tricks that, even for techniques I was already familiar with, I found useful.

I made a good start and really enjoyed stitching the background areas. I learnt a stitch that I had never encountered before and combined stitches I knew in a way that I had seen used but had not done myself. Although this kit was fulfilling my brief, I found that I did not have as much time for stitching as I had hoped and did not progress very far with it at first.

Although this is ‘Before’ it was also an ‘After’. My dad had recently died. It was sudden and unexpected. The only saving grace was that both he and mum were in a care home at the time; she was spared the horror of being the one who found him in the morning. None the less, it was a terrible shock to us all. Mum and dad were in respite care for the sake of mum’s health and, although dad had had a heart condition for more than 30 years, he was not thought to be in any immediate danger. While mum and dad had been determined to return home as soon as mum was well enough, mum had no desire to do so without dad by her side; she opted to remain in the care home. My mum, my brothers, and I were trying to adjust to a new rhythm of life … and to the fact that my mum was terminally ill.

Mum, we thought, had always been the healthy one. I knew that she had had rheumatic fever when she was a young woman. It was rarely spoken of. She’d had it; she was seriously ill with it; she’d survived it. I was vaguely aware that mum had a heart murmur. It was really spoken of; it didn’t affect her in any way. I did not know that the two were related and that it would, eventually affect her, very seriously. In about 50% of cases, rheumatic fever can cause damage to the heart valves. This usually occurs only after multiple attacks but may occasionally occur after a single attack. Mum was one of those rare cases. To begin with, the damage was minimal and undetected. Very, very gradually the damage became more severe and only manifested as a problem later in life. And because mum ignored what was happening to her believing she had a chest infection from which she would recover it remained undetected until the risks of any intervention outweighed any possible benefit.

During
Mum took dad’s death very badly, as you might expect. At first, I did not think she would survive the shock but after a few weeks, she seemed to rally. She made an effort to join in some of the pre-Christmas activities at the home, we took her to visit her brother and sisters, and she spent some time at my brother’s on Christmas day. She made a great effort, I think for our sake but, honestly, I’d don’t think she had the heart to go on without my dad!

By the end of January, I knew that she had very little time left. I spent as much time with her as possible. She slept much of the time but I tried to be there whenever she awoke. By night, I slept in a reclining chair by her bedside. By day, I left her only while the carers tended to her needs or when other family members were with her. As the care home is in the village where I live, I was able to nip home to shower and change during those times. When she was awake I held her hand and spoke to her, she did not say much in return but I could see that she was listening to everything I said. While she slept, I worked on The Gawthorpe Needlecase. Embroidery has always soothed my soul.

On the final day, I was quietly stitching when I became aware that something was different, the slightest change in the breathing pattern I had become so accustomed to. The doctor, whom the care home must had summoned, confirmed what I already suspected. I put aside my stitching and held her hand until my brothers arrived and together we stayed with her until she quietly slipped away.

After
Grief is an unpredictable thing. When my father died, I was devastated! I had not expected that. Our relationship had not always been easy; at times I had disliked him intensely. I don’t think that dad ever felt the same animosity towards me that I sometimes did for him. I think he always loved me, all of his children, but had great difficulty expressing it. And I think there were other factors that made him, at times, difficult to live with. He mellowed, I matured, I made a conscious effort to put my negative feelings aside. In later years, we had a close and loving relationship. I expected that when he died (there had been several times previously when we thought that he might) I would be extremely sad but I never imagined I would be so distraught.

In contrast, I had always been extremely close to mum. We were great friends and shared in so much together. I had always expected to be totally devastated when she died. I was, of course, profoundly sad and there were tears when we realised that she had gone. And there have been many more moments of sadness and tears but not the overwhelming grief that I expected. I think that maybe because watching my mum grieve for my dad and, I think, the person she once was, was far worse than letting her go. I truly believe that she is with dad, and Cecil and Gladys, her beloved parents, and is fit and healthy again, once more enjoying long walks with Mini, Sally, and Lady, our boxer dogs.

In the days that followed, there was so much to do that I neither had the time nor the energy for stitching. I had a Japanese embroidery class booked for the beginning of March (booked a year earlier). I thought that I might not go. In the end, I decided that a break and a change of pace might do me some good and it did. In fact, it did more than that, it rekindled my mojo and I have been stitching regularly ever since. I returned to, and finished, a piece of Japanese embroidery that had been on my frame for way too long and, in the evening, I have been working on The Gawthorpe Needlecase.

© Jenny Adin-Christie/Carol-Anne Conway

This has been a most enjoyable project! There are so many different aspects to it. Most things, I had some previous experience of but a few were new to me. As mentioned above, the whole project is broken down into small steps and many can be completed in one or two evenings. There were a few materials and techniques that were new to me. Jenny’s instructions are so good that I had no difficulty learning how to work them. I usually enjoy the embroidery far more than the finishing, sometimes I do not even bother with the finishing, but this project absolutely begs to be finished. Transforming the embroidery into the actual needlecase was every bit as enjoyable as the stitching and the finished article is gorgeous!

© Jenny Adin-Christie/Carol-Anne Conway

I am thrilled with my needlecase but it will always have a special place in my heart for being that Before, During, After project. Mum always wanted to know what I was working on and I always to them to show her when it was finished. I wish I could show her this one, too.

Happy Stitching

Friday, 24 April 2020

Sake Boxes - Finished

When I began Japanese embroidery, I had only one frame and only one piece in progress at any one time. And, initially, I worked only on Phase pieces. I began them in class in February or March and worked on them throughout the year, often working hard in January to complete them and free up the frame for the next piece.

While still working on Phase III, I had the opportunity to attend a special class, Embroidery Bridge Between East and West. Unable to complete Phase III before that class, I purchased my second embroidery frame. Over the years various ‘special’ classes have come up and, not wanting to miss the opportunity, I have had to add a few more frames to my collection.

However, I stuck to my mission to concentrate on each Phase piece in turn with the aim of completing one per year. Until, that is when I got to Phase VIII, Queen of Flowers. Although I began this piece on schedule at my Spring class, I had also started my Phase V beading, Pouchette, a few months earlier and was keen to progress with that. And then both my Japanese embroidery and Japanese Bead embroidery went on hold while I worked on a sampler for the online Goldwork Masterclass I was doing. I did get back to Queen of Flowers but had not finished it by the time my next class came around. For the first time, I began one phase piece before I had completed the previous phase.

© JEC/Carol-Anne Conway

That was in March 2014. In the years that followed, I did not spend as much time doing Japanese embroidery as previously. There were several contributing factors; a growing obsession with early English embroidery being one but long periods when my mojo went AWOL was the biggest factor. I continued to go to my Japanese embroidery courses, each time making a little more progress on Sake Boxes and hoping that would rekindle my mojo, only for my embroidery to languish again until the next class.

© JEC/Carol-Anne Conway

In 2017, I attended an advanced class with Arata-sensei. The piece we worked on had many challenging pieces and the class was excellent, I finally felt in control of some techniques that had struggled with. This time my mojo really was ignited and in the following months, I stitched regularly making slow but steady progress with the design.

© JEC/Carol-Anne Conway

A year later, I went to Japan with a group of friends and we took a 5-day class with Kusano-sensei. Again, I learnt a great deal and certain things seemed to click into place. I felt I had reached a new height in my stitching.

© JEC/Carol-Anne Conway

Following that trip, I was really fired up to stitch. I reluctantly put away the piece I had begun in 2017 and the piece begun in Japan and turned my attention to Sake Boxes. Once I had completed the Wisteria vine on the ladle, the rest was plain sailing and I thoroughly enjoyed stitched what remained.

© JEC/Carol-Anne Conway

Finishing Sake Boxes was quite a victorious achievement for me but it was not quite the triumphant moment that it should have been. In order to move on to Phase X, phases I-IX must be completed … and Phase VIII was hibernating in a cupboard waiting to be finished.

That said, I am extremely proud of myself for finishing Sake Boxes. Not only because I am proud that I stitched such a large and complex piece but, more so, because I overcame my personal struggle with this piece.

Happy stitching

Sunday, 15 March 2020

Sake Boxes - Gold Leaves

There is not nearly as much goldwork on the upper part of Sake Boxes as there is on the bottom portion but there was on challenge remaining – a few goldwork leaves.

© JEC/Carol-Anne Conway

Like the gold centres of the round petal chrysanthemum’s they are stitched round and round but, unlike most of the gold centres, They are highly irregular in shape!

© JEC/Carol-Anne Conway

I began by following the outline of the leaf. In some cases, the leaf is partly obscured by something else, as is with this one. For the first few rows I stopped where the two met and restarted a fresh row.

© JEC/Carol-Anne Conway

I continued in this way until section of the leaf becomes closed and then proceed to couch round and round until that area is completely filled.

© JEC/Carol-Anne Conway

The remain areas where then completed in the same way.

© JEC/Carol-Anne Conway

Happy Stitching.

Friday, 13 March 2020

Sake Boxes - Buds

Sometimes, reaching a certain point in a design is so monumental that can feel like you have completed the entire piece. Sometimes that feeling of having finished can rob you of all enthusiasm for going on with the design. When I completed the gold work on the section of Sake Boxes where I had already completed the silk work, I certainly felt that I had reached a milestone. Fortunately, I felt energized and more than ready to push on with the rest.

What remained was a few pointed petal chrysanthemums (some in full bloom, like those I had already stitched, and some partially opened or in bud) and a scattering of leaves. I was particularly looking forward to stitching the buds and partially opened flowers.

© JEC/Carol-Anne Conway

I always enjoy stitching padded elements. It literally adds another dimension to the embroidery. The unopened buds are highly padded and look deliciously plump! You can see from the shadow on how rounded this one is.

© JEC/Carol-Anne Conway

I did not add as many layers of padding to these buds as I did not want them to be more prominent than the partially opened flower on the same stem.

© JEC/Carol-Anne Conway

As with the fully opened blossoms, some of the petals on the partially opened blooms are padded.

© JEC/Carol-Anne Conway

I enjoyed stitching these and think that they really add to the overall appeal of the design.

Happy Stitching.

Monday, 3 February 2020

I Have no Words


There are no words to express how much I love this lady!

There are no words to describe how wonderful she was!


Margaret Elizabeth Conway, née Oakley.
28 April 1937 - 3 February 2020.
Mum and Dad - together forever!

Wednesday, 22 January 2020

Sake Boxes - More Goldwork

My plan was to complete the goldwork on the ladle and then to do stitch some, or all, of the flowers and leaves in flat silk leaving the remaining goldwork to the end. I imagined that I would have had my fill of goldwork and would need a break from it.

In fact, the discipline of daily stitching rekindled my enthusiasm for goldwork and, rather than champing at the bit to do any but goldwork, I was moved straight on to complete some of the other goldwork on the lower part of the design.

I started with the ends of the noshi papers which were stitched in exactly the same way as the rest of the papers but using two strands of #1 gold, half hitched in the needle. The greatest challenge here is to keep the threads parallel and the tension even.

© JEC/Carol-Anne Conway

The handle of the ladle was done in a technique that I have done several times now, couching round and round. On the left, were the handle attaches to the ladle, I used black couching thread.

© JEC/Carol-Anne Conway

On the right-hand side, I used the traditional red/orange couching thread. Both sections of the handle are worked from the outside and the challenge is to have everything meet up precisely in the centre.

© JEC/Carol-Anne Conway

The section on the right-hand side is particularly challenging because the handle extends to the very edge of the design. I needed to fashion a ‘shelf’ to support the koma beyond the edge of the frame.

© JEC/Carol-Anne Conway

Happy Stitching

Wednesday, 1 January 2020

Sake Boxes - Wisteria, Crossing the Line

When removing the stitch transfer after completing the gold work on the sake box, I realised that I would have difficulty do this on the ladle because I was using the same gold thread for the couching that I had used for the stitch transfer. I decided to remove the stitch transfer just prior to stitching each leaf or vine.

© JEC/Carol-Anne Conway

Because I had done the stitch transfer more than two years previous, when I removed the stitches, they left a very slight indentation on the foundation. Enough of an impression for me to make out the outline.

© JEC/Carol-Anne Conway

While this slowed down the process, it was a much cleaner and easier way to remove the stitch transfer.

© JEC/Carol-Anne Conway

I think one of the reasons I could not find any motivation to stitch the wisteria vine is that it is very fiddly – each leaf is tiny – and I found it difficult to find any rhythm or flow.

© JEC/Carol-Anne Conway

I am really happy that I persisted – the gold on that blue does look rather splendid!

© JEC/Carol-Anne Conway

Happy stitching