Wednesday, 8 May 2019

Sake Boxes - Legs

Like the fabric, the instructions that came with my design were quite old. While the fundamental techniques remain the same, some elements of the instructions do occasionally change. My instructions said that foundation for the sake box should not cover the legs. When I visited my tutor to discuss my colour scheme, we reviewed alternative instructions for Sake Boxes and noted that some suggested stitching the whole foundation in one piece, covering the legs. This is the method I used.

The first step in stitching the legs is a silk diagonal layer of flat silk. My main concern was that the black foundation would show through the yellow silk, so I took care not to allow any gapping between the stitches.

© JEC/Carol-Anne Conway

As with the instructions, the designs themselves are sometimes altered. On my design sheet, the gold features on the legs were quite simple. I had seen more decorative features on other designs. I copied these features from another design sheet. Stitching these elaborate shapes, I understood why some might have chosen to simplify them.

© JEC/Carol-Anne Conway

The whole of the box and lid are outlined with one and a half pairs of #4 gold (here, I have only done one pair; I realised that I had missed the additional half pair and added it later) and short stitch hold was used to secure any visible foundation stitches longer than 1cm.

© JEC/Carol-Anne Conway

Happy Stitching

Wednesday, 3 April 2019

Sake Boxes – Reverse Stitch Transfer

There are two vessels on Sake Boxes with ladle. The round box with Cherry Blossoms is the actual sake box. There are a lot of different elements and techniques on this vessel. As long as you stick to the rule of stitching foreground elements first, you can chop and change between cords, tassels, cherry blossoms and curlicues.

© JEC/Carol-Anne Conway

Each time I stitched, I could do whatever I felt in the mood to do and things moved along at a reasonable pace. I really enjoyed stitching this vessel.

The stitch transfer was invaluable in providing a guide line for all of the different elements but now the superimposed work was complete, some of the stitch transfer was still visible.

© JEC/Carol-Anne Conway

From a ‘normal’ viewing distance, it was not as evident as it was up close but it still ‘blurred’ the edges of the cherry blossoms and curlicues.

© JEC/Carol-Anne Conway

Putting the stitch transfer in is time consuming and laborious; removing the stitch transfer when the superimposed work is complete is very time consuming and tedious. It has to be done slowly and carefully so as not to dislodge any stitching.

© JEC/Carol-Anne Conway

It helped greatly to have done the stitch transfer in a different colour from the couching threads used for the gold work. Something I wish I had known before I did the stitch transfer on the ladle.

© JEC/Carol-Anne Conway

Happy stitching

Friday, 22 March 2019

Sake Boxes - Tassels, part 2

On the second tassel, I opted to use a transfer method that I am more familiar with, stitched transfer.

© JEC/Carol-Anne Conway

This helped me position the strand lines more precisely.

© JEC/Carol-Anne Conway

While still not perfect, I was much happier with these staggered diagonals than on the first tassel.

© JEC/Carol-Anne Conway

I was already dissatisfied with the first tassel, seeing them together I decided that the strand lines had to be redone.

© JEC/Carol-Anne Conway

The final detail on the tassels was the wrap were the tassel joins the cord.

© JEC/Carol-Anne Conway

Happy Stitching

Sunday, 10 March 2019

Sake Boxes - Tassels, part 1

I do like tassels! Be they a simple bundle of threads to the most extravagant passementerie, I find them joyful. I like making tassels – although I generally stick to the simplest techniques – and I like stitching tassels. Happily, they feature quite frequently in Japanese embroidery.

The first, and simplest, that I stitched was on Suehiro. There are two tassels; each has a flat silk horizontal foundation that is held with a tightly twisted thread that is couched into place. Simple but effective.

© JEC/Carol-Anne Conway

The single tassel on Himotaba is the one I have found most challenging. Each strand of the tassel is stitched as a line of staggered diagonals. When I had finished stitching, the tassel looked too light and flimsy for the piece. I overcame this by stitching an additional strand between the existing ones. This resulted in a fuller looking tassel but I now know that the problem was my poorly executed staggered diagonals. When I stitched Loving Couple, I encountered the same problem but this time, rather than fill the spaces with more feathers, I restitched them. It took three attempts before I was happy with them.

© JEC/Carol-Anne Conway

The next tassels I stitched were those on my own design, Riches. While they look more flamboyant than those on Suehiro, the method of stitching is essentially the same, a horizontal foundation held with a couched thread. Their shape and padding give them their voluptuous looks and the katayori couched around the skirts makes them appear ruffled.

© Carol-Anne Conway

The tassels on the sake box also use, more or less, the same methods as Suehiro and Riches. The horizontal foundation layer is stitched in flat silk over a layer of self-padding. This time the foundation is held with lines of staggered diagonals. Had this been a couched thread, I would probably have positioned the lines by eye. For a line of staggered diagonals, I knew I would need a guide line of some sort. I opted to use the shell powder technique.

© JEC/Carol-Anne Conway

One of the reasons I do not like this method is that (when done by me) the lines are thick and not very precisely positioned but, in this instance, they were good enough to serve as a guide.

© JEC/Carol-Anne Conway

© JEC/Carol-Anne Conway

© JEC/Carol-Anne Conway

I’m still struggling with staggered diagonals and was not 100% happy with these. I decided to work the second tassel and then consider whether or not to redo these.

© JEC/Carol-Anne Conway

Happy Stitching

Tuesday, 29 January 2019

Sake Boxes - Cherry Blossoms

Cherry Blossom was among the first motifs that I stitched when I began learning Japanese embroidery nearly fourteen years ago. It is possibly the motif that I have stitched more than any other, in more guised than any other.

From the very first, it embodies the fundamental rules that apply to the order of stitching in Japanese embroidery; with few exceptions foreground elements are stitched first.

© JEC/Carol-Anne Conway

On each Cherry Blossom there is one petal that is in the foreground of all others. This is the head or the face and this petal is stitched first. The petals either side of the head are the hands and they are stitched next, usually with a one point open space between themselves and the head. The remaining two petals are the feet. One foot is always atop of the other, this is stitched next and the underlying foot stitched last.

© JEC/Carol-Anne Conway

Even the teeny tiny blossoms on this design by Midori follow those basic rules.

© Midori Matsushima/Carol-Anne Conway

I enjoyed experimenting with different techniques on the oversized cherry blossoms on Kusano-san’s Flower Circle; it allowed me to try out some techniques I had seen in books and at an exhibition in Japan.

© Shizuka Kusano/Carol-Anne Conway

The Cherry Blossoms on the black sake box are done in gold work – one of my favourite techniques. As with the very first cherry flower I stitched, the head is worked first but, before that, the entire flower is outlined with a pair of couched threads.

© JEC/Carol-Anne Conway

Then, each individual petal is completed in the prescribed order; head, hands, and feet.

© JEC/Carol-Anne Conway

The blossoms are about the size of a ten pence piece so each petal is on the small side and rather fiddly but not too time consuming to stitch.

© JEC/Carol-Anne Conway

Happy Stitching

Sunday, 13 January 2019

Sake Boxes - String

Many Japanese designs include cords and/or strings. Himotaba, the design I stitched at Phase V, has five different cord techniques and some of the other pieces I have stitched have cords on them but none of them have included strings! A popular Phase I design, Bouquet from the Heart of Japan, has two heavily padded, candy striped strings. I have always thought they are a considerable challenge for a Phase I student. Konbuin-no-Fukusa has a monotone, padded string tied around the sake box; I found that challenge enough!

© JEC/Carol-Anne Conway

Each section of string is padded with twisted padding cotton which is couched with closely spaced stitches. The padding is then covered with short diagonal stitches (arg!) in flat silk. On this short, gently curved section of string, I did not find it too difficult to maintain the angle of the stitches.

© JEC/Carol-Anne Conway

On this longer section, which turns nearly 360°, I found it far more difficult. At my first attempt, I turned too much and lost the angle completely.

© JEC/Carol-Anne Conway

My second attempt was much better; at least the angle of the stitches is better, the edges could be a little more controlled!

© JEC/Carol-Anne Conway

Happy Stitching!

Sunday, 6 January 2019

Sake Boxes - Stitch Transfer

It is quite staggering to realise how long Sake Boxes has been in my life! I won the fabric and design in a JEC silent auction in 2011 but was not ready to begin Phase IX at that time so it went into storage for a couple of years.

I started stitching in 2014 at my spring class with Margaret Lewis. I had visited sensei a few weeks earlier to choose my silks and discuss preparation. As well as any stitched outlines, I hoped to have all the foundations stitched prior to class but did not get that far so the first day was spent twisting threads and stitching the foundation of the two vessels. At first these two blocks of solid colour look very stark but I knew that I needed to ignore that and just remember that they will look very different in the end.

When I last wrote about Sake Boxes, in January 2015, the foundations had been pushed to the back of my mind while I focused on the many chrysanthemums and I wrote “Until I get to the gold work on the vessels there will be nothing new to say about this piece, except for an occasional progress report.” While progress has been slow and intermittent, I have failed completely in filing progress reports!

© JEC/Carol-Anne Conway

By the time I attended class at Symondsbury Manor House in March 2015, I had made reasonable progress with the round and pointed petal chrysanthemums. Whenever possible, I like to spend class time working on something new so that I can obtain instruction and iron out any difficulties whilst my tutors are on hand. During this class I wanted to begin the superimposed work on the two vessels. As always, there is preparation to be done before you can start on the fun bits! Ahead of the class I traced the design for the sake box and the ladle on to tissue paper and began the laborious process of stitch transfer onto my foundations.

© JEC/Carol-Anne Conway

I had been advised to use a different colour couching thread for each of the various superimposed elements. This proved to be good advice even though my colour choices did not always work to my advantage.
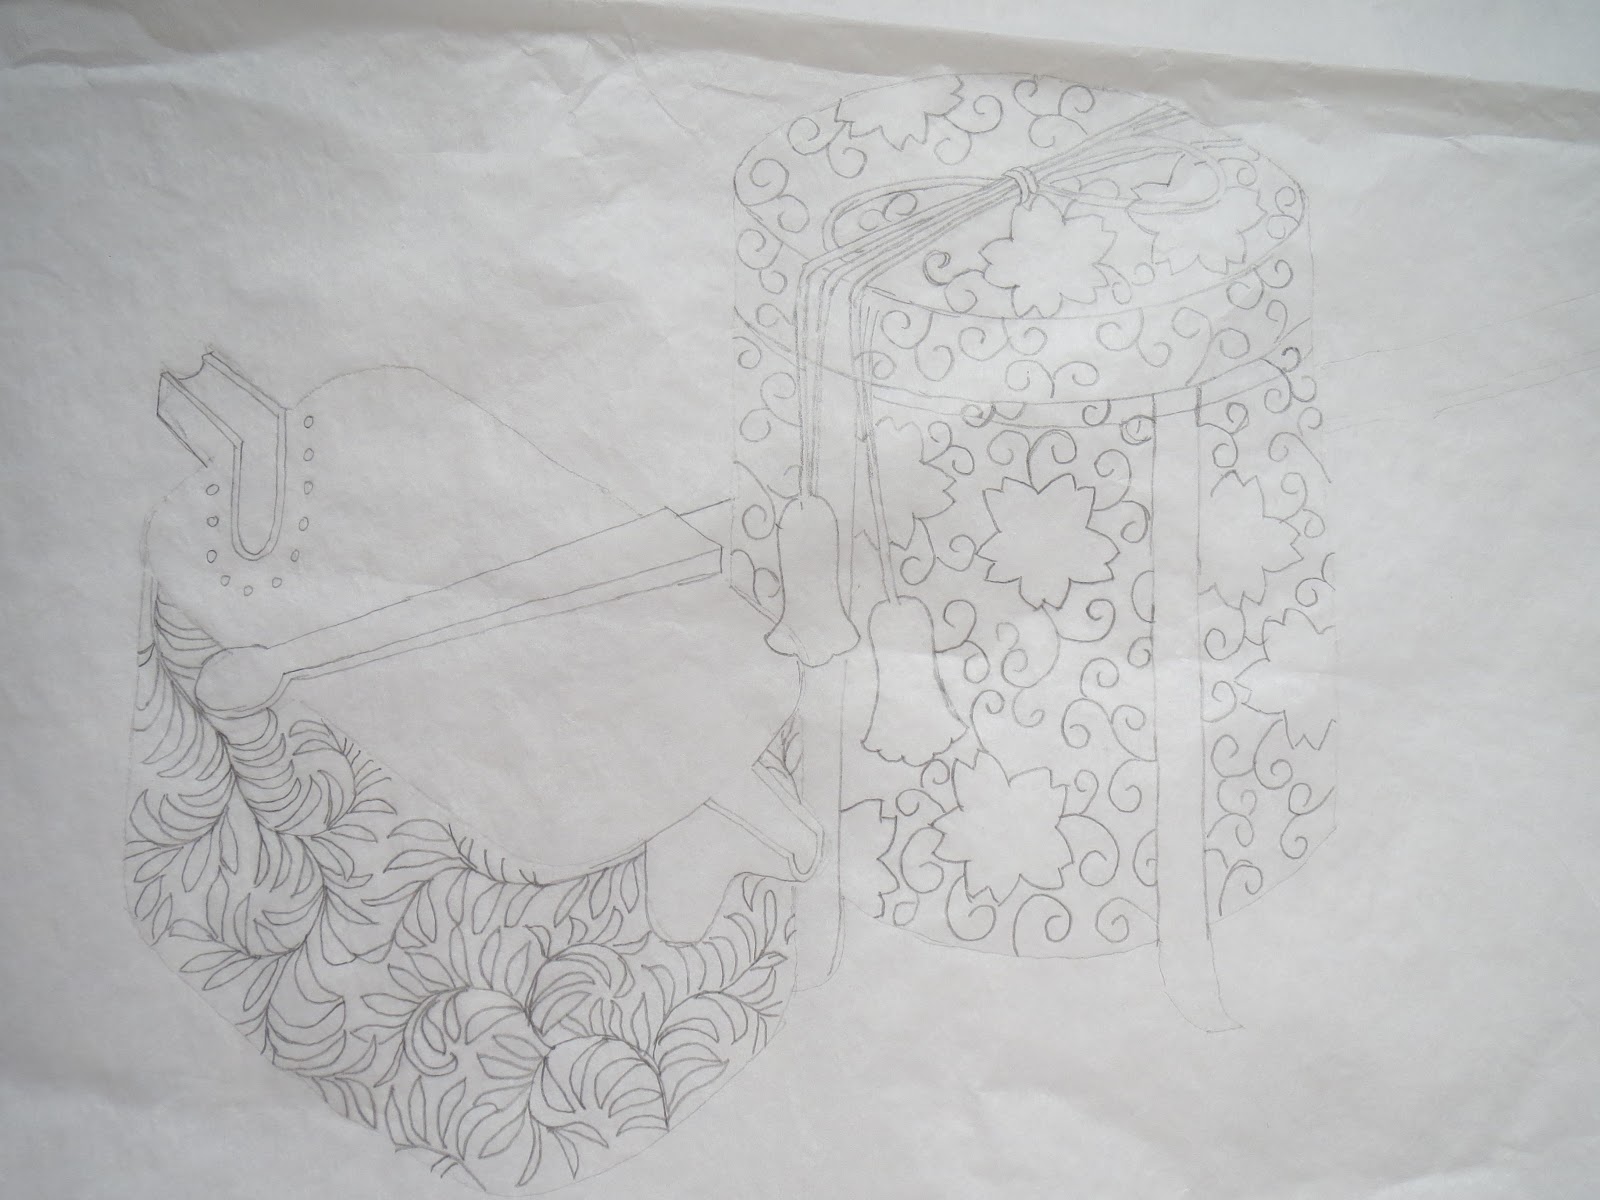
© JEC/Carol-Anne Conway

Once the entire design has been stitched through the tracing paper comes the even more laborious process of removing the tissue paper. It must be done with care so not to disturb the stitch transfer or the foundation stitches.

© JEC/Carol-Anne Conway

With the tissue paper removed, the two vessels were already transformed and began to get an impression of how they would look with the superimposed work complete.

© JEC/Carol-Anne Conway

Happy Stitching