Tuesday, 29 June 2010

Riches

This year the Oxford Branch of the Embroiderers' Guild hosted the South East West Regional Show. Because the date coincided with my Sister-in-law's 25th Anniversary, I was not able to attend the show but I determined to enter something in the competition. The theme for the competition was Rags or Riches and almost from the outset I had an idea of what I intended to do. I had been enjoying stitching 'Loving Couple' so much that I was reluctant to put it aside but at the beginning of May I realised that I would have to make a start on my entry if it was not going to end the same way as 'Girl with a Pearl Earring' (which I still intent to finish one day).

I started on 9 May, 7 weeks before the show. Doing a little each morning and evening, by the following weekend I had completed the stitch transfer and was ready to start work in earnest.


I selected my threads; 4 shades of silk (I only used 3 in the end) and #1 real gold.


I began with the real gold section of the cord. I'm glad that I did as this proved to be the slowest part of the whole design. Then something disastrous happened; good weather. For the last 2 years we have had a couple of nice weeks in spring, followed by a very disappointing summer. When the sun came out this spring, we decided to make the most of it just in case this summer went the same way. 4 weeks later, I had very little done and my schedule was looking much less comfortable.


At the beginning of June, J went away for a week. I spent every spare minute stitching and one week before the show I had finished the cords were finished but I had to deliver my finished entry to a friend before we left for Amsterdam mid week. That meant I had only 4 days to complete the stitching, do the finishing and mount it.


I stitched from dawn to dusk all weekend and, unbelievable managed to finish it in time.


When I came to mount it on Tuesday evening, I realised that there was not enough fabric to cover the artist frame I had intended to use. I had to come up with a back up plan, which I was not satisfied with but it was all that I could do in the time.

Happy Stitching

Tuesday, 22 June 2010

The Stomach, Take Two

So I stood my frame on the sideboard for 5 days and 'lived' with it, but really I know from the beginning that I was going to redo the stomach.

© JEC/Carol-Anne Conway

I remember a few years ago, at the Bournemouth class, a fellow student was stitching the Pansies for Phase VII. Having stitched what I thought was an incredibly beautiful petal, she proceeded to reverse stitch it.

© JEC/Carol-Anne Conway

I asked why she was removing it and she replied, "I think I can do it better".

© JEC/Carol-Anne Conway

Sometimes you know that you have done the best that you are able to do at this point; sometimes you know that you may be able to do a little better.

© JEC/Carol-Anne Conway

On this occasion, I thought that I might be able to do a bit better.

Happy Stitching.

Thursday, 17 June 2010

The Stomach

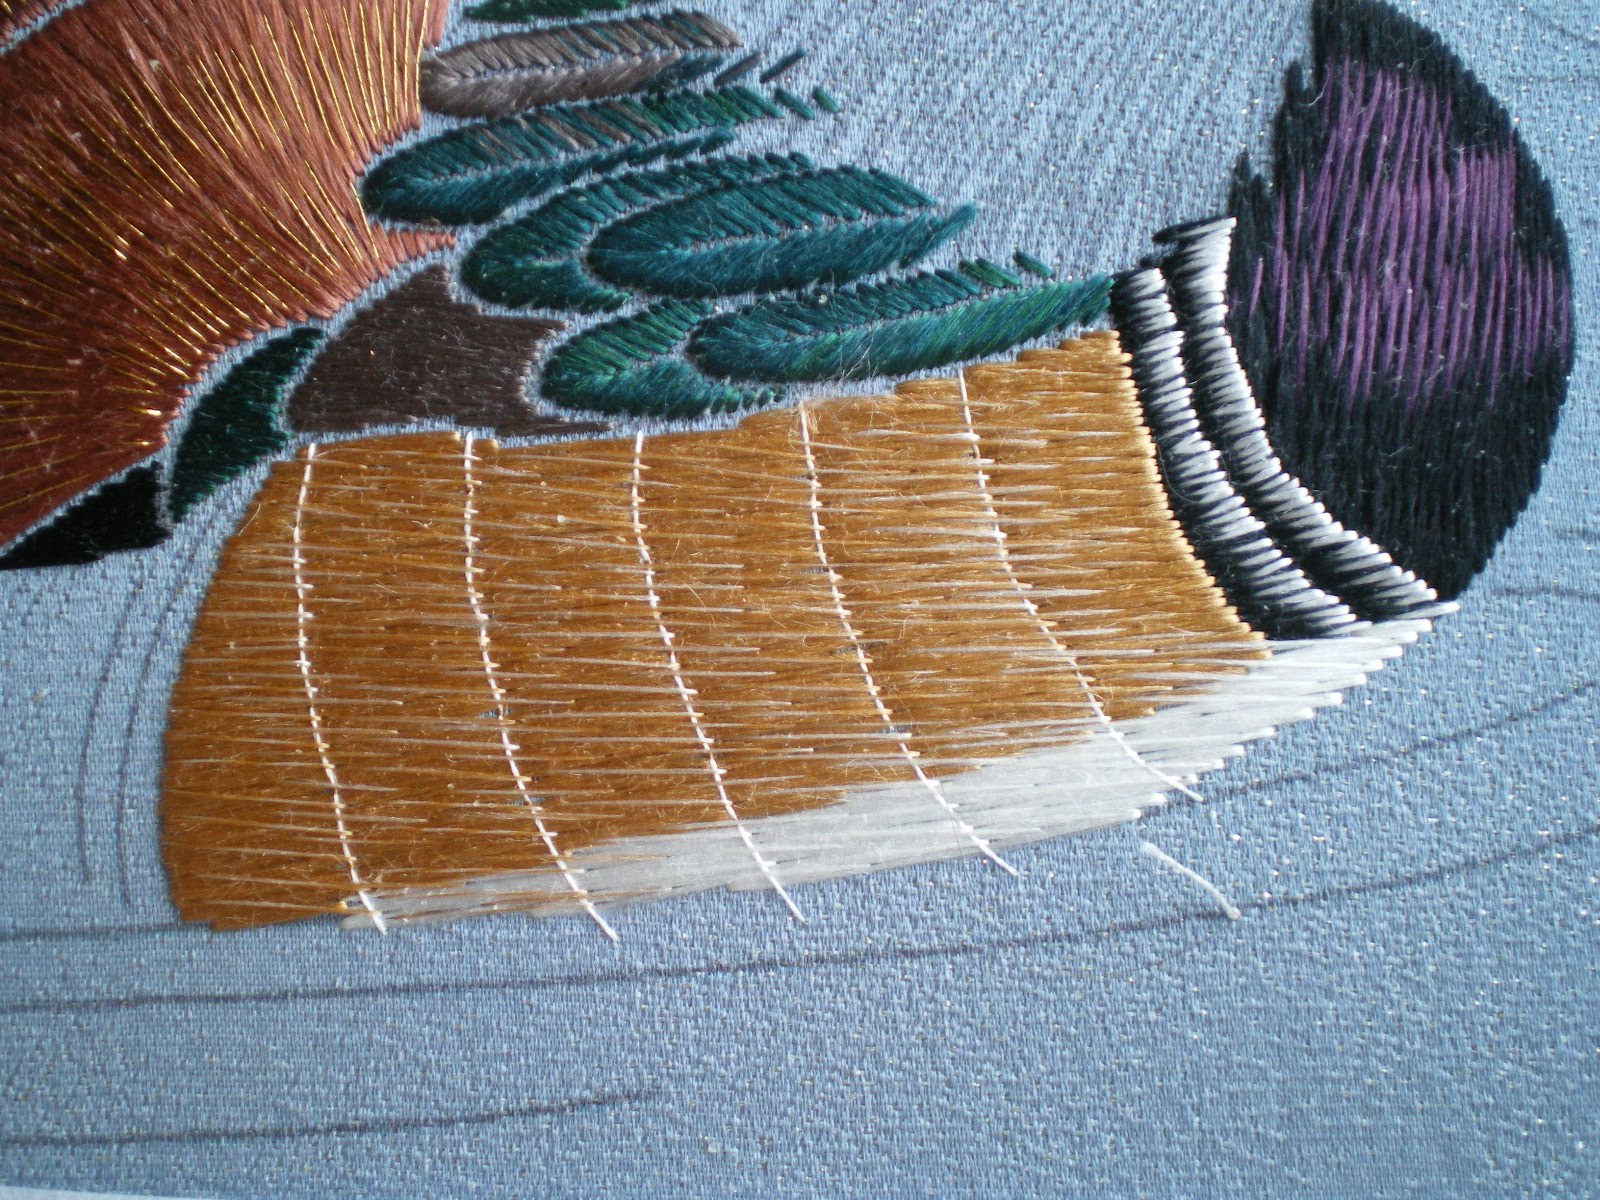
I had an hour free before work one morning and I didn’t want to waste a minute of it. I took a quick look at my box chart to find the colour and got on with laying the foundation for the stomach. I took a lot of care to ensure that my stitches were parallel and even and was very pleased with how it was progressing. When I had completed about 2 thirds, I began to think that Mr Duck did not look very comfortable on the water. I really wanted to press on but thought that I would check the box chart first. Horizontal foundation! I’d been stitching a weft foundation. In this case there is not much difference between the horizontal and the weft so I was tempted to leave it but after a few minutes procrastination, I accepted that I had to do some reverse stitching. Out it came. Out of time, it was a few days before I could restitch the foundation but when I did Mr Duck looked more at home.

© JEC/Carol-Anne Conway

The short stitch holding on his stomach follows a curve so the temporary holding stitches are curved.

© JEC/Carol-Anne Conway

This is the largest area of short stitch holding on the design and I really enjoyed doing it. The thread is a 1->2 katahineri of 345 (the same shade as the foundation) and white. The katahineri gives an irregular twist so the effect is slightly random.

© JEC/Carol-Anne Conway

When I removed the temporary holding stitches there were very pronounced lines marking the rows of short stitch holding. It is these obvious lines that some people dislike about SSH, I have eveen heard SSH as a good foundation ruined! On Mr Duck the curved lines are intended to make him look nice and plump.

© JEC/Carol-Anne Conway

I don’t think that my lines are sufficiently curved. I think that I may redo his stomach but I’m going to stand my frame where I can see it for a couple of days and ponder on it.

© JEC/Carol-Anne Conway

Happy stitching

Wednesday, 2 June 2010

The New Stripe

Mr Duck is a rather handsome bird; he clearly takes a lot of pride in his appearance. I was becoming more dissatisfied with the irregular row of white stitches on the side breast feathers as other elements were completed.

© JEC/Carol-Anne Conway

I thought that I might not be able to reverse stitch the white over stitching without disturbing the black foundation, in which case I would have to redo the entire side breast feathers. At this stage that would not be too much work but the foundation of the next area to be stitched overlaps the side breast feathers. I decided to redo the offending row before moving onto the next element. With care and patience, and working mainly from the back, I was able to remove it without damaging the foundation after all.

© JEC/Carol-Anne Conway

There, I think the new stripe far is more suitable for this proud fellow.

© JEC/Carol-Anne Conway

Happy Stitching

Sunday, 30 May 2010

Under Shoulder and Under Tail Feathers

Normally foreground elements are stitched before those behind them. The under shoulder feathers are in front of the fan shaped feathers and should have been stitched first. As I had covered the techniques used on the under shoulder feathers it was decided to skip these so that I had sufficient time to cover the techniques I had not done before. I stitched a row of Japanese running stitch along the outer edge to help me leave a one point open space between the elements.

The under shoulder feathers are worked in a weft layer with short stitch holding in the same colour.

© JEC/Carol-Anne Conway

The under tail feathers are worked in two parts. First the upper section is stitched in a vertical layer, leaving a one point open space between the individual feathers. Then the lower section is stitched in a weft layer, again with a one point open space to separate the feathers.

© JEC/Carol-Anne Conway

One point open space is one of the techniques I have found most challenging but I think that I am beginning to get to grips with it. It is immensely satisfying to feel that you are making progress.

Happy Stitching

Tuesday, 11 May 2010

Fan Shaped Feathers

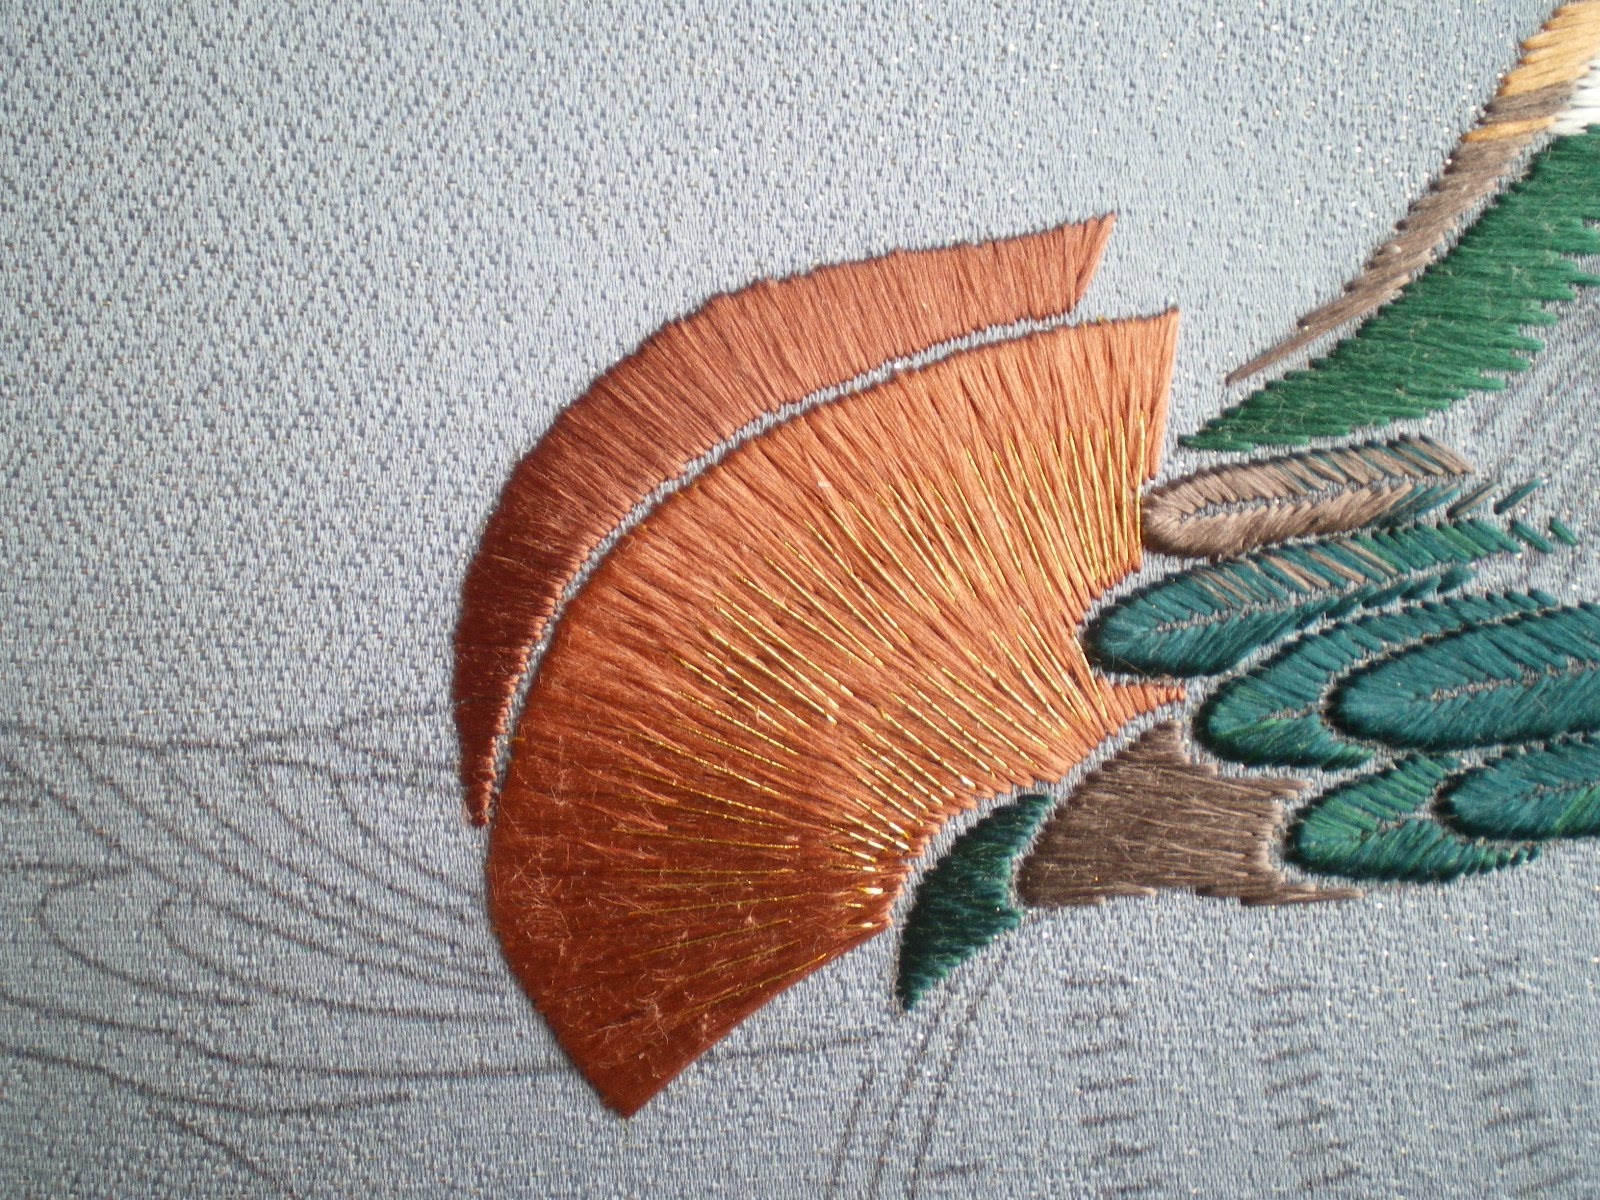
The fan shaped feathers are stitched in vertical layer. On every vertical layer I have stitched before the stitches are parrallel to each other; in this case they radiate around the shape. The angle of the stitches changes gradually and filler stitches are inserted to give a smooth, continuous foundation. The curved edge of the fan is outlined with #4 gold to slightly raise the edge and give a sharp outline.

© JEC/Carol-Anne Conway

As on the breast, the temporary holding stitches are curved to serve as a guide for the short stitch holding.

© JEC/Carol-Anne Conway

The rows of holding stitches alternate between 1 into 2 soft twist in the same colour as the foundation, and #1 gold. The stitches match the angle of the foundation stitches and the curve of the temporary holding stitches.

© JEC/Carol-Anne Conway

The background fan is one shade deeper that the foreground fan. The short stitch holding is worked in the same colour.

© JEC/Carol-Anne Conway

When a foundation radiates in this way, the light is reflected in different directions and gives the impression that the element has been stitched in several different shades of the same colour when, in fact, it is stitched in a single shade.

© JEC/Carol-Anne Conway

Happy Stitching

Thursday, 6 May 2010

Preening

The shoulder feathers are everything that I find most challenging in Japanese Embroidery.

To begin with they are stitched in a technique called separated layer. You stitch up one side of the motif, around the top and down the other side, gradually fanning the stitches to accommodate the curve. Then there is the one-point open space! A one-point open space should be exactly that – a space the width of the point of a needle between each element. In my case they range between non-existent and gapping chasms; this particular technique is the one that I am finding it most difficult to grasp. Not only is there a OPOS between feathers but also one down the centre of each one. And finally there is the size of the feathers. They are tiny and the smaller the motif the greater difficulty I have placing my stitches accurately.

And yet, I was really looking forward to this part of the design. Every time I have seen it stitched, I have been enthralled with these little delights. The outer edges of the feathers are slightly padded to lift them of the background fabric and the flat silk is blended to give an irridescence to the feathers.

The padding is tightly twisted cotton thread couched just inside the outline. The ends are tapered so that there is no sudden change in levels.

© JEC/Carol-Anne Conway

I took a lot of care stitching the separated layer, concentrating on the angle of each stitch, maintaining an even OPOS down the middle, and ensuring a smooth outline to the shape. When I finished the first feather, I was so delighted with it, I wanted to crow like a cockerel!

© JEC/Carol-Anne Conway

I only stitched the one feather during the course as there was much more I needed to learn before the end of the week. The remaining feathers were stitched after I returned home but with the same care and attention.

© JEC/Carol-Anne Conway

I am really pleased with them. Not just because of how they look but, and more importantly, because I didn’t think that I would be able to do these at all well.

© JEC/Carol-Anne Conway

Seeing how they turned out, I feel that I am making some progress and that is very satisfying.

Happy Stitching