Saturday, 26 February 2022

15 Geometrical effects (waritsuke-nui)

There is, in the world of embroidery, little to rival the glossy shine of a flat silk foundation. While stitching the pines of Hanayama, I was too focused on my errors to see any beauty in my foundations. I started stitching Phase II, Suehiro, at home in advance of the class so was able to take my time with the foundations and was more satisfied both with the actual stitching and the results.

These foundations are the first step for the geometrical effects that adorn two sections of the fan. I recall that I was particularly pleased with the flat white silk foundation on one of the sections and was loathe to “spoil” it with additional stitching. Fortunately, I really enjoyed creating the geometrical patterns and was pleased with the finished sections. Geometrical effects are not appropriate for every design but they are a aspect of Japanese embroidery that I especially enjoy.

Gt Tie-dye effect (hitta-gake)

Although I tend to think of hitta-gake as one of the novel effects, it is in fact a geometrical effect that falls under the category of Linear Effects. Hitta-gake is commonly referred to as "tie-dye effect" which, for me, conjures up images of the psychedelic t-shirts of the 1960s and 70s. Hitta-gake is nothing like that - it mimics the look of kanoko shibori which in turn mimics the camouflage spots of a fawn. It is a form of shiborizomi, a term that covers all of the manipulated resist dying techniques. I know very little about shibori or dying in general but I like to understand all aspects of my embroidery so often do some background reading about related subjects. I found John Marshall’s article on shiborizomi very informative on this subject.

The foundation represents the undyed areas of the fabric so is often stitched with flat white silk. Here I used two strands and was careful to space the stitches so that they covered the fabric without cramming them together.
© JEC/Carol-Anne Conway

The foundation is covered with a lattice of twisted thread. This lattice is very slightly larger than the lattice holding on the cherry blossoms and the thread is a tight twist.
© JEC/Carol-Anne Conway

Using the same thread, three straight stitches are placed over each intersection in the direction of the foundation.
© JEC/Carol-Anne Conway

Two additions straight stitches are placed in the centre of each "square", also in the direction of the foundation. Unsupported straight stitches in the same direction as the foundation would simply sink into the foundation stitches. Those across the intersection are supported by the thread forming the lattice; the two in the centre of each square are supported by a "sleeper" stitch. This is simply a short stitch perpendicular to the foundation that is not visible when the two stitches are placed on top of it.
© JEC/Carol-Anne Conway

When finished, the motif may be outlined to hide the stitching holes.
© JEC/Carol-Anne Conway

Tie-dye effect: in relief (honbitta-gake)

To show the tie-dye effect in sharper relief, the open spaces around the edge of the motif may be filled using the same thread.
© JEC/Carol-Anne Conway

I did not understand this concept until I saw pictures of kimono that have areas of kanoko and areas of solid colour. Only the complete spots remain with the solid colour filling any remaining space.
Happy Stitching

Friday, 18 February 2022

A Very Long Tail

Generally, I have two WIPs (Work in Progress) on the go at a time. I have one on my stand in the sewing room. This is usually a larger piece that will take several months, if not years, to reach completion. Such a piece was most likely started in a class. Following the class it may have gone into hibernation either immediately or when I next attended a class and started something else. I mostly work on this piece at the weekend or on days off. During the summer months, I may work on it for a while before or after work.

During the evenings I like to have what I refer to as a sofa project. These tend to be smaller projects, both in size and the time I expect them to take, and something I can manage while watching television at the same time. Once started, I usually stick with a sofa project until it is completed but there have been a few that I did not for one reason or another. Recently, I have been working on the fourth in the series of Casket Keepsakes (and loving it). It is nearly complete but I need to make some finger loop braids before I can finally finish it. Each braid takes me over an hour to make and, once started, I have to keep going until it is finished and concentrate fully. I have not been able to find the time to make them yet. So, I needed something else to do in the evenings but was reluctant to start a new project until the Keepsakes are done.

Looking for a "little" something to do, I came across one of the sofa projects that I had stalled. I started the Bird Thimble ten years ago and it had taken me about two months to make its body. I was very pleased with it but that was only the first of four online lessons. I then moved onto the second lesson which was to make the tail feathers.

I mentioned in Dressing the Bird that starting the cover for the body was a little bit fiddly … to say the least! Starting each of the feathers was also a little fiddly and I did not seem to get any easier no matter how many feathers I made … and I made a lot of them (eventually). Like the body, the feathers are detached buttonhole stitch on a silver wire. The wire travels back and forth to form a series of concentric ‘U’ shapes.
© The Essemplaire/Carol-Anne Conway

The feathers are either five or seven rows wide and either one, two, or three centimeters long, although mine are not very consistent in length. There is a total of 66 feathers stitched in nine different colours, just under half of them in the same yellow green as the body.

I don’t know exactly why this project stalled but I remember that I was struggling with these little feathers. In my progress report of February, 2013, I wrote,
"The bird thimble holder, which I forgot to mention last month, has not progress very much. His body is complete and I have begun to make the many, many tail feathers but because I usually work on these during the evening they have fallen victim of my S.A.D.ness. I will probably resume work on this when the lighter evenings return."
S.A.D.ness referring to seasonal affective disorder brought on by the dull, grey weather. I did not resume work when the lighter evenings returned and the project languished for ten years.

When I resumed making the feathers, I still found the process fiddly. Fiddly but not quite the struggle that I remember them being before and I can only attribute that to the hours I spent doing buttonhole stitch on the carnation and cornflower petals for the Spring Casket Keepsakes. At first, it took me an entire evening to make one feather but quite quickly I was able to make three or four in an evening, depending on the size. Initially, I thought it might take me several weeks to complete them but, in fact, it took little over two weeks.
© The Essemplaire/Carol-Anne Conway

Happy Stitching

Sunday, 13 February 2022

8 Lattice Holding (goban-osae)

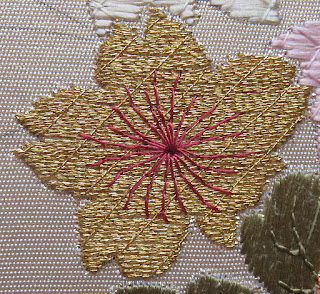
While I enjoy the challenge of some of the more complex techniques, I very much appreciate the elegance of some of the simpler stitches. Lattice holding (Hl) covers the foundation with a lattice of thin threads. It is a decorative stitch that requires no additional embroidery on top. As with many simple techniques, accuracy is the key to success.
The lattice is created by stitching two layers of long stitches that cover the entire motif. The first is stitched at a forty-five degree angle to the foundation stitches. The second layer is stitched at right angles to the first. A fine thread is used. This does not necessarily need to be the same colour as the foundation. The stitches are tied down at each intersection using the same thread. As with diagonal holding, the couching stitches are made in the same direction as the foundation and pierce the foundation stitches and again, in my opinion, slightly longer couching stitches gives a more pleasing result.

I first used this technique on the pines on Hanayama and while it is not too bad, some of the angles are slightly off resulting in mismatched squares. Even minor defects in a simple, regular design can be very noticeable.
© JEC/Carol-Anne Conway

Despite my best efforts, a few of the holding stitches are slightly off on these cherries but I am pleased that I carefully aligned the lattice across the three. To my mind, a misalignment would have been distracting. Instead, I think they sit quietly and harmoniously together.

© JEC/Carol-Anne Conway

Happy Stitching

Tuesday, 8 February 2022

Happy Harikuyo

I have written about Harikuyo and Japanese needles a few times before

Shiny, Happy Needles
Festival of Needles
Harikuyo
A Needle in a Market
Needles and Pins
Sanjo-Honke Misuyabari, Kyoto © Carol-Anne Conway

When I began learning Japanese Embroidery, I attended a week long class in February each year. The festival of needles fell a few days before this class so I would spend the evening cleaning my needles and generally tidying my equipment and supplies in preparation of the up coming class.

It is tradition, in Japan, to rest your needles for Harikuyo and in the past I have followed this tradition but I think this applies mainly to people whose profession centers around stitching. My needles spend more time resting than I spend stitching so I will honour them this evening but doing some stitching.

Happy Harikuyo

Saturday, 5 February 2022

7 Diagonal Holding (hippari-osae)

If a foundation is used on small motifs, it is used as a single layer. On larger motifs, other embroidery may be added on top in which case it is a foundation layer and some form of holding is used to secure it.
© JEC/Carol-Anne Conway

Diagonal holding (Hd) is used only on a foundation of twisted thread*. The success of this technique is largely dependent on the consistency of the foundation, i.e., the uniformity of the twist and the spacing of the threads. The twisted threads on the Pines on my Hanayama are very inconsistent so it was difficult to establish the correct angle and the holding thread is clearly visible in some places.
© JEC/Carol-Anne Conway

Long diagonal stitches in a thin thread of the same colour as the foundation cover the entire foundation.
© JEC/Carol-Anne Conway

The angle of the holding stitches is adjusted to match the twist in foundation thread so that it is barely visible.
© JEC/Carol-Anne Conway

© JEC/Carol-Anne Conway

We had overcast weather for a couple of weeks with very poor natural light. I stitched this pine under artificial light. At the time of stitching, I thought that I had matched the direction of the twisted thread but in natural light I can see that it is not well matched.
© JEC/Carol-Anne Conway

Stitching in natural light, I was better able to align the holding stitches with the twist on this pine.
© JEC/Carol-Anne Conway

The holding stitches are tied down at intervals with short stitches in the same direction as the foundation. The couching stitches, in the same thread as the holding stitches, pierce the foundation stitches. This was counter intuitive to me as I thought this would spoil the look of the foundation. I have learnt to make my couching stitches a little longer so that they blend into the foundation stitch and do not "pinch" the holding stitch. If the couching stitches are placed between the foundation stitches, they can displace them creating small gaps in the foundation.

Happy Stitching

*On the Konbuin fukusa, stitched in the Edo period, a variation of diagonal holding was used on a flat foundation. The diagonal holding stitches (of 0.5 flat silk) are at a much shallower angle, similar to that used in short stitch holding. The couching stitches are spaced approximately 1 cm apart and arranged in rows. As the holding stitches and couching are more visible than on a twisted foundation, consistency is crucial.