Sunday, 23 November 2014

Sake Boxes - Leaves

The same method is used to stitch the chrysanthemum leaves on both Hanayama and Venerable Friends. First the leaf area is filled with a horizontal layer of flat silk then lines of gold thread are couched on to represent the veins. This is a relatively simple but highly effective way to do leaves.

© JEC/Carol-Anne Conway

Another common technique used to do leaves is separated layer. This is how the maple leaves on Hanayama are stitched. If chrysanthemums were the motif I found most difficult on Hanayama, then the maple leaves were the second most difficult. Here the challenge is not to keep all of the stitches parallel but rather to gradually adjust the angle of each stitch to follow the shape of the leaf. This is how the leaves on Sake Boxes are stitched.

© JEC/Carol-Anne Conway

The lobes of each leaf are divided by a vein. The stitches progress up one side of the lob, around the top, and back down the other side much like the hands of a clock rotate around the clock face. The stitches extend from the vein to the outline of leaf with a one point open space between the stitches either side of the vein.

© JEC/Carol-Anne Conway

I find it difficult to judge the adjustment in the angle at the top of the leaf so that the rotation is smooth and the stitches do not become too short.

However, the area I find most perplexing on these heavily lobbed leaves is where one lob meets another. Getting the stitches to radiate around the arc without bunching them up at the outer edge is a real challenge.

© JEC/Carol-Anne Conway

There are plenty of leaves on this design, so as with everything else, I have plenty of opportunity to practice!

Happy Stitching

Wednesday, 19 November 2014

Sake Boxes - Round Petal Chrysanthemums

In addition to the pointed petal chrysanthemums there are about 17 round petal chrysanthemums, depending on how many of the partial flowers you count. These are very similar to the round petal mums on Hanayama but the centres will be treated very differently.

Each of these flowers are arranged in the same way with one uppermost petal that slightly overlaps its neighbours which in turn overlap the next petal. There is one petal, opposite the uppermost petal, that is overlapped by both of its neighbours. As with the pointed petal blooms, the petals are padded with the fore ground petals having the most padding and the background petals having none.

© JEC/Carol-Anne Conway

As is usual in Japanese embroidery the uppermost petal is worked first. It must be padded and stitched before either of its neighbours can be worked.

© JEC/Carol-Anne Conway

I then usually work clockwise around the petals, padding and stitching each in turn until I come to the bottom petal which I leave until later. I then return to the petal to the left of the top petal and work anti-clockwise around the remaining petals, again padding and stitching each in turn finishing with the bottom petal.

© JEC/Carol-Anne Conway

I stitched the first of these mums back in September when we enjoyed an Indian summer in the south of England. I loved the warm sunny days, except for my stitching time in the morning. I have heard from others in warmer climates than the UK that silk can be difficult to handle in humid conditions but I had never experienced it before. I really struggled stitching these first few round petal mums and I’m blaming the weather!

© JEC/Carol-Anne Conway

Of course the problem may have been that these petals are smaller than the pointed petals but they are still done in diagonal foundation stitch. Same stitch but small and therefore, I find, harder. I’m not really satisfied with the first few blooms I stitched but I have decided to leave them until I have stitched all the other flowers. If I still don’t like them then, I will restitch them.

© JEC/Carol-Anne Conway

© JEC/Carol-Anne Conway

The centres of the round petal mums are done in gold so I will be leaving that until later, like all of the gold work.

© JEC/Carol-Anne Conway

The Fuzzy Effect website has started a new feature called Snippets. Their first snippet is on Chrysanthemums. Jane has put together a lovely selection of pictures show some of the many different ways chrysanthemums are depicted and some of the many different techniques for stitching them in Japanese Embroidery.

Happy Stitching

Monday, 17 November 2014

Sake Boxes - Pointed Petal Chrysanthemums

I found everything difficult at phase I but by far the biggest challenge for me was stitching the chrysanthemums in the summer mountain.

Looking at them now, I suppose they are not bad for a first attempt at diagonal foundation but there is a lot wrong with them. The stitches are uneven; sometimes too close together, sometimes too spaced out. Some of the stitches are not parallel so the angle of the stitches change. But the worst thing, I think, are the one point open spaces; sometimes the space is none existent and other spaces are far too wide.

© JEC/Carol-Anne Conway

I next stitched a chrysanthemum on Venerable Friends at phase III. I am pleased to see some improvement in every aspect; the stitches are more evenly spaced, the edges of the petals are neater, and the one point open spaces are much better. The central petals on this chrysanthemum are padded.

© JEC/Carol-Anne Conway

I haven’t stitched a chrysanthemum since phase III and I still find short diagonal foundation stitches difficult. The pointed petal chrysanthemums on Sake Boxes are different from both those I have stitched previously. They are most like those on Hanayama but on Sake Boxes the petals are layered more realistically. As on Venerable Friends, some of the petals are padded.

© JEC/Carol-Anne Conway

Because the top petals are not adjacent to each other I could pad them all before I stitched them. They have a single layer of padding using four strands of cotton. The padding stitches are laid in the opposite direction to eventually top layer of silk.

© JEC/Carol-Anne Conway

The second layer of petals has less padding and can only be padded, then stitched once the petals in front of them have been stitched.

© JEC/Carol-Anne Conway

The third layer of petals have a layer of self-padding.

© JEC/Carol-Anne Conway

The remaining petals have no padding.

© JEC/Carol-Anne Conway

Well, I do think my stitching on this chrysanthemum is better than on those on Hanayama. I would be very disappointed if I saw no improvement in nine years of learning Japanese embroidery. However, I think there is still room for a lot of improvement. I have eleven more pointed petal chrysanthemums, plus some buds, to practise on!

© JEC/Carol-Anne Conway

Happy Stitching

Thursday, 13 November 2014

Sake Boxes - foundations

Before you can do lots of superimposed work you first have to stitch lots of foundations. There are different versions of Konbuin-no-fukusa- Sake Box, the full design has four vessels. The smaller Sake Box with Ladle design that I am stitching (see picture 13 in this gallery) has only two vessels, a sake box and a long handled ladle. The sake box has a black twisted silk foundation. It looks very stark at this stage but will look entirely different when all of the superimposed work is added.

© JEC/Carol-Anne Conway

Although a solid block of colour, the beautiful blue twisted silk foundation on the outside of the ladle does not look quite as stark as the sake box. This too will look completely different when the decoration is added.

© JEC/Carol-Anne Conway

The lacquered inside of the ladle is also visible. There is no superimposed work on this part of the ladle but the handles, the spout and the rivets will be completed in gold work so it will not be one large orange area when it is finished.

© JEC/Carol-Anne Conway

I have never stitched such large foundations before. I was advised to make long twisted threads to minimise the amount of wasted thread. I spent an entire morning twisting threads before I started stitching. All three areas are weft valley foundation. I find this the easiest of the foundations. The weft threads in the fabric serve as a guide, helping to keep the stitches evenly spaced and parallel. I also find it much easier to keep long stitches parallel as small fluctuations in spacing are less noticeable over greater lengths.

Once completed, temporary holding is stitched over all three foundations. I used a 1->2 twist of the same colour silk on the blue and the black foundations. The superimposed work will stitch over the temporary holding so I think it will end up being permanent holding. Any parts of the lacquer interior not covered in gold work will require short stitch holding so here I did the temporary holding in white couching thread.

I will not do the super imposed work until all of the surrounding silk work has been completed even thought I am itching to get to that part.

Happy Stitching

Tuesday, 11 November 2014

Phase IX - Sake Boxes

Japanese Embroidery is taught in Phases. In phases I-III students are taught the basic stitches and techniques, how to handle flat silk, and how to twist threads. Phases IV – VIII each focus on a specific technique: gold work, cords, short stitch holding, long and short stitch and fuzzy effect. I’ve never heard it said that Phase IX teaches a particular technique but it seems to me that a key feature of Phase IX is superimposed work. Although students do some superimposed work at Phase III it is far more prominent in the Phase IX designs.

© JEC/Carol-Anne Conway

At each phase the student has some choice of designs. Over the years some designs have been phased out (no pun intended) and new ones introduced. Taking into account only those designs currently offered on the JEC website there are, by my calculation, 4608 different combinations of Phase I through Phase IX.

For me the choices at each phase were fairly simple until it came to Phase IX. Of the four designs available (only three are shown on the website) I could easily have chosen any one of three. In the end it was an unusual stroke of luck that made the decision for me.

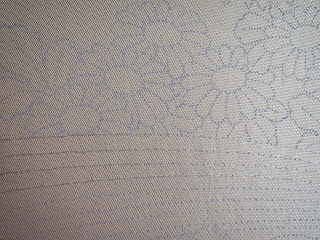
In 2011 the JEC held a silent auction of items that had been donated to them, including some designs that students had purchased but, for some reason, had never stitched. Among the items on offer was Konbuin-no-Fukusa – Sake Box with Ladle (see picture 13) on vintage silver nishijin fabric. My original tutor and sensei, Margaret Lewis, has waxed lyrical about the superior quality of the vintage metallic fabrics and lamented that they are no longer available. The description of the lot stated that the fabric was 15 inches long. If that was correct, this would not be long enough to accommodate the whole design but the image (difficult to see clearly because the design is printed onto the fabric in pale blue dots) appeared to have the whole design. I decided to bid on the item regardless. If I won, and it turned out to be the whole design I would stitch it as my Phase IX piece, otherwise I would be content that I had a design on antique metallic fabric in my stash and I would choose another design for Phase IX. I did win and the fabric turned out to be 22 inches long containing the whole Sake Box with Ladle design.

© JEC/Carol-Anne Conway

Ahead of the class in March this year, I visited my tutor for a lesson on double lacing and to choose my silks. I stayed with the traditional red, white and gold pallet for the chrysanthemums but we choose slightly different shades that work better with the silver background.

Back home I framed up and started the lengthy process of outlining the sake box, the long handled ladle and the noshi papers with Japanese running stitch. I had hoped to stitch the foundations before class but did not get that far.

© JEC/Carol-Anne Conway

One thing that all of the Phase IX designs have in common is that they are big designs, far bigger than most of the earlier phase pieces, and they are all reputed to be more challenging that the earlier phase pieces, I suppose that is to be expected. Sake Boxes contains many chrysanthemums. All of the petals, hundreds of them, are stitched in diagonal layer, the stitch I find most difficult to execute well especially on small scale. I hope to have mastered it by the time I complete Phase IX.

Happy Stitching

Sunday, 9 November 2014

Phase VIII – Queen of Flowers

As far as I know, the technique taught at Phase VIII is unique to Japanese embroidery. Fuzzy effect is considered to be the most refined and elegant of all the techniques. It is stitched onto crepe fabric with a pronounced weft valley and the stitches, couched threads, are placed in these valleys. The effect is that of a woven design or tapestry. The two couching techniques used in fuzzy effect are akin to well-known couching stitches: basic couching, also known as convent stitch and kloster stitch, where a thread is held onto the surface of the fabric with small straight stitches perpendicular to the held thread; and Romanian couching where a thread is held onto the surface of the fabric with diagonal couching stitches. But never before have I come across these two couching techniques used in combination, or even individually, to produce the subtle shading found in fuzzy effect.

© JEC/Carol-Anne Conway

The Japanese Embroidery Center offer a choice of three designs for Phase VII and I like all of them. Final Dress Up, usually stitched on black, can look very dramatic and affords the student the opportunity to select their own autumn leaf colours. This piece always attracts a lot of attention at shows.

Crane with Reeds is the largest of the three designs and probably the most challenging.

I have always liked the design of Queen of Flowers but the original colour scheme did not appeal to me. When I first saw a version stitched by Jenny Orchard with bright red blossoms stitched on a black back ground, I thought it was absolutely stunning and I decided then that this was the piece I wanted to stitch at Phase VIII.

I began my Queen of Flowers at class in March 2013. You are asked not to frame up or do any prep before class because the process is slightly different than for other techniques. Firstly, you stitch a line of running stitches across the fabric, following a weft valley, before framing up. It is essential to have the weft perfectly straight for this technique and that line of running stitch helps to ensure that. Secondly, when you do frame up, the weft direction is not stretched at taught as is normal for Japanese embroidery, I’m not actually certain why that is.

A year earlier, when beginning Phase VII, I had been nearly paralysed with fear at the thought of doing long and short stitch. I had no such problems starting this phase. I have always been intrigued by fuzzy effect and from the first stitch I was enjoying it. Sadly, I cannot locate any of my early step-by-step photographs. This is quite a tragedy for me because I frequently refer to my photographs and rely on them as a record of what I have done far more than I do notes. This is the first picture I have, showing my progress at the end of that class.

© JEC/Carol-Anne Conway

At an outing to Garstang in October 2013 where I completed two more leaves and a few more leaves when I returned home, but since then Queen of Flowers has been hibernating.

© JEC/Carol-Anne Conway

I really like this piece and the technique and cannot wait to get back to it but it is going to have to wait while I concentrate on something I am finding much more challenging.

Happy Stitching.

Friday, 7 November 2014

Wot no Japanese Embroidery

You could be forgiven for thinking that I have not done any Japanese Embroidery in the last 12 months and you would not be far from wrong!

A quick review of the year gives some indication as to why JE has taken a back seat. Last winter I was focused on completing my Phase V Japanese beading and up until March this year nearly all of my stitching time was dedicated to that. I finished that in March, just before I went to my five day JE class in Bournemouth where I made a good start on my next phase piece. I should have used that momentum to get back into a stitching regime but I got distracted by other things. The problem is I’m jist a girl who cain’t say no … to embroidery projects that is. There have been so many temptations this year that I have not been able to resist. I’ve written about some of them in the last few posts but there have been several more that I have not had time to stitch. They have been added to the stash for a later date.

© JEC/Carol-Anne Conway

But there is another thing that has been preventing me from getting on with my Japanese embroidery … Fear of Failure!

When I began learning JE in 2005, I wasn’t thinking about doing all ten phases, I just wanted to learn this exquisite form of embroidery. As one class became two, then three, and my love of JE grew, so did my desire to complete all nine phases so that one day, just maybe, I might be able to go to Phase X class in Atlanta. But I hardly dared hope it would actually happen.

© JEC/Carol-Anne Conway

Nearly eight years ago, when I started to write about Japanese embroidery on my blog, I wondered if anyone else was blogging about JE. After searching the internet I found only one other person, Susan Elliot of Plays With Needles. When I first found her blog, Susan’s latest post was about a piece affectionately known to JEC students as ‘Gracie’. I returned to Susan’s blog frequently, hoping for an update but I had a long wait. What I didn’t know then was that life had thrown Susan a curve ball and it would be some 18 months before she would post again.

In the years since, Susan’s blog has become one of my favourite places on the internet and we have become good friends. We share several ambitions and hope that life will afford us the opportunity to undertake some of them together. In fact, we have made a pact to realise the first of those ambitions, we are both working towards completing Phases I – IX so that we can attend Phase X class together in Atlanta.

© JEC/Carol-Anne Conway

Initially, we spoke about going to Atlanta in 2014 but we realised that was not a realistic goal for either of us so we are aiming for 2015. To be honest, I am not sure that I can achieve all that I need to in order to meet this deadline and that is what I am afraid of failing at. The stupid thing is that instead of knuckling down while this was a realistic goal, I have let time whittle away and now I have a huge mountain to climb.

Since Sue’s illness, trying to do any Japanese embroidery just filled me with sadness but three weeks ago I attended class in Garstang. There, surround by friends and people who loved Sue, I refound my JE mojo. The first two days were very painful but I found the tears and laughter on the Saturday very cathartic. Since returning from Garstang, I have renewed my commitment to stitch for at least 15 minutes every day and have been making slow but steady progress with Phase IX. I still have a huge mountain to climb … but I have started climbing!

© JEC/Carol-Anne Conway

If you have ever wanted to learn Japanese embroidery, my tutor in Garstang, Denise Foster, is now teaching JE at Missenden Abbey in Buckinghamshire. She has two 2-day courses scheduled for the weekends of January 24-25 2015 and May 2-3 2015 - ideal for beginners as well as experienced Japanese embroidery students. What could be better than a weekend away from the household chores, having someone else cook your meals and make your bed while you spend your days stitching?

Happy Stitching

Wednesday, 5 November 2014

20/21 Sampler

Following the great success of The Big Stitch in 2012, the Ashmolean Museum and the Embroiderer’s Guild decided to host a second day in conjunction with the Eye of the Needle exhibition. As part of that event, SEW Region held a members’ competition to create a "Modern Sampler".

© Carol-Anne Conway

There were two sections to the competition, one for individuals, and one for group entries. I took part in a group entry from the Oxford Branch. Under the rules we could enter either individual 'tiles' combined to form a finished piece maximum size A3, or a book (either concertina style or spine bound) of 5 individual 'pages' including the covers. Each page maximum size A5 and we could use both sides of each page if we wished.

© Carol-Anne Conway

We decided on the concertina book option and 10 people signed up to each complete a page. The name of the competition was 20/21 sampler so we decided to do 5 pages based on the number 20 and five based on the number 21.

© Carol-Anne Conway

Rule #1 of the competition stated that "The 20/21 in the title refers to 20th and 21st century so any images, motifs, alphabets, individual letters or numbers used must be from that time period". We chose traditional typefaces or those that reflected early 20th century for the 20 pages and these were embroidered using traditional hand embroidery techniques that were relevant to that period. We used contemporary typefaces and embroidery/textile art techniques for the 21 pages. Each participant decided how to embroider their page but we conferred to ensure that no two pages used the same technique.

© Carol-Anne Conway

I decided to do my '20' page in canvas work. I took my inspiration from a couple of pieces shown the "Canvaswork – RSN Essential Stitch Guild" and all of the stitches I used came from that book. Rule #2 stated that "Any combination of techniques or stitches can be used but the piece must show a variety of at least 6. You can use more if you wish". We had already covered the "at least 6" criterion but having 10 different techniques but I wanted my page to include at least 6 different stitches. All the stitches I used were chosen to work on the diagonal line.

© Carol-Anne Conway

Rule #3 said "Any colour(s) can be used." I decided to work in monotone so the focus would be on texture rather than colour.

© Carol-Anne Conway

As usual, I seriously under estimated that amount of time it would take and came perilously close to missing the deadline for submission. As I had suggested that Oxford Branch submit a group entry and coordinated the project, I would have been very shame face to have let the others down so had to work furiously every spare minute to make sure I completed on time!

© Carol-Anne Conway

The other participants submitted beautiful pages and I think we covered a good range of traditional and contemporary embroidery/textile art. Their pages can be seen on the Oxford Embroiderer's Guild blog. I'm delighted to say that our entry won the group category and I am absolutely certain that had nothing to do with the fact that it was the only entry!

© Carol-Anne Conway

Happy Stitching

Monday, 3 November 2014

English Work: Embroidery Short Course – Part 2

The second day of the three part course was in September. This lesson would teach us how to stitch faces. I was looking forward to this lesson!

We had a few technical problems linking Tanya’s computer to the projector. The Ashmolian’s technical folk were unable to resolve the problems so we huddled around Tanya’s computer to look at the lovely images of faces she has collected over time. Tanya said that basically all Opus Anglicanum faces are ugly but there are nice ugly faces and there are down-right ugly, ugly faces. I think I could see where she is coming from. I think the problem is 1. they are mostly very small faces and 2. intended to be viewed from a distance so subtle details are a waste of time and silk. One thing Tanya did point out was that, by far the majority of faces, are depicted at three quarter profile, rarely straight on or in full profile.

We also looked at how hair is worked and then spent some time selecting silk shades for skin, eyes and hair.

© Tanya Bentham/Carol-Anne Conway

The dress is worked in small (approximately 4mm), closely placed rows of split stitch using three strands of very fine silk (if you read the instructions properly!). The face and hands are worked in the same technique but using even smaller (approximately 2 mm) split stitch and two strands of fine silk. It is a very slow progress and I didn’t get very much done during the class. Nor have I done much in the intervening time but I want to get some more done before the next class in November when we will be learning something very exciting!

Happy Stitching.