Wednesday, 17 August 2011

Ribbons and Lace

Nearly every project I choose to do is because I want to do the embroidery rather than actually wanting the finished item. Once the embroidery is complete, my attention is drawn to the next project. I have a lot of UFO’s. For the most part, I am completely content with this. There are a few items that I occasionally think "I must get around to finishing that someday" but it is highly unlikely that I ever will. There are too many things to be embroidered and too many techniques to be learnt.

Given the time and effort I put into my Japanese Embroideries, I do finish those and recently I have taken part in a few swaps, so I am compelled to finish those. When I started Floral Glove, I resolved that I would 'finish' it but as soon as the embroidery was done, my interest wavered and I have found it very difficult to find the motivation to do the finishing work. As an incentive (more a stick than a carrot) I have banned myself from starting anything new until it is done. This has succeeded mainly in preventing me from doing any stitching and that makes me miserable!

Another sticking point for me is that the directions call for many of the component parts to be glued. Even though finishing Japanese embroidery involves pasting the back of the embroidery with glue made from wheat powder, I am still very adverse to gluing textiles. Once I had resolved to stitch, rather than glue, where possible, I felt more inclined to get on with it.

Before beginning the actual construction of the scissor case, there were a couple of trims to add to the embroidered linen. Gold lace is used to outline the gauntlet.

© Thistle Threads/Carol-Anne Conway


The bottom of the gauntlet is trimmed with a bright red, double faced satin ribbon. Elizabethan twist is first stitched to one edge together with spangles stitched at intervals along the same edge. The ribbon is then gathered along the opposite edge and slip-stitched in place.

© Thistle Threads/Carol-Anne Conway


I attached both the lace and ribbon before removing the linen from the frame.

© Thistle Threads/Carol-Anne Conway


The kit comes with many of the finishing materials already die cut. Some of these pieces have to be cut in half or trimmed to a smaller size but having the basic shape pre-cut is a big bonus point in my view. The embroidered linen is applied to one of the pieces of die cut mount board with a layer of wadding between them. The instructions said to glue the wadding to the board and then fold the edges of the linen over the board and glue down on the back. I could see no alternative to gluing the wadding to the board but I laced the linen on the reverse of the board instead of gluing it.

Silk brocade is supplied for the inside of the scissor case. One piece is used to cover a die-cut piece of skirting. Again the instructions said attach the silk by folding the edges over and gluing them to the back; again I stitched the two layers together but this time with tacking stitches that I later removed. A needle felt is attached to the lining with a small stitch in each corner; I used some of the remaining spangles rather than plain stitches. The embroidered front and silk lining are then joined, wrong sides together, with ladder stitch.

Happy Stitching

Monday, 15 August 2011

Ouch!

Did you know that there is a higher concentration of nerve endings in the cornea than in any other part of the body making it highly susceptible to pain? Did you also know that the cornea is the fastest healing tissue in the body? How do I know this? Last weekend I had a close encounter with this plant.


I stabbed my right eye on one of the leaves causing a 4mm scratch on the cornea.


The nice doctor at the eye hospital provided not only these salient facts above but also some very effective pain relieve and much needed reassurance. Since then I have been diligently applying cream to prevent infection and drops to keep the eye lubricated. As he had assured me it would, the swelling and pain had greatly subsided after a few days and now the scratch has all but gone.

This time last week, I could barely see a needle, let alone stitch but I am very pleased to report that I am stitching again for short spells. My schedule of 1 hour beading per day took a serious hit but I hope to resume that regime this week. Before this incident I had been making good progress and I really like how this piece is developing but at the moment I am keeping my computer time to a minimum (especially as I have now returned to work and spend most of the day staring at the screen).

Happy Stitching

Wednesday, 3 August 2011

Progress Report - August

The decorating is finally finished (all bar a couple of small jobs the electrician has to come back to do). It still took the first to weekends in July to finish everything. The following weekend we gave the kitchen a thorough spring clean. The next Saturday I spent at Art in Action and Sunday was generally tidying up in preparation for visitors. J’s sister and brother-in-law were over from Amsterdam for the last week of July and, of course, we wanted to spend as much time as possible with them. You’ve guessed it; I’ve not had much time for embroidery!

With little time and little motivation it has been slow going doing the finishing on Floral Glove, but I am getting there and if I knuckle down to it, this should be finished in time for September’s report.


© Thistle Threads/Carol-Anne Conway

I’ve started the beading on Floral Melody, hoorah! I have been doing a little bit before work each day for the past week. I estimate that this will take me approximately 130 hours and I want to complete it by Christmas. There are only 144 days until Christmas so I have to aim to average about an hour a day, every day. Eek!

© JEC/Carol-Anne Conway

I completed one more Travelling Page this month. These have been such fun to do and this one was a theme particularly close to my heart. I have three more TP’s to do in this series and another in a different vein.

Happy Stitching

Tuesday, 12 July 2011

Floral Glove, Spangles and Pearls

All that is needed to complete the embroidery is a little embellishment with a few seed pearls and spangles.

One seed pearl is stitched into the centre of the gold leaves on each of the outer roundels. Nothing too difficult here, I just had to select pearls that would fit into the available space and that had a big enough hole to fit the beading needle; these are teeny tiny little pearls.

© Thistle Threads/Carol-Anne Conway

A cluster of pearls is added to the centre of the rose. I thought that the gold outline made this rose but the pearl centre really makes it. I think this is so pretty.

© Thistle Threads/Carol-Anne Conway

Finally, tiny gold spangles are stitched into the empty spaces between the embroidered motifs. I wasn’t feeling too well when I did this. I had enough interest/energy to do a little mindless stitching but I could not be bothered to redraw the outline of the glove or to measure where they should go. I guestimated their position and a couple are outside the seam line so I will have to reposition those.

© Thistle Threads/Carol-Anne Conway

It is difficult to capture the sparkle of the spangles on camera but they really glitter and glint as the embroidery moves in the sunlight.

© Thistle Threads/Carol-Anne Conway

And this is the back!

© Thistle Threads/Carol-Anne Conway

Happy Stitching

Wednesday, 6 July 2011

Floral Glove, Rough Purl Leaves

On the remaining roundels the tendrils are couched sections of Gilt Super Lizardine that has been stretched to about 30 per cent more than its original length.

© Thistle Threads/Carol-Anne Conway

The leaves are then covered with pieces of Gilt Rough Purl, which is a tightly wound spring made from a round wire. It has a slightly matt finish that gives a nice contrast to the bright check used in the central roundel.

© Thistle Threads/Carol-Anne Conway

I found the rough purl slightly easier to handle than the bright check but found it more difficult to cut the pieces to a precise length even with the aid of a magnifying lamp.

© Thistle Threads/Carol-Anne Conway

Happy Stitching

Tuesday, 5 July 2011

Floral Glove, Bright Check Leaves

When we demonstrate Japanese embroidery, people often say "that must take a lot of patience". I enjoy embroidery so much, become so absorbed in the process, that I find it more relaxing than something that requires patience. But the next step on Floral Glove certainly did take a lot of patience!

I’d had a taste of how painstaking this process would be when covering the calyx with coloured purl. The leaves in the middle roundel are covered with bright check – a triangular shaped wire formed on a three cornered needle. If anything, the bright check is even more springy than the purl and the leaves are very much smaller that the calyx. Measuring and cutting the tiny pieces needed to cover each leave was very fiddly.

An even greater test of one’s patience is sewing the pieces into place. Bright check is made from a very fine flattened wire and it is near impossible to cut without leaving a small tail sticking out. Silk threads have an amazing ability to snag on the slightest thing so sliding the ‘beads’ of bright check onto the silk thread is rather like trying to put silk stockings onto barbed wire!

© Thistle Threads/Carol-Anne Conway

It’s not that I didn’t enjoy this part but it really did test my patience. But, boy was it worth it. The triangular segments spiral around the wire creating a faceted surface that glitters and sparkles like no other thread. This is the blingiest of BLING!

© Thistle Threads/Carol-Anne Conway

Happy Stitching

Monday, 4 July 2011

Progress Report - July

Perhaps I should write a progress report on the decorating since most of my days off have been devoted to that! I’d love to report that it is finished but alas it is not. It is however very nearly finished.

I had one day out to play with beads with a friend. I also had an entire weekend of stitching when I managed to finish the gold work on Floral Glove. I then had a couple of days off sick but felt so lethargic that attaching a few spangles and seed pearls was all I could muster enthusiasm for. I even managed to get a few of the spangles in the wrong place so I will have to redo those! All of the embroidery on Floral Glove is completed; I now have to make it up into a scissor case. I am far more motivated to do the embroidery than the finishing so this has languished the last few days. However, I am determined that this will get finished so have banned myself from starting anything new until it is done.

© Thistle Threads/Carol-Anne Conway

I have also made significant progress on my Japanese bead embroidery, although I have not actually attached any beads! I did the finishing on Poppy Pouch and removed it from the frame then moved Floral Melody from its temporary frame onto frame three. This is a psychological milestone rather than physical progress. It means that I can now begin beading Floral Melody in earnest and frame 4 is also available for a new project but I haven’t decided what that is going to be yet!

© JEC/Carol-Anne Conway

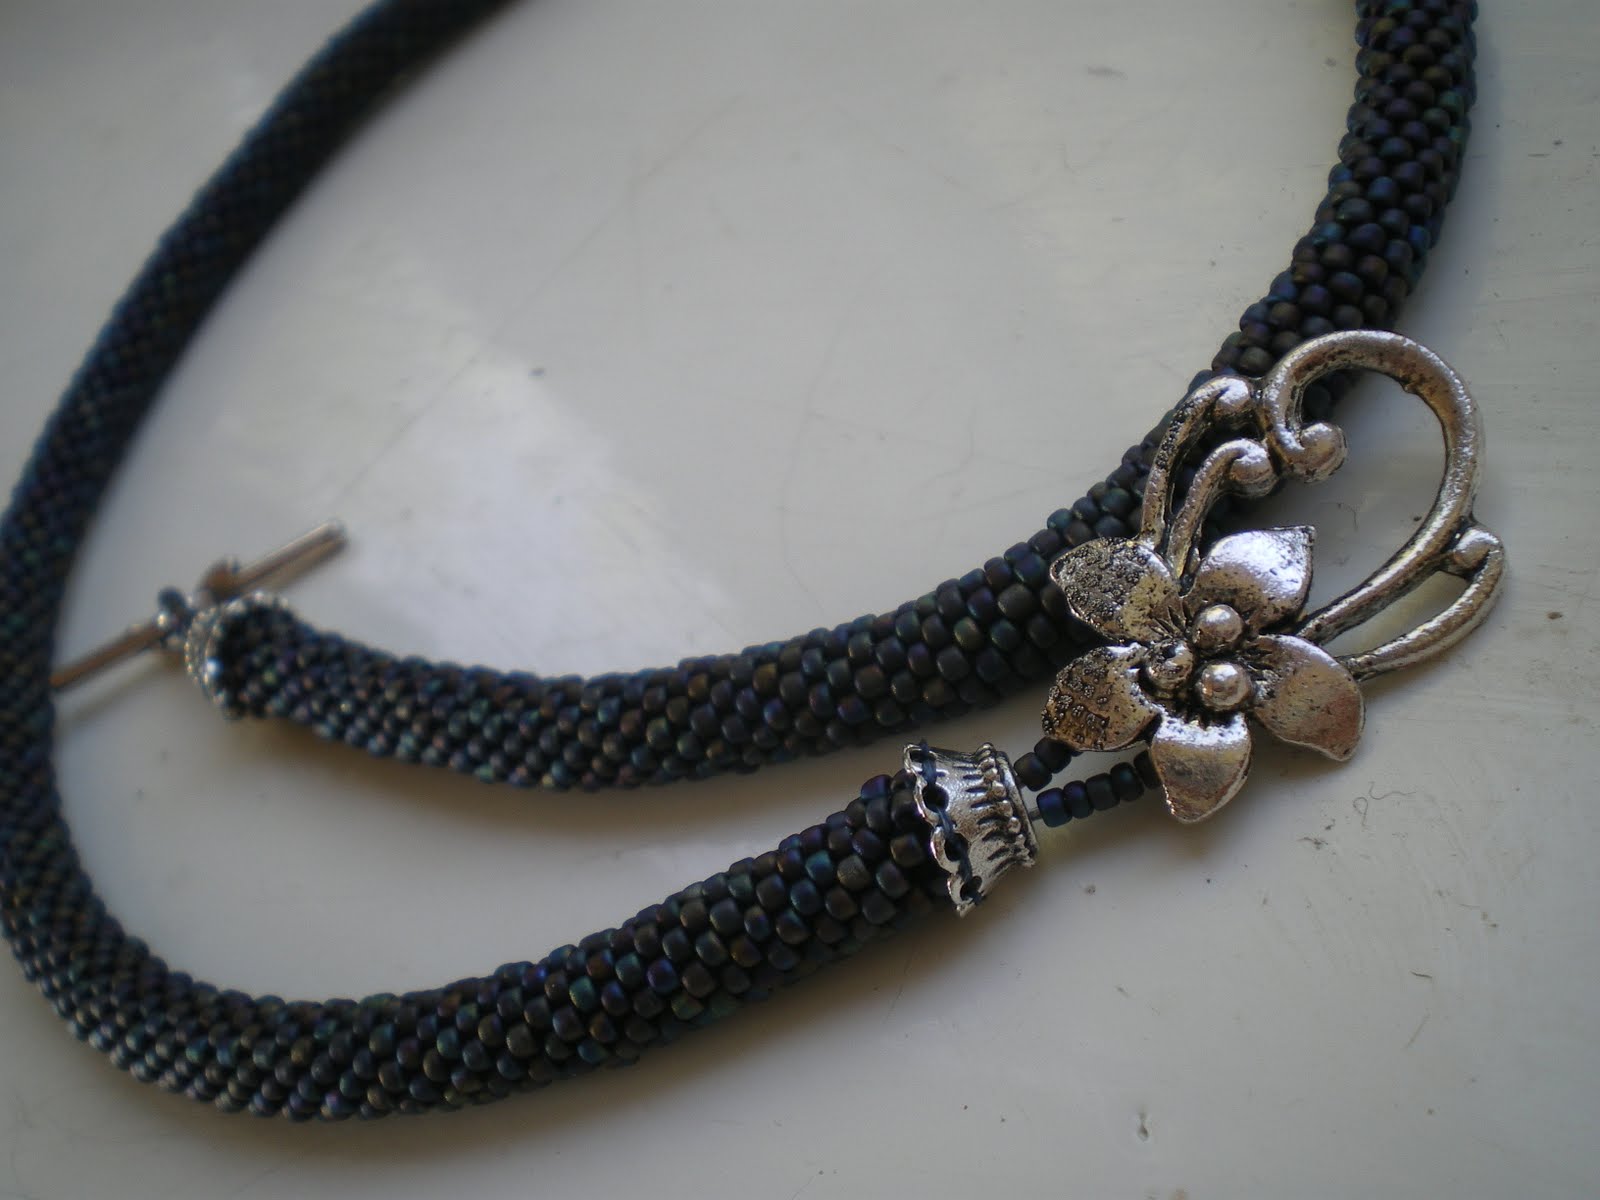
On the subject of Poppy Pouch, I have been working on a crochet rope handle for the pouch in the evenings. My friend Sue taught me how to make a crochet rope a little over a year ago. Since then I had been making a rope with Black FAB (frosted aurora borealis) beads that appear to be dark denim blue. Initially, I really struggled with the technique and made very slow progress. I kept the beads and crochet hook in my handbag and worked on it when I had some time on my hands. When we broke down in the snow last December, I whiled away the hours waiting for the tow truck with this project. A few weeks ago, I started doing some in the evenings; it doesn’t require too much brain activity so is nice to do when I am too tired for anything more demanding. Somewhere along the line the penny dropped and I finally crocheted a length long enough to make a necklace.


Buoyed by that success, I threaded the beads for the handle in a 2 white, 1 gold repeat on white thread. I’m not entirely sure when I started work but I managed to make a couple of inches every time I worked on it and over the course of the month made enough rope for the handle.


Looking back at the first post in this series, I am reminded that my aim was not merely to report what I had done but to actually set myself some goals. My goal for frame 1 was to finish Loving Couple so that the frame was ready for Camellias. I met that goal, so my new goal for frame 1 is to complete Camellias by February 2012. That seems easily achievable but I know how things can languish so must keep reminding myself of this goal. For now though, Camellias is resting!

Embroidery Bridge Between East and West
on frame 2 is also resting. The goal for this project is to have it finished by the end of the year. Again, that seems easily achievable but this dead line is a low priority so it may not get done.

Floral Melody is now on frame 3. My goal is to complete this by the end of the year. This deadline is my highest priority.

My immediate priority is to finish the Floral Glove.

Happy Stitching